1
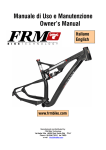
Manuale Di Uso e Manutenzione
Owner’s manual
Italiano
English
!
"
#
$ %
&
' %
(
)*
)*
+ ,
-
www.frmbike.com
Manufactured by:
THE BIKE SHOP
Via Mattei 18/a 48025 Riolo Terme
Phone +39 0546 70310 fax 74623
e-mail : info@frmbike.com
ITALY
Pagina 1
ITALIANO
FULL SUSPENDED DA CROSS COUNTRY RACING
Congratulazioni per aver scelto la FRM 10 HP. La 10 HP è una MTB estremamente sofisticata che
richiede cura ed attenzione. E’ assolutamente necessario leggere questo manuale prima di montare o
usare la bici.
Il telaio 10 HP è costruito utilizzando
tubazioni Ultralite MTB in alluminio 7005 a
doppio e triplo spessore sia per il triangolo
principale che per il carro posteriore.
Molte delle parti della sospensione sono
ricavate dal pieno con macchine a controllo
numerico (CNC), cosa che permette una
riduzione dei pesi ed una precisione
ineguagliabile della costruzione
Il fulcro principale, così come quelli del
bilanciere, ruota su cuscinetti di precisione
a rulli, per una assenza totale di giochi ed
una durata nel tempo illimitata.
In virtù del peso estremamente contenuto,
la 10HP può essere considerata la
macchina ideale per il X-Country Racing.
Sulla 10HP vengono installati gli
ammotizzatori DT modello HRV200 con
funzionamento aria-olio, regolazione della
velocità di ritorno e regolazione del punto di
stacco (Stable Platform), il Rock Shox
MC3,3 di tipo stable Platform o
l’ammortizzatore Kind Shock Focus ad aria/
olio, con regolazione della velocità di ritorno
e blocco manuale.
Struttura della sospensione
La sospensione è del tipo semipivotless.
In questo caso il giunto che manca nella
usuale struttura a parallelogramma è quello
posteriore tra foderi verticali ed orizzontali.
Questo tipo di sospensione offre grande
rigidità laterale ed ottima resa sulla spinta,
con una attività della sospensione mentre si
pedala ridotta al minimo.
L’ammortizzatore, separato dalla
sospensione per mezzo del bilanciere
(rocker arm), non viene sollecitato da forze
laterali che ne comprometterebbero il buon
funzionamento.
Posizione del fulcro
Per evitare i fenomeni di Biopacing o di
DISC, che portano rispettivamente alla
estensione ed alla compressione della
sospensione durante la pedalata (con un
conseguente movimento oscillatorio della
sospensione), il fulcro, 55 mm più alto del
movimento centrale, è allineato alla corona
media.
Il baricentro della sospensione si trova nella
posizione che influenza in maniera minore
la attività della sospensione, permettendole
di essere attiva anche mentre si pedala e
di non venire influenzata dalla forza della
pedalata.
La sospensione è di tipo semi-attivo a
causa della assenza di un giunto di tipo
Horst.
Fenomeni di Biopacing e di Pedal
Feedback (rotazione antioraria dei pedali
quando la sospensione si comprime),
classici delle sospensioni a fulcro alto, sono
sconosciuti a questo telaio.
Corsa
La sospensione del 10 HP produce 65 mm
di corsa alla ruote, a fronte di 37 mm di
corsa dell’ammortizzatore, con un rapporto
di 1,75.
Finitura
Telaio e sospensione sono micropallinati a
sfere di vetro per una migliore resistenza a
fatica ed anodizzati per una ottima
resistenza agli agenti atmosferici e agli urti.
LA SOSPENSIONE E’ ASIMMETRICA
La parte in CNC che collega il fulcro
primario della sospensione ai foderi
orizzontali è ora composta da due parti
saldate in posizione per mezzo di un
tubino centrale, posizionato obliquamente
rispetto ad esse.
Questo perché il pezzo che forma il
passaggio ruota destro deve arcuarsi
verso il basso per far posto al deragliatore
ed alla catena, mentre la parte sinistra
prosegue rettilinea verso il giunto Horst.
Il peso del telaio si è ridotto di 60 gr
rispetto alla sospensione simmetrica e la
rigidità è aumentata.
I forcellini posteriori sono ora dotati di
nervature di irrigidimento che li rendono
meno soggetti a rotture
LA POSIZIONE DELLA SELLA
Lo scostamento della sella rispetto al
movimento centrale e la sua
inclinazione, variano a seconda che la
sospensione sia scarica o sia
compressa dal vostro peso. Dopo
averla tarata, salire in sella e bloccare
la sospensione in posizione con un
cuneo di legno inserito tra il ponticello
del bilanciere ed il tubo piantone. Solo
a questo punto è possibile misurare lo
scostamento della sella con un filo a
piombo e la sua inclinazione con la
livella.
I telai 10 HP sono utilizzabili esclusivamente per il Cross Country.
Qualsiasi altro uso improprio limita la responsabilità del costruttore.
Forcelle a doppia piastra sono sconsigliate e limitano la garanzia del telaio.
Per ottenere le migliori prestazioni, il telaio
10 HP deve essere assemblato con
componenti idonei. Si raccomanda di
seguire le seguenti istruzioni.
FORCELLA:
Il tubo di sterzo accetta sterzi da
1 1/8”. La corsa consigliata va da 80 a 90 mm.
Non montare forcelle a doppia piastra.
MOVIMENTO CENTRALE:
la scatola movimento è da 68 mm a passo
inglese.
CORONE GUARNITURA:
per il più corretto funzionamento della
sospensione utilizzare corone di tipo Compact
e controllare che la linea catena sia tra 47,5 e
50 mm (misurata dalla corona centrale all’asse
di simmetria del telaio)
DERAGLIATORE:
utilizzare deragliatori di tipo Top-Pull con
fascetta di diametro 31,8. I deragliatori
Shimano di tipo Top Swing (fascetta bassa)
non possono essere montati sulla Be Active.
Sono compatibili invece deragliatori Shimano
Down Swing (tradizionali con fascetta alta),
oppure SRAM X-Gen. Utilizzare sempre un
tubino di teflon entro il tubetto metallico saldato
sul telaio.
CAMBIO :
la guaina del cambio parte dal comando
cambio destro e prosegue ininterrotta fino al
cambio, stretta dai due farfallini sul tubo
obliquo e passando poi all’interno del fodero
destro
FRENI :
Il 10HP è compatibile sia per freni V-Brake che
per freni a disco Nel caso dei freni V-Brake è
necessario ordinare gli appositi collarini
smontabili che vengono posizionati sui foderi
verticali.
REGGISELLA :
il diametro del reggisella è di 27,2 mm. Fare in
modo che almeno 60 mm di reggisella
rimangano all’interno del telaio.
MANUTENZIONE
Non lavare mai la bici con prodotti o solventi
derivati dal petrolio (benzina, petrolio, nafta
ecc) che sciolgono il grasso dei mozzi,
movimento centrale e sterzo, ma solo con
detergenti o saponi ad acqua. Dopo il lavaggio,
asciugare e ungere catena, pedali, movimento
e deragliatori con oli specifici.
Suggeriamo vivamente l’uso dei prodotti di
manutenzione Morgan Blue / FRM: Olio per
catena Extra Dry, Grasso per cuscinetti e
sgrassante Bio Cleaner
Pagina 2
ITALIANO
MANUTENZIONE
1
2
l telaio 10 HP richiede una manutenzione
non molto diversa da quella riservata ad
ogni altro telaio da MTB.
La sospensione infatti non richiede cure
particolari se non un semplice ingrassaggio
dei cuscinetti sui quali scorre la
sospensione. Telaio e sospensione sono
anodizzati per cui non richiedono alcun tipo
di manutenzione, se non una normale
pulizia.
3
4
5
6
7
8
Prima di ogni uscita
Controllare la forcella anteriore.
Controllare il serraggio dell’attacco
manubrio e del manubrio.
Controllare il gioco dello sterzo.
Controllare la tensione degli sganci.
Controllare il funzionamento dei freni e
l’usura dei pattini.
Controllare il funzionamento di cambio
e deragliatore.
Controllare la pressione delle gomme.
Controllate che le ruote siano centrate
1
2
3
4
5
Ogni 3-6 mesi
Sostituire l’olio della forcella
Smontare, pulire e ingrassare lo sterzo
ed il movimento centrale
Smontare, pulire ed ingrassare i mozzi.
Sostituire guaine e cavi del cambio,
deragliatore e freni.
Smontare, pulire ed ingrassare gli snodi
della sospensione.
COME SMONTARE LA SOSPENSIONE
ATREZZATURA NECESSARIA
• Chiave a brugola da 3 mm
• Chiave a brugola da 4 mm
• 2 chiavi a brugola da 5 mm
• 1 chiave aperta da 10 mm
• Martello in plastica
• Frenafiletti Loctite Medio
• Sgrassante Morgan Blue/FRO
3
Controllare il movimento della
sospensione. Deve essere fluido,
omogeneo e senza alcun gioco.
4
Svitare le due viti a brugola (17) che
collegano l’estremità della sospensione (2)
ai bilancieri (3 e 4). Togliere il perno di
collegamento (14) e separare la
sospensione dai bilancieri facendo
attenzione alle 2 rondelle in ottone (16) e
alle 6 rondelle in plastica (15) inserite tra i
bilancieri e la estremità della sospensione
5
Controllare il movimento dei bilancieri.
Deve essere fluido, omogeneo e senza
alcun gioco.
6
Svitare le 4 brugole svasate (13) che
bloccano i 2 distanziali a fuso (12) tra i
bilancieri
7
Con la stessa tecnica del punto 4 smontare
i bilancieri dal telaio facendo attenzione alle
2 rondelle in acciaio (18) inserite tra
cuscinetti e supporto dei bilancieri e al
perno (21) inserito tra le alette del supporto
per i bilancieri.
8
Nel caso i cuscinetti (19) del bilanciere
vadano sostituiti, smontarli e sostituirli.
BioClaeaner
• Grasso Morgan Blue/FRM Campa
Vedi figura 1 a pag. 4
1
2
Svitare il bullone inferiore
dell’ammortizzatore (8) con una chiave
a brugola da 5 mm ed una chiave
aperta da 10 mm, controllare il gioco tra
snodo superiore dell’ammortizzatore e
bilanciere. Deve essere fluido
omogeneo e senza alcun gioco.
Svitare la vite a brugola (11)sulla testa
dell’ammortizzatore e sfilare la bussola
il alluminio (10). Separare
l’ammortizzatore dal telaio
9
Smontare la sospensione (2) svitando le
due viti svasate (22) con 2 chiavi a
brugola a T da 5 mm. A causa del
frenafiletti potrebbe essere necessario
svitare e riavvitare alternativamente le
due viti per impedire al perno interno di
girare. Tra il forcellone ed i cuscinetti ci
sono 2 rondelle in materiale sintetico (24)
e 2 O-Ring (23) che sigillano i cuscinetti
(25)
10 Sfilare l’assale primario (27) Nel caso i
cuscinetti a rulli (25) vadano sostituiti,
sfilarli dal telaio battendo con un martello
leggero ed un cilindro metallico di
opportune dimensioni. Estrarre anche il
distanziale in alluminio (26) che separa i
cuscinetti. Nel caso questi vadano solo
ingrassati, lavare il tutto con uno
sgrassante biodegradabile (suggeriamo
Morgan Blue/FRM Biocleaner), asciugare
con aria compressa ed ingrassare con
grasso bianco idrorepellente (suggeriamo
Morgan Blue/FRM Campa).
COME MONTARE LA SOSPENSIONE
Vedi figure 1 a pag. 4
1
Inserire i cuscinetti (19) nelle sedi dei
bilancieri (3 e 4) e porre il distanziale
cilindrico filettato M6 (21) tra le alette del
supporto bilancieri saldato al telaio.
2
Fissare i 2 bilancieri (3 e 4) al telaio
utilizzando le 2 viti a brugola 6x20 (20) e le
4 rondelle in acciaio 12x1,5 (18) da
interporre tra cuscinetto e telaio e sotto la
testa delle viti a brugola.
3
4
Congiungere i 2 bilancieri per mezzo dei 2
distanziali a fuso filettati M5 (12) e le viti a
testa conica M5x15 (13) con una goccia di
Loctite Frenafiletti Medio.
Ingrassare i cuscinetti o le boccole dei 2
occhj dell’ammortizzatore (a seconda dei
modelli) ed infilare i 2 distanziali con foro
da 8 mm (6) nell’occhio alto e quello con
foro da 6 mm (7) nell’occhio basso.
5
Con la vite a brugola 6x35 (8) ed il dado
autobloccante (9), fissare l’occhio inferiore
dell’ammortizzatore al telaio. Controllare
che l’ammortizzatore possa ruotare
liberamente.
6
Infilare la bussola (10) nel foro del
bilanciere destro e, allineando
l’ammortizzatore, anche attraverso il suo
occhio superiore. Avvitare la brugola
M6x10 (11) con una goccia di Loctite
Frenafiletti Medio, utilizzando due chiavi a
brugola da 5 mm contrapposte.
7
Inserire i cuscinetti (25) nel fulcro primario,
interponendo il loro apposito distanziale in
alluminio (26). Ingrassarli ed infilare il
perno di rotazione (27).
8
Infilare i due O-Ring (23) e le due rondelle
in plastica da 30 mm (24) sulle estremità
del perno.
9
Posizionare la sospensione in
corrispondenza del suo asse di rotazione e,
dopo aver versato una goccia di Loctite
Frenafiletti Medio sulle viti a testa svasata
8x20 (22), avvitarle e serrarle con forza
utilizzando due chiavi a brugola da 5 mm
contrapposte. Controllare la rotazione del
forcellone
10 Spessorare le estremità dei bilancieri con 1
rondella in ottone 12x4,5 mm (16) e 3
rondelle in plastica di diametro 22 mm (15)
per parte.
11 Inserire tra le 2 bielle (3 e 4) il distanziale a
fuso con filetto M6 (14). Collegare
l’estremità superiore della sospensione alle
bielle per mezzo delle viti a brugola M6x25
(17) avvitate al distanziale a fuso, con una
goccia di Loctite Frenafiletti Medio.
Pagina 3
ITALIANO
LA TARATURA DELL’AMMORTIZZATORE
Gli ammortizzatori montati sulla 10HP possono
essere il taiwanese Kind Shok Focus,
l’americano Rock Shox MC3.3 lo Svizzero DT
HRV200
SAG
La pressione dell’aria, immessa con una pompa
dotata di valvola Shraeder, determina il sag
(affondamento) che si determina con il ciclista, in
ordine di marcia, seduto in sella
Il Focus è un ammortizzatore aria-olio a doppia
camera.
Si consiglia un sag di 8-9 mm
Queste le sue principali caratteristiche:
Un O-Ring filato sullo stelo dell’ammortizzatore
• Camera d’aria positiva di grandi dimensioni aiuta a calcolare questa distanza
per utilizzare basse pressioni di esercizio
Attenzione: l’ammortizzatore non deve
• Camera di aria negativa regolabile con
apposita valvola immissione aria per variare comprimersi per più di 12 mm con il peso del
ciclista in sella.
lo stacco iniziale
Oltre questo limite è molto facile raggiungere il
• Regolazione della velocità di ritorno
fondocorsa con conseguenti problemi strutturali
• Blocco manuale
dell’ammortizzatore e/o del telaio.
La corsa totale dell’ammortizzatore è di 37 mm
• Circuito di sicurezza per il blocco “blow-off”
• Peso: 270 gr
• Lunghezza occhio-occhio: 165 mm
• Corsa: 37 mm
IL Rock Shox MC3,3 è un ammortizzatore ad
aria dotato del sistema Stable Platform ed
anche del blocco manuale.
Queste le sue principali caratteristiche:
• Camera d’aria positiva di grandi dimensioni
per utilizzare basse pressioni di esercizio
• Levetta per passate dalla funzione
PROCEDURA PER CALIBRARE LA
PRESSIONE DELL’ARIA
• Immettere aria nella valvola con una pompa ad
alta pressione dotata di valvola Shraeder.
• Far scivolare l’O-Ring sullo stelo
dell’ammortizzatore completamente verso l’alto
• Salire in sella appoggiando le mani sul
manubrio, nella posizione della pedalata.
• Scendere lentamente dalla bici e misurare lo
PROCEDURA PER CALIBRARE LA
VELOCITA’ DI RITORNO (Rebound
Damping
• Rock Shox MC 3,3 e DT HRV200:
Il damping in ritorno viene regolato per
mezzo dell’apposito rotore. Ruotandolo in
senso orario si rende l’ammortizzatore
progressivamente più lento in fase di ritorno.
La rotazione in senso antiorario velocizza lo
smorzamento in ritorno.
• Focus: Il damping in ritorno viene regolato
per mezzo della levetta rossa. Ruotandola
in senso orario si rende l’ammortizzatore
progressivamente più lento in fase di
ritorno. La rotazione in senso orario
velocizza lo smorzamento in ritorno.
• Il freno di ritorno ha una particolare utilità in
discesa. Nel caso in cui si avverta che la
sospensione posteriore tende a scalciare,
ovvero a sollevare il posteriore dopo aver
superato un ostacolo, si dovrebbe
aumentare il freno idraulico. Se, al
contrario, la velocità di ritorno è troppo
lenta, la sospensione tende a non ritornare
in posizione quando si supera una serie
ravvicinata di ostacoli. In tal caso conviene
aumentare la velocità di ritorno.
spostamento dell’O-Ring sullo stelo, ovvero la
distanza tra l’O-Ring e il paraolio.
BLOCCO DELLA SOSPENSIONE
Pedalando in asfalto o in particolari momenti
• Se l’ammortizzatore affonda troppo occorre
in cui può essere necessaria una pedalata in
• Nella funzione Gate è possibile regolare il
piedi sui pedali rilanciando la velocità può
ripetere l’operazione dopo aver aumentato
punto di stacco
essere utile bloccare completamente la
leggermente la pressione. Se, al contrario,
• Peso: 245 gr.
sospensione. Il suo blocco non ha invece
l’ammortizzatore non affonda a sufficienza,
• Lunghezza occhio-occhio: 165 mm
senso quando si affronta una salita sterrata
occorre sgonfiarlo leggermente.
percorsa a velocità più o meno costante
• Corsa: 38 mm
Dopo un certo numero di prove sarà evidente a
anche se si pedala in piedi sui pedali.
quale pressione si deve gonfiare
Chiudendo la apposita levetta si ottiene
Il DT HRV 200 è un ammortizzatore aria-olio a
l’ammortizzatore perché il sag sia quello giusto.
un blocco della sospensione.
doppia camera di tipo Stable Platform.
E’ evidente che chi utilizza la bici per puro
Una valvola di sicurezza permette comunque
Queste le sue principali caratteristiche:
escursionismo cercherà il massimo del confort e all’ammortizzatore di comprimersi quando
• Camera d’aria positiva di grandi dimensioni probabilmente utilizzerà una pressione inferiore a necessario.
per utilizzare basse pressioni di esercizio
quella in tabella, che permetta di raggiungere un Con il Rock Shox MC3,3 o il DT HRV200
• Camera negativa ad elastomero per evitare sag di 8 - 9 mm, mentre gli agonisti, che
occorre invece settare la regolazione del
prediligono la prestazione, possono aumentare la punto di stacco, alzandolo fino al punto in cui
le alte pressioni delle camere negative ad
pressione
in
modo
da
ottenere
un
sag
inferiore.
aria
la sospensione non viene attivata dai
La possibilità di bloccare l’ammortizzatore nei
movimenti del ciclista o dalla pulsione della
• Pistone primario mobile per diminuire il livello momenti
di rilancio della velocità offre comunque pedalata
di progressione e fruttare tutta la corsa anche
la possibilità di mantenere la pressione a livelli
con pressioni iniziali elevate
normali. L’O-Ring infilato sullo stelo
• Occhielli montati su giunti sferici per il
dell’ammortizzatore permette anche di controllare MANUTENZIONE
L’ammortizzatore va lavato e pulito dopo
migliore allineamento sul telaio
la corsa massima raggiunta dopo una discesa.
uscite
particolarmente sporche. Il fango che
Nel caso in cui, per particolari stili di guida, non si
• Regolazione della velocità di ritorno
si secca sullo stelo può infatti danneggiare le
riesca mai a sfruttare tutta al corsa
• Regolazione del punto di stacco
tenute idrauliche. Durante il lavaggio
dell’ammortizzatore sarà bene diminuire la
accertarsi che il tappo di protezione della
• Circuito di sicurezza per il blocco “blow-off”
pressione. Il contrario ovviamente se, per una
valvola dell’aria sia avvitato. Non è prevista la
guida particolarmente aggressiva si raggiunge
• Peso: 200 gr
sostituzione dell’olio all’interno
troppo frequentemente il fondocorsa.
• Lunghezza occhio-occhio: 165 mm
dell’ammortizzatore se non nel caso in cui
questo presenti dei problemi di
• Corsa: 37,5 mm
funzionamento. Lo smontaggio
dell’ammortizzatore va eseguito solo da
centri specializzati col permesso del
produttore.
I prodotti FRM sono garantiti contro difetti di materiale e costruzione per un periodo di 2 anni
La garanzia decade automaticamente nel
dalla data di acquisto del primo utilizzatore, certificata dallo scontrino fiscale del negozio.
La garanzia decade nel caso in cui la manutenzione ordinaria o straordinaria consigliata in questo manuacaso in cui si smonti l’ammortizzatore senza
le non sia stata eseguita OBBLIGHI: in caso di vizio, FRM si impegna ad effettuare la sostituzione o la
autorizzazione.
GARANZIA
“Sbloccato”, “Bloccato” o “Gate”
riparazione, a sua discrezione dell’elemento riconosciuto difettoso. Per essere accettato, il difetto deve
essere comunicato dal legittimo proprietario al negoziante dove il prodotto è stato acquistato e da quest’ultimo, dopo averlo verificato, alla FRM Nel caso in cui la FRM non riconosca l’esistenza del difetto
o stabilisca che questo è dovuto ad una delle cause riportate nel seguente paragrafo, la sostituzione non è
dovuta ed il componente viene restituito a spese del destinatario LIMITI: la garanzia non copre i danni
risultanti da trasporto, giacenza, incidenti, negligenze, colpi o cadute, mancato rispetto delle informazioni
del libretto istruzioni, montaggio errato o con prodotti non compatibili, cattiva manutenzione, usura normale, modifiche o alterazioni del prodotto. La Garanzia non copre le parti soggette a normale usura
(cuscinetti, paraolio ecc.)
Per la pulizia della bici consigliamo lo
sgrassante Morgan Blue/FRM BioCleaner
Pagina 4
Page 4
Parti sospensione
17
30
18
Suspension schematic
19
4
16
15
31
2
29
1
2
3
4
5
5
5
6
7
8
8
9
9
10
11
11
12
13
14
15
16
17
17
18
19
20
20
21
22
22
23
24
25
26
27
28
29
30
31
12
3
1
13
24
28
Item no.
14 11
Code
HPMF03
HPS03
HPRAR04
HPRAL04
KSF165
RSMC33165
HRV200S
UES10HP
LEAXF
TCE635
TCE635Ti.
SNM6
SNM6E
HLP03
TCE610
TCE610E
HPRS5
TSE515
HPRS6
WD022
BW1245
TCE625
TCE625Ti.
SW1215
BB1966
TCE620
TCE620Ti.
HPRAS6
TSE820
TSE820Ti.
ORD22
WD030
MPR96
MPRS
MPA97
DISC96
TCE512
CB99
ACS96
22
21
23
25
26
9 18 19 18
27
6
10
5
20
7
8
DESCRIZIONE - DESCRIPTION
Triangolo principale anodizzato Titan - Main Frame Titan anodised (17,5” –19” – 20,5”)
Sospensione - One-Piece Suspension
Biella Destra - Rocker Arm Right Plate (Black Anodised)
Biella Sinistra - Rocker Arm Left Plate (Black Anodised)
Ammortizzatore Kind Shoch Focus. Lockable (165 mm eye to eye)
Ammortizzatore Rock Shox MC3,3. Stable Platform + Lockable (165 mm eye to eye)
Ammortizzatore DT HRV200 - Rear Shock DT HRV200 Stable Platform (165 mm eye to eye)
Distanziale Occhio Superiore (specificare modello) - Spacer of Upper Eye (2 pcs) Specify Shock Type
Asse Occhio Inferiore (Specificare Modello) - Axle of Lower Eye (Specify Shock Type)
Brugola Acciaio & Rondella - Allen Steel Bolt M6 x 35 & Washer
OPTIONAL: Brugola Titanio - Titanium Allen Bolt M6 x 35
Dado Autobloccante & Rondella - Self-Locking nut M6 & Washer
OPTIONAL: Dado Autoblocante in Ergal - Self-Locking Nut M6 Light Allloy
Perno in Alluminio dell’Occhio Superiore - Axle of the Shock Upper Eye (Light Alloy)
Brugola acciaio M6x10 - Allen Steel Bolt M6x10
OPTIONAL: Brugola in Ergal - Allen Bolt in Light Alloy
Distanziale a Fuso - Fuse-Shaped Spacer M5 (2pcs)
Brugola a Testa Conica - Cone-Headed Bolt M5x15 (4 pcs)
Distanziale a Fuso - Fuse-Shaped Spacer M6
Rondella Plastica - Plastic Washer dia. 22 mm (4 pcs)
Rondella Ottone - Brass Washer 12x4,5 mm (2pcs)
Brugola in acciaio M6x25 (2pz) - Allen Steel Bolt M6x25 (2pcs)
OPTIONAL: Brugola Titanio - Titanium Allen Bolt
Rondella Acciaio - Steel Washer 12x1,5 mm (6pcs)
Cuscinetto a Sfere - Ball Bearing 19x6x62RS (4pcs)
Brugola in acciaio M6x20 (2 pz)- Allen Bolt M6x20 (2pcs)
OPTIONAL: Brugola Titanio - Titanium Allen Bolt M6x20 (2pcs)
Perno Alluminio - Light Alloy Rod M6
Brugola in Acciaio Testa Conica M8x20 (2pz) - Steel Cone-Headed Bolt M8x20 (2 pcs)
OPTIONAL: Brugola Testa Conica Titanio - Titanium Cone-Headed Bolt M8x20 (2 pcs)
O-Ring dia. 22 mm (2pcs)
Rondella Plastica - Plastic Washer dia. 30 mm (2pcs)
Cuscinetto a Rulli Fulcro Primario - Main Pivot Needle Bearing (2pcs)
Distanziale Cuscinetti - Bearings Spacer
Asse Fulcro Primario - Main Pivot Axle (Light alloy with steel sleeves)
Adattatore Freno a Disco - Disc Brake Adaptor
Brugola - Allen Bolt M5 x12 mm (2pcs)
Collarino per Freno V-Brake - V-Brake Collar (2pcs)
Perno V-Brake in Alluminio - Brake stud M8 in Light Alloy
Figura 1
Figure 1
Page 5
ENGLISH
X-COUNTRY RACING MACHINE
Thank you for making the 10HP frame your choice in full suspension. This frame is a highly technological
product which requires your maximum attention and care.
It is mandatory to read this manual entirely prior to working on your bike.
The main triangle and the suspension of the
10HP frame is constructed from double and
triple butted Ultralite MTB 7005 light alloy.
Many of the suspension parts are CNC
machined from billet, which allows for a
reduction in weight and greater
manufacturing precision.
The main and rocker-arm pivots all turn on
precision needle and ball bearings, to avoid
play and assure a lifetime durability.
This frame, which weights approx. 2,2 kg
shock included (DT HRV200), can be
utilized for X-Country Racing.
Rising Rate
The suspension is of the Rising Rate type,
which offers optimum lateral rigidity since
both the swing-arm and the seat-stays work
together to eliminate flex.
The rocker-arm system keeps the shock
absorber separated from the suspension
arms, in order to avoid lateral forces which
could compromise its performance. The
suspension structure has been engineered
in order to eliminate the rear Horst Link. For
this reason the 10 HP suspension can be
considered of the Semipivotless type
so that the shock can react actively to the
terrain at all times.
This suspension system is semi- active
because there is no Horst Link.
It is not affected by Biopacing and Pedal
Feed-back (anti-clockwise rotation of the
pedals while the suspension is
compressed).
Travel
The wheel travel of the rear wheel is 65
mm: As the shock extension is 37 mm the
rate is 1,75.
Finish
Frame and suspension parts are bedblasted for better fatigue resistance and
then anodized to resist atmospheric
corrosion and chipping.
ASYMMETRICAL SUSPENSION
The CNC machined yoke which links the
main suspension pivot to the chain-stays
is composed of two separate arms which
are connected by an oblique-set joist.
The right yoke-arm is pitched downwards
to provide room for the chain and
derailleur cage, whereas the left yoke-arm
extends directly towards the Horst link.
This design permits a weight reduction of
60 g, with respect to the previous
symmetric swingarm, while improving
torsional rigidity.
The rear drop-outs are ribbed fro greater
rigidity and higher resistance to impact
SADDLE SET-UP
The fore-aft position of the saddle with
respect to the vertical axis of the
bottom bracket, as well as the saddle
tilt change when the bike is mounted.
After setting the correct shock sag, sit
on the saddle and block the
suspension in position using a
wooden wedge between the rocker
arm and the seat tube.
Only at this stage can the saddle
position and tilt be correctly measured
and set with a plumb-line and spiritlevel.
Main pivot height
To avoid Biopacing or DISC effects, which
are caused respectively by the extension
and compression of the suspension during
pedalling, the main pivot is positioned 55
mm higher than the bottom bracket, in
alignment with the middle ring.
This is the position in which the chain
torque least interacts with the suspension,
The 10 HP frame has been designed exclusively for Cross Country.
Any other improper use will void your warranty
The use of double-triple crown front forks will void your warranty.
To obtain the best performance results, this
FRONT DERAILLEUR:
frame must be assembled with the correct
Use Top-Pull type derailleurs with a clamp
components. Please heed the following
diameter of 31,8 mm.
instructions.
Shimano Top-Swing derailleurs are not
FRONT FORK:
compatible with the 10HP frame.
Steering tube diameter is 1 1/8”.
We suggest using Shimano Down-Swing type
Forks from 80 to 90 mm of wheel travel can be or SRAM X-Gen derailleurs.
fitted, but you must never install double-triple
Always insert a Teflon liner inside the
crown forks.
aluminium tube welded to the frame
BOTTOM BRACKET:
Width 68 mm, English thread.
REAR DERAILLEUR :
The cable-guide sheath from the shifter to the
derailleur is a single continuous unit fitted
between two clamps bolted to the down-tube
and inserted inside the right seat-stay.
CHAINRINGS:
For correct suspension performance we
suggest the use of Compact-type rings (44-32BRAKES :
22).
Make sure that the chain-line is from 47,5 to 50 The 10HP frame can be fitted with either VBrake Disc brakes.
mm from the mid-ring to the frame axis
If V-Brake are selected, you should order the
specific replaceable collars.
SEATPOST :
Seat-post diameter is 27,2 mm.
Make sure that there is at lest 60 mm of seatpost tube inside the frame
MAINTENANCE
Never clean the bike with petroleum-based
products or solvents (petrol, gasoline, diesel,
etc.) as they will dissolve the grease in the
bearings.
We recommend the use of water-based
detergents like Morgan Blue/FRM BioCleaner.
After washing, wait until the bike is dry, then
lubricate the chain, pedals, bottom bracket,
hubs and derailleurs with good products like
Morgan Blue/FRM Extra Dry oil.
Page 6
ENGLISH
Before every ride
MAINTENANCE
1
The Be Active frame requires a regime of
maintenance similar to that of any type of
MTB.
The suspension simply requires the
occasional greasing of the bearings.
The frame and suspension are anodised
and therefore require no maintenance apart
from normal cleaning
Every 3-6 months
Check the front fork.
1
Replace fork oil
2
Disassemble, clean and grease the
headset, and bottom bracket
3
Disassemble, clean and grease the
front and rear hubs.
4
Replace derailleur and brake cable
guides.
5
Disassemble, clean and grease all
suspension pivot points.
2
Check bolt tension of the stem.
3
Check headset play.
4
Check tension of quick releases.
5
Check brake efficiency.
6
Check front and rear derailleur
efficiency.
7
Check tire pressure.
8
Check wheel trueness
SUSPENSION DISASSEMBLY
TOOLS:
• One 3 mm Allen key
• One 4 mm Allen key
• Two 5 mm Allen keys
• One 10 mm open wrench
• One plastic mallet
• Loctite Medium thread compound
• Cleaner. Suggested Morgan Blue/FRM
3
The suspension without shock should be
turned up and down in search of possible
play or friction. It should turn freely and
smoothly without play.
4
Unscrew the two Allen bolts (17) linking
the rocker arms to the upper end of the
seat-stays assembly (2). Now the fuseshaped spacer (14) can be removed.
Separate the suspension from the arm
plates (3 & 4), paying attention to the 2
brass washers (16) and 6 plastic washers
(15) which are located between the arm
plates and the bearings at the upper end of
the suspension.
BioCleaner
• Grease. Suggested Morgan Blue/FRM
Campa grease
See figure 1 on page 4
1
2
Unscrew the bolt at the lower end of
the shock (8) with a 5 mm Allen key
and a 10 mm open wrench. Check any
eventual play between rocker arm and
upper end of the shock. It should turn
freely and smoothly without play.
5
Check any possible play between rocker
arms and frame support plate. They should
turn freely and smoothly without play.
6
Unscrew the 4 cone-headed bolts (13)
linking the rocker arm plates (3 & 4) and
remove the 2 fuse-shaped spacers (12).
7
Unscrew the two Allen bolts (20) linking
the arm plates to the frame support plate,
paying attention to the 4 steel washers (18)
located between the bearings and the
frame plate as well as under the bolt head.
Unscrew the Allen bolt at the upper eye
of the shock (11) and push the axle (10)
out of the eye. Now the shock can be
separated from the frame.
Now the spacer (21) located between the
frame support plates can be removed.
Separate the two arm plates (3 & 4) from
the frame.
8
Disassemble the two bearings (19) from
their seats of the arm plates. Replace
them if necessary.
9
With two 5 mm Allen keys unscrew the
two cone-headed bolts (22) connecting
the suspension to the frame. Push the
axle (27) out of the bearings.
Disassemble the bearings (25) if it is
necessary to replace them. An aluminium
sleeve seats between the two bearings.
If the bearings should not be replaced,
clean them with any biodegradable
degreaser Umorgan Blue/FRM
BioCleaner suggested) and compressed
air. Grease them with waterproof grease
(Morgan Blue/FRM Campa suggested).
SUSPENSION ASSEMBLY
aluminium spacer with 6 mm hole into
the lower eye. Fix the lower end of the
shock to the frame with the M6x35 Allen
bolt (8) and its self locking nut (9).
Check that the shock can rock back and
forth freely on its axle.
See figure 1 on page 4
1
2
3
4
Press the bearings (19) into their seats
of the two rocker arm plates (3 & 4).
Slide the spacer (21) between the
support plates welded to the frame.
Put two steel spacer 12x1,5 mm (18)
each side between the bearing and the
support plates, as well as under the
head of the Allen bolts M6x20 (20). Put
one drop of Loctite Medium Compound
on each bolt. Screw in the two bolts
through the support plates to the inner
spacer. (21)
Connect the two rocker arm plates with
two M5 fuse-shaped spacers (12) and
four cone-headed M5x15 bolts (13). Put
one drop of Loctite Medium Compound
on each bolt. Check that the rocker arm
assembly can rock back and forth freely
on its axle.
Grease both eyes of the shock and
slide two aluminium spacers with 8 mm
holes into the upper eye and the
5
Connect the upper eye of the shock to
the rocker arm plates, sliding the
aluminium axle (10) from the right side
and the Allen bolt M6x10 (11) from the
opposite side. Put one drop of Loctite
Medium Compound on each bolt.
6
Grease the 2 bearings (25) of the main
pivot. If they have been disassembled,
reinstall them on their seats putting the
spacer (26) in between. Insert the axle
(27).
7
Insert two O-ring (23) and two plastic
washers (24) at both ends of the axle.
8
Slide the pivot point of the suspension
(2) in front of the axle. Put one drop of
Loctite Medium Compound on the two
cone-headed M8 x 20 bolts (22). Screw
in the two bolts with two 5 mm Allen
keys. Check that the swing-arms can
rotate freely and smoothly without play.
9
Rotate the suspension arm until the
upper end comes in contact with the
rocker arm assembly. Slide three plastic
washers (15) into each of the brass
spacers 12x4,5 mm (16) and put this
assembly in front of the two holes of the
upper yoke, and between the joke and
both rocker arms.
10 Slide the fuse-shaped spacer M6 (14)
between the rocker arm plates. Slide
the Allen bolts M6x25 (17) into the
bearings and connect the suspension to
the rocker arm plates screwing in the
bolts to the fuse-shaped spacer. Put
one drop of Loctite Medium Compound
on each bolt.
Page 7
ENGLISH
REAR SHOCK TUNING
SAG
The suggested sag has been determined as 8 mm.
This sag level is about 1/4 of the total shock travel.
In practice the rear shock should shorten by 8 mm with the cyclist
sitting on the saddle.
Warning: a sag higher than 11-12 mm is detrimental to the shock
functional capacity.
Beyond this limit it is very easy to bottom out, with negative
consequences on the shock and/or frame structure.
The total travel of the shock is 37 mm, which translates into 65 mm of
wheel travel.
AIR PRESSURE CALBRATION PROCEDURE
• Unscrew the cap of the valve (positive chamber) and inflate with a
fork pump fitted with Shraeder adaptor.
• Pressurize the shock following the weight/pressure table.
NOTE: if you re-attach the pump, the hose will re-fill with air. This will
result in a lower PSI registering of approximately 15 to 20 PSI on the
gauge
• Sit on the saddle and measure the shock sag.
• If the shock over-sags de-pressurize the positive chamber and
repeat the procedure to a slightly lighter pressure
• If the shock under-sags de-pressurize it and repeat the procedure to
a slightly lower pressure.
• After a few tests the correct pressure for optimum sag will become
evident. It is clear that if the bike is used simply for sport, the rider
should tune the suspension as confortably as possible (9-10 mm of
sag) and will probably obtain the best results at pressures which are
slightly lower than those of the table. The pro-racers however may
prefer to sacrifice confort for a stiffer suspension. In this case we
suggest increasing the pressure until the bobbing is minimal.
• The low progression of the spring rate, achieved with variable
WARRANTY
volumes of the air-chamber allows up to 10% more travel available
at the some pressure of a shock with constant air chamber volume.
This means that you can use an higher pressure in order to avoid
bobbing and nevertheless use the whole travel of the shock if
needed.
REBOUND DAMPING CALIBRATION PROCEDURE
• DT HRV200 and Rock Shox MC3,3 : Rebound damping can be
varied by turning the regulator rotor at the top of the shock. Turning
it clockwise produces a higher damping, meaning a slower return
speed, while turning it counterclockwise produces a lower damping
that is a faster return speed.
• Focus : Rebound damping can be varied by turning the regulator
lever at the top of the shock. The + sign (clockwise) indicates
higher damping, meaning a slower return speed, while the - sign
(anticlockwise) indicates lower damping that is a faster return
speed.
Damping is particularly useful in downhill situations. If you feel the
rear suspension kicking at the moment of passing an obstacle, the
hydraulic brake damping should be increased (clockwise). If, on the
other end, the return speed is too slow, you might feel the
suspension packing during a series of close obstacles. In this case
the hydraulic brake damping should be decreased (anticlockwise).
LOCK-OUT
• DT HRV200 and Rock Shox MC3,3 : their Stable-Platform
feature prevent a bicycle’s suspension from compressing with each
successive push on the pedals, without restricting the system’s
ability to react to bumps. Tune the clicker until you find the correct
threshold for your pedalling cadence. No need for a total lock-out
• Focus : Turning the damping lever to the full left (clockwise)
position increases the damping to the point where the shock is
locked-out.
MAINTENANCE
The shock should be washed and cleaned after wet and muddy
rides. Mud drying on the stanchions can in fact damage the seals.
During washing make sure that the air-valve cap is securely in place.
The oil inside the shock need not be replaced unless there are
functional difficulties. The shock-unit should only be disassembled by
specialists authorized by the manufacturer.
The guarantee will be void if the shock-unit is disassembled without
prior authorisation
FRM products are guaranteed against any defects for a period of 2 years from the date of purchase by the first owner, registered in a dealer shop.
OBLIGATIONS: In case of defects, FRM pledge to replace or repair, at their discretion, the part recognised as defective. To be accepted, the rider
compliant must be communicated to FRM through the dealer/importer after his own control.
If FRM after sales checking reveals that the damage is due to one of the reasons mentioned in the following paragraph, the replacement is no longer
accepted and the defective item is sent back to the plaintiff who supports the shipping fees.
LIMITATIONS: The guarantee does not cover damage resulting from transportation, warehousing, accidents, negligence, impact or falls, non-compliance
with the information in the instruction manuals, assembly errors, assembly using non-compatible products, bad maintenance, modifications or alterations to
the product.
The guarantee does not cover parts and components subject to normal wear and tear such as ball-bearings, bushings, seals, etc.