1
Operator's Manual – Slam'N'Jam Junior
© LAI GAMES
Slam‘N’Jam Junior ASSEMBLY Quick Guide
Do’s and Don’ts for Assembling Slam‘N’Jam Junior
Do read the Slam‘N’Jam Junior assembly manual as it will help
you in the correct step by step order of assembly
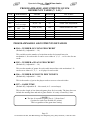
Do take note of what size bolts are used where when assembling Slam„N‟Jam
Junior
Do make sure that all cables are free to move and not pinched or
jammed under the playfield or other parts when assembling
Slam‘N’Jam Junior.
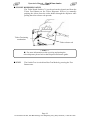
Do make sure that all earth point cables are connected when
assembling both the Front Frames and Front Playfield Speaker
Pods on Slam‘N’Jam Junior.
Don‟t forget to remove the Slam‘N’Jam Junior cables from inside
the game cabinet before bolting the front playfield in place.
Don‟t forget after assembling Slam‘N’Jam Junior to check and
tighten all the bolts.
Don‟t forget to check the voltage setting of Slam‘N’Jam Junior is
set to the mains voltage for your country before applying power.
TIPS for Assembling Slam‘N’Jam Junior
o
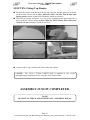
We recommend using two people when assembling Slam„N‟Jam Junior.
While one person is able to do most of the assembly, using two people will
be much easier. A stepladder will also be very handy during assembly.
o
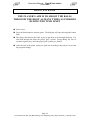
We recommend that assembling Slam„N‟Jam Junior is best done on a
level and even surface. Adjust the rubber feet on the frames to align them
for easier assembly.
o
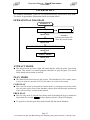
We recommend when assembling Slam„N‟Jam Junior not tightening all
the bolts until all major parts are fitted. This will allow the easy alignment
of holes as the frame is not held rigid.
* NOTE *
Slam„N‟Jam Junior uses metric size Nuts & Bolts throughout its construction.
Page 5
To Purchase This Item, Visit BMI Gaming | www.bmigaming.com | (800) 746-2255 | +1.561.391.7200