1
!
NEW
MODEL
1
FAN
LESS
DESCRIPTION
WORLDWIDE
REMOTE
CONTROL
WIFI and
MODBUS
SALT/L
UPGRADE
POSSIBLE
SELF
CLEAN
SEA
WATER
3g
2015
INSTALLATION GUIDE
from
PORTABLE
COLOR
DISPLAY
(TFT)
Electronic box
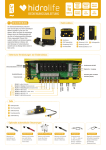
Hidrolife is a water treatment system and a controller
for swimming pools.
Water treatment: The salt water electrolysis produces
chlorine from a base of salt water of low salinity.
The electrolysis cell attains a production of sodium
hypochlorite (liquid chlorine) from 3g salt per liter.
The chlorine combats and eliminates bacteria, virus,
pathogenic agents and oxidizes organic matter
present in the water. The used sodium hypochlorite
reconverts into salt after a few hours.
Hidrolife controls centrally all the components of your
pool, ensuring an efficient interaction.
4
1
2
3
5
6
110-230 V
1 Electrolysis
2 RCA flow detector
3 Main connection 230 V
5 Fuse for device and cell 3.15 A
4 ON/OFF switch
6 Fuse relays 3.15 A
Electrical connections of the electronic box
Cover
FL1
Device control SLAVE
Digital inputs / outputs
Chlorine probe
detector (rotameter)
110-230 V max. 3.15 A
DRY CONTACT
Conductivity probe
Connection
WIFI / RS module
Temperature probe
Connection display
redoX
pH
Free
Chlorine
N
L
A1 A2
14
12
pH
pH Control
AUX 1
Base (pump)*
AUX 2
redoX / free chlorine
ppm´s (pump)*
11
FILTER PUMP
Filtration control
LIGHT
Lighting control
AUX 3
AUX 4
Heating control*
* An “Installer Menu” does exist for advanced functions. If you are an authorized installer, please ask your provider for the installers/service manual.
Cell
1
Electrolysis cell
2
RCA flow detector
3
Cell connector
4
Cell housing
5
Flow/gas detector (internal)
4
1
5
2
3
Optional automatic controls
pH control
Metering and control
of the pH of the water.
redoX control
Metering and control of
the redoX as check value
of the free chlorine.
Free chlorine control
Metering and control in
ppm of the free chlorine
of the water.
Conductivity
Metering and control of
the conductivity of the
water in Msiemens.
Temperature
Temperature probe
0 - 100° C necessary
to activate the filtration
modes: heating /
intelligent / smart.
Flow detector
Mechanic security
flow switch. Stops the
electrolysis if there is
no water flow.
2
SYSTEM INSTALLATION
Electrical consumption
1
16
Product
A
17
8
3
5 4
9
B
15
10
Maximum Recommended
consumption
protection
gr Cl2/h
SAL 8
80 W
10 A
8
SAL 16
120 W
10 A
16
SAL 22
160 W
10 A
22
SAL 33
180 W
16 A
33
SAL 50
400 W
16 A
50
SAL 85
680 W
25 A
85
SAL 125
1000 W
25 A
125
SAL 175
1020 W
25 A
175
SAL 250
2880 W
25 A
250
* Filtration control by external timer
C
Filtration mode:
“Manual/ON”
A
Filtration pump timer *
B
C
Silex / glass / diatom filter
8
Acid dosing pump
(optional - for models with pH control)
Recirculation pump
9
Acid injector
(optional - for models with pH control)
1
Electronic box
10
3
Electrolysis cell
(always in vertical position)
4
pH probe
(optional - for models with pH control)
15
Other pool equipment
5
redoX probe
(optional - for models with redoX control)
16
Module RF or RF/WIFI or WIFI
17
Free chlorine control
3
Hydrochloric acid container
(optional, for models with pH control,
not supplied with unit)
Filtration mode:
See section 4.3
Relay FILTER PUMP
110-230 V
Adding salt to the water / conductivity
Adjust the alkalinity between 90 and 110 ppm’s.
Adjust the pH between 7,2 y 7,5.
Adjust the chlorine between 1 y 1,5 ppm’s.
•• In case the water is supplied from a well:
Shock chlorination with trichloroisocyanuric acid
(2 kg / 50 m3 of water).
4
* Filtration control by internal timer
INITIAL WATER ADJUSTMENTS
Water adjustments
1
2
3
110-230 V
FUNCTIONING OF THE SYSTEM
1
2
We recommend to add 5-6 g of salt (without iodine) for each liter of water in your
swimming pool (5 to 6 kg NaCl per m3 water).
Open the bottom valve of your swimming pool and add the salt directly to your
swimming pool water. Let the circulation pump run during the first 24 hours.
•• Hidrolife system may operate while the salt is dissolving and will operate without problems with salt
concentrations from 2,5 g/l to 50 g/l.
•• In pools with strong insolation, it’s necessary to add 40 gr/m3 of stabiliser (isocyanuric acid).
Main screen
Heating ON/OFF
Water temperature
Pol 1 Polarity 1 / Pol 2 Polarity 2
Cover Production automatically reduced to
Status of the auxiliar relays
Current time
Electrolysis
Intensity of the production in gr/h
Automatic measurements: pH/redoX/
free chlorine/conductivity (according to options)
State filtration relay
(see section 4.3 - Filtration)
man
aut
hea
smt
int
Manual
Automatic
Heating
Smart
Intelligent
12:30 1 2 3 4
the % selected (see display 1.3)
Waiting time
Lack of conductivity or salt / scale on cell /
exhausted cell (check working hours)
Flow Filtration stopped due to lack of water flow
25º
--Low
electrolysis
22
gr/h
measures
7.2
700
Pol 1
Cover
Low
pH
7.5 OFF
7.0 OFF
Rx
mV
700 OFF
FL1
man
off
7.5
ON/OFF
AL3
7.0
ON/OFF
man
off
FL 1
700
Modify value/selection
MINUS key
Modify value/selection
Function of chlorine pump
Flow alarm / FL 2 Error rotameter Cl2
Setpoint redoX minimum
State relay lighting
Manual / aut Automatic
Communication display – mother board
red indicates communication error
PLUS key
Setpoint pH maximum (acid control)
Function of acid pump and base pump
Maximum dosing time exceeded ( to reset the alarm)
Setpoint pH minimum (base control)
man
OK key
Select/confirm
UP key
Navigation up
DOWN key
Navigation down
RETURN/ESCAPE key
4.1 Electrolysis
1.1
1.1 Electrolysis:
Programming of
electrolysis functions.
1.2
1.2 Level: Desired
production of
chlorine (gr/h).
1.3
1.4
1.3 Cover: connection of
automatic cover.
Reduction of chlorine
production in percent, when
the pool cover is closed.
1.5
1.4 Boost: Continuous
filtration during 24 hours
at maximum intensity.
Automatic return to
programmed filtration mode.
1.5 During the
boost period the
redoX control can
be deactivated.
4.2 Measures
2.1
2.2
2.4
2.5
2.9
2.10
2.14
2.15
2.1 Measures:
Adjustment of setpoints and
measuring probes.
2.2 Setpoints for each measurement.
2.3 Setting of setpoints.
2.4 Calibration of pH probe:
Recommended every month during
usage season.
2.3
2.5 Calibration with buffers (buffer
solutions pH7 / pH10 / neutral): Follow
the instructions which appear on the
displays (fig. 2.6).
2.7 Manual calibration: Allows to
adjust the probes at 1 point (without
buffers) – only recommended to
adjust small deviation in the readings.
2.6
2.11
2.9 Calibration of the redoX
probe: Recommended every 2
months during usage season.
2.10 Calibration with buffer
(buffer liquid 465 mV): Follow
the instructions which appear
on the displays (fig. 2.11).
2.12
2.12 Manual calibration: Allows to adjust
the probes at 1 point (without buffers) – only
recommended to adjust small deviation in
the readings.
2.13 Without removing the probe from the
water, use the plus/minus keys to adjust the
reading so it matches with your reference
value (photometer or other measurement).
2.7
2.8
2.13
2.8 Without removing
the probe from the
water, use the plus/
minus keys to adjust the
reading so it matches
with your reference value
(photometer or other
measurement).
2.15 Temperature calibration:
To set the difference between the
measured value of the probe and
the actual temperature, use the
plus/minus and up/down keys.
Set to the actual temperature of
the probe and press OK.
4.3 Filtration
3.1
3.2
3.3
3.7
3.4
3.5
3.6
You can access
the display “Filter
cleaning” from any
filtration mode.
Once selected this
function, press the
OK key.
3.1 Filtration modes
3.2 Manual: Filtration can be switched ON and OFF manually.
3.3 Automatic (or with timer): In this mode the filtration
switches ON/OFF according to 3 timers. The timers always
work on daily bases.
3.4 Smart*: This mode uses, as a basis, the automatic or
timer mode, with its 3 intervals of filtration, but adjusting
the filtration time in function of the water temperature. For
that reason 2 parameters of temperature are provided: The
maximum temperature, from which on the filtration times will
be the ones from the timer setting. The minimum temperature:
below this value the filtration time will be reduced to 5
minutes, which is the minimum working time. Between these
2 temperatures the filtration times will climb linearly. There
is an option to activate the antifreeze mode in which the
filtration will start if the water temperature is below 2° C.
3.5 Timed heating with option of climatization*: This mode
acts equally to the automatic mode, but besides it includes
the option to work on a relay to control the temperature.
The desired temperature is set in this menu, and the system
works with a hysteresis of 1 degree (example: the setting
temperature is 23° C, the system will activate itself when
the temperature goes below 22° C and will not stop before it
passes 23° C).
4.3 Filtration (continuation)
Clima OFF: The heating only works within the set filtration periods.
Clima ON: Keeps the filtration working when the filtration period is finished if the
water temperature is below the setting temperature. When the setting temperature
is reached the filtration and the heating will stop and will not switch on till the next
programmed filtration period.
3.6 Intelligent*: In this mode the user has 2 working parameters to guaranty the
desired water temperature with a minimum of filtration hours: You select the desired
water temperature and the minimum filtration time (minimum of 2 hours and
10 min
ON
28ºC
28ºC
27ºC
maximum of 24 hours). The device divides the selected “minimum filtration time”
in 12 fragments which start up every 2 hours. If one of these fragments finishes,
without the temperature reaching the desired level, the filtration/heating continues
until the desired temperature is accomplished. In order to keep the filtrationelectricity-cost to a minimum, this additional filtration time is subtracted from the
following fragments of the “minimum filtration time”. The first 10 minutes of each
fragment will not be subtracted. Example (see diagram): Minimum temperature =
28°C and minimum filtration time = 12 hours.
28ºC
27ºC
OFF
0h
1h
2h
3h
4h
5h
6h
8h
7h
9h
10h
11h
12h
14h
13h
15h
16h
17h
18h
19h
20h
22h
21h
23h
24h
DIAGRAM INTELLIGENT MODE
3.7 Filter cleaning mode (and pool cleaning by suction): Use the up/down keys to activate or deactivate the filtration pump. The device will inform about the elapsed time
from the moment of activation or deactivation. Follow the instructions of the filter manufacturer to execute an adequate filter cleaning.
* Note: Modes only visible if the option to use temperature and/or heating probe is activated in the “Installer Menu”.
4.4 Lighting
4.1
4.2
5.1
5.2
4.3
4.1 Lighting
4.2 Manual mode (ON/OFF).
4.3 Automatic mode: Shuts lights ON/OFF according to a
timer. The timers can be configured with a frequency: Daily;
Every 2 days; Every 3 days; Every 4 days; Every 5 days;
Weekly; Every 2 weeks; Every 3 weeks; Every 4 weeks.
4.5 Auxiliary relays
5.1 Auxiliary relays
5.2 It is possible to control up to 4 extra auxiliary
relays (water features, fountains, automatic irrigation
systems, built-in cleaning systems, air pumps for
spas, garden lighting, etc.). This menu displays the
relays which are still available on your device and
allow configuration.
5.3
5.4
5.3 Manual mode (ON/OFF).
5.4 Automatic mode: ON/Off according to a timer.
The timers can be configured with a frequency: Daily;
Every 2 days; Every 3 days; Every 4 days; Every 5
days; Weekly; Every 2 weeks; Every 3 weeks; Every
4 weeks.
5.5
5.5 Timer mode: Working time is programmed in
minutes. Each time the key on the front panel in
relation to the relay is pressed, it will start up for the
time programmed. This function is recommended for
the timing of air pumps for spas.
4.6 Settings
6.1
6.2
6.3
6.4
6.5
6.3 Setting of preferred language.
6.5 Setting of day and current time.
6.7 Setting of the intensity of the
display lighting (0-100%) and
programming its ON and OFF time.
6.6
6.7
6.8
6.9
6.10
6.11
6.12
6.13
6.14
2x
6.9 Sound: Programming of the system to emit sound for the functions: Keyboard (keys);
Notices (pop-up message); Alarms (working alarm); Filtration (start of the filtration).
6.11 Password: Allows to protect the access to the user´s menu by activating a password.
To enter your password press a combination of 5 keys and the system will memorize. If
you forget the password, there is a “master password”. Ask you installer/provider.
6.12 Time info: The system memorizes the operation times of the different modules and
they are displayed on the screen.
6.13 System info: Information about the available software version of the TFT display and
the power module. It also shows the ID node which is necessary for the configuration of
the WIFI connection of the system.
5
SYSTEMS WITH redoX CONTROL
The redoX value advises us of the oxidation/reduction potential and is used to determine the level of water sterilization.
The parameters or setpoints are the minimum/maximum accepted redoX levels before the titanium cell is connected/disconnected.
Adjusting the ideal redoX level (setpoint) is the last step in the Hidrolife start up sequence. To find the optimum redoX levels for your pool
follow these steps:
1
2
3
4
5
6
Connect the pool filtration system (the salt in the pool must be adequately dissolved).
Add chlorine to the pool till a level of 1-1,5 ppm is achieved (approx. 1-1,5 gr/ m3 of water). pH levels should be between 7,2 - 7,5.
After 30 min. test the free chlorine levels in the pool (manual test kit DPD1) if the free chlorine level is between 0,8 - 1,0 ppm.
Look at the redoX screen and memorize this level as the setpoint to CONNECT / DISCONNECT the electrolysis cell.
The next day check free chlorine levels (manual test kit DPD1) and redoX. Raise / lower setpoint if necessary.
Remember to check the redoX set-point every 2-3 month and/or if the water parameters change (pH / temperature / conductivity).
MAINTENANCE
First days of maintenance
During the first 10-15 days your pool system will require more attention and the following care:
1
2
Make sure the pH remains on the ideal level (7,2 - 7,5). If the pH is unusually unstable and uses a lot of acid check the alkalinity
(recommended levels between 80 y 125 ppm).
The pool must be vacuumed and the skimmers cleaned whenever necessary to ensure perfect water conditions.
REMEMBER that the system requires a certain amount of time to adapt to your swimming pool and will require additional chemicals during the first 3-5 days.
Cleaning the titanium cell
If necessary, carry out a monthly visual inspection. To clean the cell:
1
2
3
Remove the cell from its support (after turning off the filtration system and closing off the necessary valves).
Place the cell for no more than 10 minutes in 15% hydrochloric acid (1,5 l of acid for each 8,5 l of water).
Once the incrustations have softened remove with a hose to complete cleaning the cell.
DO NOT USE METALIC OR SHARP OBJECTS TO REMOVE INCRUSTATIONS. Scratching the edges or surface of the cell will make it
vulnerable to chemicals, deteriorate the cell and cancel the guarantee.
Fortnightly checks
FREE CHLORINE: 1,0 - 2,0 ppm
pH: 7,2 - 7,5
Monthly checks
TOTAL ALKALINITY (TAC) pH: 80 - 120 ppm
SALT CONCENTRATION: 4.000 - 6.000 ppm
CYANURIC ACID: 30 - 50 ppm
TITANIUM CELL: Visual inspection to
detect incrustations.
General maintenance
1
The pool must be vacuumed as usual and the skimmers emptied whenever necessary.
2
FILTER BACKWASHING: The system requires only occasional filter cleaning; once every 20 days should be sufficient (providing
the filter pressure does not exceed 1 bar, in which case a filter cleaning may be necessary).
VERY IMPORTANT: Make sure the cell is off while cleaning the filter. If the system controls the filtration pump, use the option “filter cleaning” of the programmed
filtration mode. See section 4.3 – Filtration (Filter Cleaning).
3
ADDING NEW WATER: Always through the skimmers so that the new water passes through the Hidrolife before entering the pool.
Remember to add the necessary salt (6 gr) per added liter of water.
4
In winter changing the pool water is not recommendable. We recommend that the system runs 2-3 times per week (2-3 hours per day).
5
DOSING PUMPS: Check regularly to ensure that the container contains liquid to prevent the dosing pump of running dry. The dosing
pump requires maintenance (SEE INSTRUCTIONS ON BOX).
6
pH PROBES / redoX / CONDUCTIVITY: Probes must be cleaned whenever necessary (check every 5-6 months). To clean the probe
insert in distilled water (clear liquid). After each cleaning the probes must be calibrated. Also: the probes should never dry out and
must be kept wet if stored (when emptying the pool for winterizing, make sure to store the measuring head in water).
7
TROUBLESHOOTING
Blank display
••
••
••
••
••
Check if ON/OFF switch is illuminated.
Check the connection wire between display and motherboard.
Check fuse of the device 3.15 A – it could have tripped due to overload.
Check the power supply 110V/60Hz – 230V/50Hz.
If problem persists contact TECHNICAL SERVICE
Electrolysis does not reach maximum intensity
••
••
••
••
••
Check sodium bromide or common salt concentration in water.
Check cell status (may be incrusted or calcified).
Clean the cell according to the instructions in section 6.
Clean the flow detector situated in the cell housing.
Check titanium cell is not worn out (remember that the cell is guaranteed for
5.000 hours, approx. 2-3 years of summer usage).
Free chlorine levels don’t reach 0,8 ppm
••
••
••
••
••
••
••
Increase filtration interval.
Increase electrolysis level.
Check levels of sodium bromide or common salt in the pool (6 gr NaCl/l).
Check level of isocyanuric acid in pool (30-50 ppm), only if using common salt.
Check if reactive agents in test kit are expired.
Check if the temperature or amount of users has risen.
If the water pH is above 7,8 it must be adjusted.
Electrolysis display shows LOW
•• Water lacks conductivity (see section 3 - Initial water adjustments).
•• Check for incrustations on cell.
•• See section 7 - Electrolysis does not reach maximum intensity.
Electrolysis display shows FLOW
•• Check flow detector cable.
•• Clean incrustations of flow detector at the top of cell housing.
•• Check if system is free of air (probe must be always submerged).
Excess of chlorine in the water
•• Lower electrolysis cell intensity.
•• If your system includes automatic redoX control, check redoX setpoint.
•• Check redoX probe and calibrate it if necessary.
Titanium cell incrusted in less than 1 month
•• Very hard waters with a high pH and total alkalinity: balance water adjusting
pH and total alkalinity.
•• Check to ensure the system automatically changes polarity every 300
minutes approximately.
•• Consult with our technical service to consider accelerating the polarity
change (auto-cleaning). WARNING: Accelerating the polarity change
decreases the cell life (5.000 hours) proportionally.
Alarm AL3 and pH dosing pump stopped
•• The maximum dosing time (standard 200 min.) is accomplished and the acid
dosing pump stops in order to avoid the acidification of the water.
•• To delete the message and to restart the metering press ESC ( ). Do the
following verifications in order to preclude errors on the device: Verify if the pH
probe reading is correct (if not, calibrate the probe or substitute it with a new
one); Verify if the acid/base deposit is full and if the dosing pump is working
correctly; Verify the variable speed of the dosing pump.
White flakes in the water
•• The water is excessively hard and it is unbalanced.
•• Balance the water and check the cell, proceeding to clean it if necessary.
•• Put 1 small bag of flocculant in the skimmer and recirculate 24 hours.
Rust on metallic components in the pool
•• Metallic elements lack standardized earth connection. Contact an
electrician to solve the problem.
•• Rusted components are not stainless steel (minimum 304 – recommended 316).
Polarity 1 reaches maximum intensity, but polarity 2 (auto clean) does not reach maximum intensity
•• If salt level is correct (4-6 kg/m3): Cell is reaching its end of life. As of this moment check intensity every 15-30 days.
•• When polarity 2 does not reach medium intensity, we recommend substituting the cell for a new one if it happens during the summer period. If it happens during
winter, change the cell before the next summer period.
WARNING
Keep chemical levels in pool as instructed in this manual.
CLEANING FILTER
Very Important: Make sure the cell is off while cleaning the filter. If the system controls the filtration pump, use the option “filter cleaning” of the
programmed filtration mode. See section 4.3 – Filtration (Filter Cleaning).
VERY IMPORTANT
Remember that the system needs some time to adapt to your pool and that you will have to increase chemical levels for the first 5 days.
EARTHING
All metallic components in the pool such as lamps, ladders, heat exchangers, drains or similar elements within 3 m from the pool (10 feet) must be
connected to an earth below 37 Ohms. If using heat exchangers, we recommend them to be made of titanium.
SECURITY
To avoid accidents, children should not handle this product unless supervised by an adult. Children should be supervised at all times when in or
near a spa, pool or jacuzzi.
HANDLING AND DOSING DANGEROUS CHEMICALS
Chemicals should be handled with extreme precaution. When preparing acid, always add acid to water, never add water to acid, because very
dangerous gasses may be produced.