1
TIC
MA
-O- 5
NN 335 4
BU P/N
5
6
7
3
6
8
7
2
5
6
4
S
UTE
1
MIN
S
3
UTE
MIN
DE
DIL
ON
UTI
LAY
SERVICE (cont.)
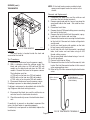
DILUTION SOLENOID VALVE
the brewer to the power source, place the ON/OFF
switch in the “ON” position and momentarily place
the start switch in the lower position and release.
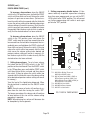
Listen carefully after the approximate setting on
the delay dial in the vicinity of the solenoid valve
for a “clicking” sound as the coil magnet attracts
and after the approximate setting on the dilution
dial, repels the plunger.
6. Disconnect the brewer from the power source.
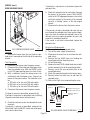
P3040
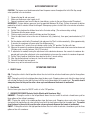
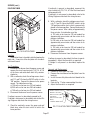
FIG. 8 DILUTION SOLENOID VALVE
Location:
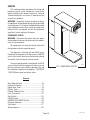
Viewing the brewer from the rear the dilution solenoid is mounted on the center of the solenoid mounting bracket which is secured to the trunk base.
Test Procedure:
1. Disconnect the brewer from the power source.
2. With a voltmeter, check the voltage across the
white/blue and white/violet wires on the dilution
solenoid terminals when the ON/OFF switch is in
the “ON” position and the start switch is momentarily placed in the lower position. Connect the
brewer to the power source. After the approximate
setting on the delay dial, the indication must be:
a) 120 volts ac for two wire 120 volt models.
b) 230 volts ac for two wire 230 volt models.
c) 100 volts ac for two wire 100 volt models, remain for the approximate setting on the dilution
dial, and then return to its previous indication.
3. Disconnect the brewer from the power supply.
If the sound is heard as described and water will not
pass through the solenoid valve, there may be a blockage in the water line before or after the solenoid valve
or, the solenoid valve may require inspection for wear,
and removal of waterborne particles.
If the sound is not heard as described, replace the
solenoid valve.
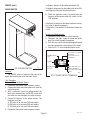
Removal and Replacement:
1. Remove all wires from the solenoid valves.
2. Turn off the water supply to the brewer.
3. Disconnect the water lines to and from the solenoid valves.
4. Remove the two 8-32 keps nuts holding the
mounting bracket to the trunk base.
5. Lift out the bracket.
6. Remove the two 10-32 slotted-head screws holding the solenoid valve to the mounting bracket.
7. Securely install the new solenoid valve to the
mounting bracket.
8. Attach the mounting bracket to the trunk base.
9. Securely fasten the water lines to and from the
solenoid valves.
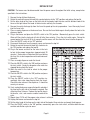
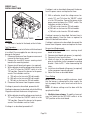
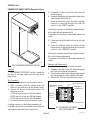
10. Refer to Fig. 9 when reconnecting the wires.
If voltage is present as described, proceed to #4.
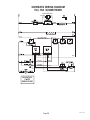
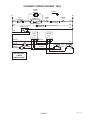
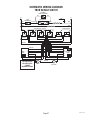
If voltage is not present as described, refer to the Wiring Diagrams and check the wiring harness.
4. Remove both wires from the coil and check for
continuity across the coil terminals.
If continuity is present as described, reconnect the
white/blue and white/violet wires and proceed to #5.
If continuity is not present as described, replace the
solenoid valve.
5. Check the solenoid valve for coil action. Connect
Page 20
WHI/VIO to Dilution
WHI/GRN to
Solenoid
Brew Timer TL4
WHI/VIO to Brew Solenoid
WHI/VIO to Brew Timer TL1
WHI/BLU to Dilution
Timer TL4
BREW
SOLENOID
DILUTION
SOLENOID
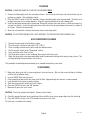
FIG. 9 SOLENOID VALVE TERMINALS
P1278
37235 080204