1
MC Series
User Manual
3.0 Installation and Operation
The following sections will examine the installation and operation details for the 8002MCBXLR, 8002MCB-PHNX, and 8002MCB-FP mic/line mixers.
3.1 Unpacking and Connecting the Mixer
1. Take the mixer out of box and inspect for shipping damage. If there is obvious physical
damage to the outside of the mixer, contact your Intelix representative before you begin
installation.
2. Turn all mixer and amplifier Volume Control Knobs to zero.
3. Connect the source inputs the 8002MCB’s XLR or Phoenix connectors on the rear panel.
4. Toggle each input’s mic/line switch to the appropriate position; in for line inputs and out for
mic inputs. Note that the input from some microphones is actually close to line level (-20
dB) and should be set to the line position. All unused channels should be set to line level.
Note: The auxiliary input is line level only.
5. Connect the destination output. Specifically, connect the main bus XLR or Phoenix connector to an amplifier’s input.
6. Toggle the main output’s mic/line switch to the appropriate position; in for line level
outputs and out for mic level outputs.
7. Connect the auxiliary bus XLR or Phoenix connector to the second destination device.
Note: The auxiliary output is line level only.
3.2 Powering and Configuring the Mixer
1. Connect the 8002MCB’s power supply to the rear panel
power supply connector. Then connect the power supply to
an AC power jack.
2. Power up the mixer. Toggle the front panel power switch in
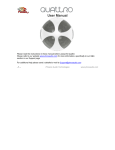
Volume knob set at “2 o’clock”
so that the front panel power indicator LED illuminates.
3. Toggle the mixers main output volume knob and auxiliary volume knob to “2 o’clock.”
www.intelix.com
10
Intelix LLC
2222 Pleasant View Road
Middleton, WI 53562
Phone: 608-831-0880
Toll-Free: 1-866-4-MATMIX
Fax: 608-831-1833