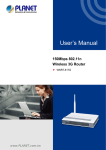
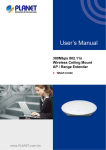
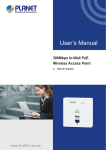
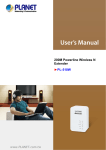
1
Copyright Copyright 2012 by PLANET Technology Corp. All rights reserved. No part of this publication may be reproduced, transmitted, transcribed, stored in a retrieval system, or translated into any language or computer language, in any form or by any means, electronic, mechanical, magnetic, optical, chemical, manual or otherwise, without the prior written permission of PLANET. PLANET makes no representations or warranties, either expressed or implied, with respect to the contents hereof and specifically disclaims any warranties, merchantability or fitness for any particular purpose. Any software described in this manual is sold or licensed "as is". Should the programs prove defective following their purchase, the buyer (and not this company, its distributor, or its dealer) assumes the entire cost of all necessary servicing, repair, and any incidental or consequential damages resulting from any defect in the software. Further, this company reserves the right to revise this publication and to make changes from time to time in the contents hereof without obligation to notify any person of such revision or changes. All brand and product names mentioned in this manual are trademarks and/or registered trademarks of their respective holders. Federal Communication Commission Interference Statement This equipment has been tested and found to comply with the limits for a Class B digital device, pursuant to Part 15 of FCC Rules. These limits are designed to provide reasonable protection against harmful interference in a residential installation. This equipment generates, uses, and can radiate radio frequency energy and, if not installed and used in accordance with the instructions, may cause harmful interference to radio communications. However, there is no guarantee that interference will not occur in a particular installation. If this equipment does cause harmful interference to radio or television reception, which can be determined by turning the equipment off and on, the user is encouraged to try to correct the interference by one or more of the following measures: 1. Reorient or relocate the receiving antenna. 2. Increase the separation between the equipment and receiver. 3. Connect the equipment into an outlet on a circuit different from that to which the receiver is connected. 4. Consult the dealer or an experienced radio technician for help. FCC Caution: To assure continued compliance, (example-use only shielded interface cables when connecting to computer or peripheral devices) any changes or modifications not expressly approved by the party responsible for compliance could void the user’s authority to operate the equipment. This device complies with Part 15 of the FCC Rules. Operation is subject to the Following two conditions: (1) This device may not cause harmful interference (2) This Device must accept any interference received, including interference that may cause undesired operation. Any changes or modifications not expressly approved by the party responsible for compliance could void the user’s authority to operate the equipment. I Federal Communication Commission (FCC) Radiation Exposure Statement This equipment complies with FCC radiation exposure set forth for an uncontrolled environment. In order to avoid the possibility of exceeding the FCC radio frequency exposure limits, human proximity to the antenna shall not be less than 20 cm (8 inches) during normal operation. CE mark Warning This is a class B device, in a domestic environment; this product may cause radio interference, in which case the user may be required to take adequate measures. Energy Saving Note of the Device This power required device does not support Stand by mode operation. For energy saving, please remove the DC-plug or push the hardware Power Switch to OFF position to disconnect the device from the power circuit. Without remove the DC-plug or switch off the device, the device will still consuming power from the power circuit. In the view of Saving the Energy and reduce the unnecessary power consuming, it is strongly suggested to switch off or remove the DC-plug for the device if this device is not intended to be active. R&TTE Compliance Statement This equipment complies with all the requirements of DIRECTIVE 1999/5/CE OF THE EUROPEAN PARLIAMENT AND THE COUNCIL OF 9 March 1999 on radio equipment and telecommunication terminal Equipment and the mutual recognition of their conformity (R&TTE). The R&TTE Directive repeals and replaces in the directive 98/13/EEC (Telecommunications Terminal Equipment and Satellite Earth Station Equipment) As of April 8, 2000. Safety This equipment is designed with the utmost care for the safety of those who install and use it. However, special attention must be paid to the dangers of electric shock and static electricity when working with electrical equipment. All guidelines of this and of the computer manufacture must therefore be allowed at all times to ensure the safe use of the equipment. National Restrictions This device is intended for home and office use in all EU countries (and other countries following the EU directive 1999/5/EC) without any limitation except for the countries mentioned below: Country Restriction Reason/remark Bulgaria None General authorization required for outdoor use and public service France Outdoor use limited to 10 mW e.i.r.p. within the band 2454-2483.5 MHz Military Radiolocation use. Refarming of the 2.4 GHz band has been ongoing in recent years to allow current relaxed regulation. Full implementation planned 2012 Italy None If used outside of own premises, general authorization is required Luxembourg None General authorization required for network and service supply(not for spectrum) II Norway Implemented This subsection does not apply for the geographical area within a radius of 20 km from the centre of Ny-Ålesund Russian Federation None Only for indoor applications WEEE Regulation To avoid the potential effects on the environment and human health as a result of the presence of hazardous substances in electrical and electronic equipment, end users of electrical and electronic equipment should understand the meaning of the crossed-out wheeled bin symbol. Do not dispose of WEEE as unsorted municipal waste and have to collect such WEEE separately. Revision User’s Manual for PLANET 802.11n Wall Plug Universal WiFi Repeater Model: WNAP-1260 Rev: 1.0 (July, 2012) Part No. EM-WNAP-1260_v1.0 (2081-E10450-001) III CONTENTS Chapter 1. Product Introduction.......................................................................................................... 1 1.1. Package Contents................................................................................................................... 1 1.2. Product Description................................................................................................................. 1 1.3. Product Features..................................................................................................................... 5 1.4. Product Specification .............................................................................................................. 6 Chapter 2. Hardware Interface ............................................................................................................. 9 2.1. Overview ................................................................................................................................. 9 2.2. Front Panel and LED Indications ..........................................................................................10 2.3. Rear/Side Panel and Interface Description........................................................................... 11 Chapter 3. Operation Mode Introduction ..........................................................................................12 3.1. Wireless Universal Repeater/WDS Mode .............................................................................12 3.2. AP Mode................................................................................................................................12 3.3. Router Mode .........................................................................................................................13 3.4. Client Mode ...........................................................................................................................13 Chapter 4. Installation Guide .............................................................................................................15 4.1. System Requirements...........................................................................................................15 4.2. Before You Begin ..................................................................................................................15 4.3. Operation Range...................................................................................................................15 4.4. Manual Network Setup - TCP/IP Configuration ....................................................................15 4.4.1. Obtain an IP Address Automatically ..........................................................................16 4.4.2. Configure the IP address manually ...........................................................................18 4.5. Hardware Installation ............................................................................................................20 4.6. Starting Setup in Web UI.......................................................................................................22 Chapter 5. Quick Mode Configuration ..............................................................................................25 5.1. Repeater Mode Configuration...............................................................................................25 5.2. WDS Mode Configuration .....................................................................................................27 5.2.1. Repeater Configuration in the WDS Mode................................................................27 5.2.2. Central Base Station Configuration in the WDS Mode..............................................28 5.2.3. WDS Application........................................................................................................29 5.3. Bridge Mode Configuration ...................................................................................................30 5.4. Router Mode Configuration...................................................................................................32 5.5. Client Mode Configuration ....................................................................................................34 Chapter 6. Web Configuration for the Wireless Universal Repeater Mode ...................................36 6.1. Running Status......................................................................................................................36 6.1.1. System Status ...........................................................................................................36 6.1.2. Clients List.................................................................................................................37 6.2. Setup Wizard.........................................................................................................................37 6.3. Repeater Mode Setting .........................................................................................................37 6.4. Network Settings ...................................................................................................................38 6.4.1. LAN Interface Settings ..............................................................................................38 IV 6.4.2. DHCP Server.............................................................................................................38 6.5. Wireless Settings ..................................................................................................................40 6.5.1. Wireless Universal Repeater.....................................................................................40 6.5.2. WPS Setup................................................................................................................41 6.5.3. Wireless Client Function ...........................................................................................43 6.6. Management Function ..........................................................................................................45 6.6.1. Backup Settings ........................................................................................................45 6.6.2. Reboot Device...........................................................................................................46 6.6.3. Set Password ............................................................................................................46 6.6.4. Upgrade.....................................................................................................................47 Chapter 7. Web Configuration for the Bridge Mode ........................................................................48 7.1. Bridge / AP Mode Topology...................................................................................................48 7.2. Hardware Setting ..................................................................................................................48 7.3. Running Status......................................................................................................................48 7.3.1. System Status ...........................................................................................................48 7.3.2. Clients List.................................................................................................................49 7.4. Setup Wizard.........................................................................................................................49 7.5. Mode Setting .........................................................................................................................49 7.6. Network Settings ...................................................................................................................50 7.6.1. LAN Interface Settings ..............................................................................................50 7.6.2. DHCP Server.............................................................................................................51 7.7. Wireless Settings ..................................................................................................................53 7.7.1. Wireless Basic Settings.............................................................................................53 7.7.2. Multiple SSID.............................................................................................................57 7.7.3. Wireless Advanced Settings......................................................................................58 7.7.4. WPS Setup................................................................................................................61 7.8. Management Function ..........................................................................................................63 7.8.1. Backup Settings ........................................................................................................63 7.8.2. Reboot Device...........................................................................................................64 7.8.3. Set Password ............................................................................................................64 7.8.4. Upgrade.....................................................................................................................65 Chapter 8. Web Configuration for the Router Mode ........................................................................66 8.1. Router Mode Topology ..........................................................................................................66 8.2. Hardware Setting ..................................................................................................................66 8.3. Running Status......................................................................................................................66 8.3.1. System Status ...........................................................................................................66 8.3.2. Clients List.................................................................................................................69 8.4. Setup Wizard.........................................................................................................................69 8.5. Mode Setting .........................................................................................................................70 8.6. Network Settings ...................................................................................................................71 8.6.1. LAN Interface Settings ..............................................................................................71 8.6.2. WAN Interface Settings .............................................................................................71 8.6.3. DHCP Server.............................................................................................................78 8.6.4. VPN Passthrough......................................................................................................80 8.7. Wireless Settings ..................................................................................................................81 V 8.7.1. Wireless Basic Settings.............................................................................................81 8.7.2. Multiple SSID.............................................................................................................85 8.7.3. Wireless Advanced Settings......................................................................................86 8.7.4. WDS Function ...........................................................................................................89 8.7.5. WPS Setup................................................................................................................90 8.8. Network Application ..............................................................................................................92 8.8.1. Port Forwarding.........................................................................................................92 8.8.2. Port Triggering...........................................................................................................93 8.8.3. UPnP .........................................................................................................................95 8.8.4. IGMP Proxying ..........................................................................................................96 8.8.5. DMZ Server ...............................................................................................................96 8.8.6. Dynamic DNS............................................................................................................97 8.8.7. Static Routes .............................................................................................................97 8.9. Security Options....................................................................................................................99 8.9.1. Block Sites.................................................................................................................99 8.9.2. Block Services.........................................................................................................100 8.9.3. Protection ................................................................................................................102 8.10. Management Function ......................................................................................................103 8.10.1. Backup Settings ....................................................................................................103 8.10.2. Remote Management............................................................................................104 8.10.3. Schedules..............................................................................................................105 8.10.4. SNTP.....................................................................................................................106 8.10.5. Reboot Device.......................................................................................................107 8.10.6. Set Password ........................................................................................................107 8.10.7. Upgrade.................................................................................................................107 Chapter 9. Web Configuration for the WDS Mode .........................................................................109 9.1. WDS Mode Topology ..........................................................................................................109 9.2. Hardware Setting ................................................................................................................109 9.3. Running Status....................................................................................................................109 9.3.1. System Status .........................................................................................................109 9.3.2. Clients List............................................................................................................... 110 9.4. Setup Wizard....................................................................................................................... 110 9.5. Mode Setting ....................................................................................................................... 110 9.6. Network Settings ................................................................................................................. 111 9.6.1. LAN Interface Settings ............................................................................................ 111 9.6.2. DHCP Server........................................................................................................... 111 9.7. Wireless Settings ................................................................................................................ 114 9.7.1. WDS Function ......................................................................................................... 114 9.7.2. Wireless Basic Settings........................................................................................... 114 9.8. Management Function ........................................................................................................ 119 9.8.1. Backup Settings ...................................................................................................... 119 9.8.2. Reboot Device.........................................................................................................120 9.8.3. Set Password ..........................................................................................................120 9.8.4. Upgrade...................................................................................................................121 Chapter 10. Web Configuration for the Client Mode......................................................................122 10.1. Client Mode Topology........................................................................................................122 VI 10.2. Hardware Setting ..............................................................................................................122 10.3. Running Status..................................................................................................................122 10.3.1. System Status .......................................................................................................122 10.3.2. Clients List.............................................................................................................123 10.4. Setup Wizard.....................................................................................................................123 10.5. Network Settings ...............................................................................................................123 10.5.1. LAN Interface Settings ..........................................................................................124 10.5.2. DHCP Server.........................................................................................................124 10.6. Wireless Settings ..............................................................................................................126 10.6.1. WPS Setup............................................................................................................126 10.6.2. Wireless Client Function .......................................................................................127 10.7. Management Function ......................................................................................................128 10.7.1. Backup Settings ....................................................................................................128 10.7.2. Reboot Device.......................................................................................................129 10.7.3. Set Password ........................................................................................................130 10.7.4. Upgrade.................................................................................................................130 Chapter 11. Quick Connection to a Wireless Network ..................................................................131 11.1. Windows XP (Wireless Zero Configuration)......................................................................131 11.2. Windows 7 (WLAN AutoConfig) ........................................................................................133 11.3. Mac OS X ..........................................................................................................................136 11.4. iPhone / iPod Touch / iPad ................................................................................................140 Appendix A. Planet Smart Discovery Utility...................................................................................143 Appendix B. FAQ...............................................................................................................................144 VII User’s Manual of WNAP-1260 Chapter 1. Product Introduction 1.1. Package Contents The following items should be contained in the package: WNAP-1260 Wall Plug Universal WiFi Repeater Ethernet Cable Quick Installation Guide CD-ROM (User’s Manual included) If there is any item missed or damaged, please contact the seller immediately. 1.2. Product Description WNAP-1260, a WiFi Repeater, is case-shaped, easy to carry, and easy to install. Its wireless transmission rate is up to 300 Mbps. It is a high-performance and IEEE802.11b/g/n-compatible network access device that can provide reliable and convenient network access service for individual users and SOHO (Small Office, Home Office). It features Web-based GUI, allowing users to easily modify settings to connect the device to ISP (Internet Service Provider) and conveniently perform upgrade using the WEB page. Figure 1-1 In addition, WNAP-1260 has a three-way switch on the side panel that enables users to change the device’s working mode among AP, Repeater, and Client. In the AP mode, the device functions as a wireless router to achieve wireless connection for the wired LAN. In the Repeater mode, the device provides the URM (Universal Repeater Mode) function for users to expand wireless coverage of the existing AP in a quick and easy way. In the Client mode, the device functions as a wireless network adapter but it can provide a better transmission and connection performance. -1- User’s Manual of WNAP-1260 Figure 1-2 Multiple Wireless Network Technologies for Greater Access PLANET Wall Plug Universal WiFi Repeater, the WNAP-1260 features 802.11n radio with 2T2R antenna technology compliant with 802.11b/g/n standards. Compared with general wireless routers, the WNAP-1260 offers more powerful and flexible capability for business demands to access Internet with true mobility and range extension of wireless network. More Flexibility and Mobility With the tiny-sized and wall plug design, the WNAP-1260 is easy to plug to wall outlet for wireless access in any place. It can operate in various environments with the hardware switch modes including AP, Repeater, and Client, which helps to immediately set up a wireless network without software configuration. The wall plug design and operation flexibility make the WNAP-1260 suitable for range extending. Figure 1-3 -2- User’s Manual of WNAP-1260 One-touch Secure WiFi Extension In order to simplify security settings for home and SOHO network, the WNAP-1260 supports Wi-Fi Protected Setup (WPS) with configuration in PBC and PIN type. Just push the WPS button or key in the PIN code, the secure connection between the WNAP-1260 and the Access Point can be built immediately, which offers users a convenient and fast method to extend a secure wireless network. Figure 1-4 Wide Range of Wireless Security Support To secure the wireless communication, the WNAP-1260 supports most up-to-date encryptions including WPA/WPA2-PSK with TKIP/AES. Made to fulfill enterprise and various applications demand, the WNAP-1260 enhances security and management features such as multiple SSID support. It can create up to 5 virtual standalone AP with 5 different SSID according to individual security levels and encryption scheme of various wireless devices. Internet Broadband Sharing PLANET Wall Plug Universal WiFi Repeater, WNAP-1260, provides home and SOHO users a reliable and cost effective wireless solution by featuring WAN Internet access and high speed IEEE 802.11n wireless transmission. The WNAP-1260 is equipped with one LAN/WAN port for connection to local network or for wired cable / xDSL service connection. The WNAP-1260 provides more flexible and easier way for users to share an instant wireless network service via range extension wherever at Home, Hotspot, or in public places like transportation, outdoor events, and etc. Advanced Firewall Security In the Router mode, the WNAP-1260 supports NAT functions and allows multiple users to access Internet via only one single legal IP. It provides Port Forwarding and DMZ for LAN PC to act as an application server. Furthermore, the advanced firewall by the WNAP-1260 can protect your Intranet clients from unauthorized accesses and various DoS attacks from the Internet. In aspect of the firewall, the WNAP-1260 provides IP/ MAC/ Port/ URL filtering, and prevents possible hackers attack. Easy Setup Anytime Anywhere The WNAP-1260 provides a total solution for home and business users. With the High Speed 802.11n wireless technology, the WNAP-1260 is easy to integrate the wireless devices with existing wired network. -3- User’s Manual of WNAP-1260 Figure 1-5 -4- User’s Manual of WNAP-1260 1.3. Product Features Industrial Compliant Wireless LAN & LAN Compliant with IEEE 802.11n wireless technology capable of up to 300Mbps data rate Backward compatible with 802.11b/g standard Equipped with 10/100Mbps RJ-45 Ports for LAN/ WAN, Auto MDI/ MDI-X supported Fixed-network Broadband Router Supported connection types: Dynamic IP/ Static IP / PPPoE / PPTP / L2TP Support Static Routing, IGMP Proxy Support multiple sessions SIP ALG, IPSec, L2TP and PPTP VPN pass-through Support DMZ, Port Forwarding and Port Triggering for various networking applications Support DHCP Server, UPnP, Planet Dynamic DNS Wireless Network Range Extender Multiple Wireless Modes: AP, WDS, Repeater, Universal Repeater, Client Support Multiple SSID to allow users to access different networks through a single AP Support WMM (Wi-Fi Multimedia), Wireless QoS Support IAPP (Inter Access Point Protocol), Wireless Roaming Secure Network Connection Advanced security: 64/128-bit WEP, WPA/WPA2, WPA-PSK/WPA2-PSK(TKIP/AES) Built-in NAT firewall features, with SPI function to protect against DoS attacks. Support IP/ MAC/ URL/ DNS Filtering Easy Installation & Management Web-based UI and Quick Setup Wizard for easy configuration Remote Management allows configuration from a remote site System status monitoring includes DHCP Client and Associated Client list Flexible Usage & Compact Design Built-in Power Supply & Wall-Plug design Hardware switchable operation modes: AP / Repeater / Client Easy Sync by One-touch Wi-Fi Protected Setup (WPS) -5- User’s Manual of WNAP-1260 1.4. Product Specification Product WNAP-1260 300Mbps 802.11n Wall Plug Universal WiFi Repeater Hardware Specification Interface LAN/WAN Antenna Gain: 1 x 10/100Mbps Auto MDI/MDI-X RJ45 port 2 x Internal 2dBi Antenna Orientation: Horizontal and Vertical Mode Selection Switch (AP / Repeater / Client) Button/Switch WPS Button Reset button *Push about 3~6 seconds to reset to factory default settings LED Indicators PWR, WPS, Ethernet, WLAN Power Consumption On-state: 2.1W Material Plastic Dimension 75 x 55 x 40 mm (L x W x H) Weight 80g (gross weight) Low power state: 1.5W Wireless interface Specification Standard Compliance with IEEE 802.11b/g/n Frequency Band 2.4~2.4835GHz Extend Frequency DSSS Modulation Type DBPSK, DQPSK, QPSK, CCK and OFDM (BPSK/QPSK/16-QAM/ 64-QAM) 11n (40MHz): 270/243/216/162/108/81/54/27Mbps 135/121.5/108/81/54/40.5/27/13.5Mbps (Dynamic) Data Transmission 11n (20MHz): 130/117/104/78/52/39/26/13Mbps Rates 65/58.5/52/39/26/19.5/13/6.5Mbps (Dynamic) 11g: 54/48/36/24/18/12/9/6Mbps (Dynamic) 11b: 11/5.5/2/1Mbps (Dynamic) Transmission Distance Indoor up to 100m outdoor up to 300m (it is limited to the environment) America/ FCC: 2.412~2.462GHz (11 Channels) Channel Europe/ ETSI: 2.412~2.472GHz (13 Channels) Japan/ TELEC: 2.412~2.484GHz (14 Channels) Channel Width 20/ 40MHz 11b: 17±1.5dBm Max. RF Power 11g: 14±1.5dBm 11n (20MHz): 14±1.5dBm 11n (40MHz): 14±1.5dBm 11b: -92dBm @ 1Mbps; -85dBm @ 11Mbps, PER < 8% Receive Sensitivity 11g: -88dBm @ 6Mbps; -73dBm @ 54Mbps, PER <10% 11n: -90dBm @ MCS8; -70dBm @ MCS15, PER <10% -6- User’s Manual of WNAP-1260 Software Features AP/Router Operation Mode Repeater Client (Switchable by H/W) Wireless Mode AP, Client, WDS PTP, WDS PTMP, Repeater (WDS+AP), Universal Repeater (AP+Client) WEP (64/128-bit) encryption security Encryption Security WPA / WPA2 (TKIP/AES) WPA-PSK / WPA2-PSK (TKIP/AES) Provide wireless LAN ACL (Access Control List) filtering Wireless Security Wireless MAC address filtering up to 16 entries Support WPS (Wi-Fi Protected Setup) Enable/Disable SSID Broadcast WMM(Wi-Fi Multimedia): 802.11e Wireless QoS Multiple SSID: up to 4 Wireless Advanced Wireless Isolation: Enable it to isolate each connected wireless clients, to let them cannot access mutually. IAPP(Inter Access Point Protocol): 802.11f Wireless Roaming Provide Wireless Statistics Max. Clients Wire: 253 Wireless: 32 Shares data and Internet access for users, supporting following internet access: Internet Connection Type Dynamic IP Static IP PPPoE PPTP L2TP NAT firewall with SPI (Stateful Packet Inspection) Built-in NAT server supporting Port Forwarding, Port Triggering, and DMZ Firewall Built-in firewall with IP address/ MAC address/ Port/ URL filtering Support ICMP-FLOOD, UDP-FLOOD, TCP-SYN-FLOOD filter, DoS protection Routing Protocol Static Routing VPN Pass-through SIP ALG, PPTP, L2TP, IPSec Built-in DHCP server supporting static IP address distributing LAN Support UPnP, Dynamic DNS Support IGMP Proxy System Management Web-based (HTTP) management interface SNTP time synchronize Easy firmware upgrade Standards Conformance IEEE Standards IEEE 802.11n (2T2R, up to 300Mbps) -7- User’s Manual of WNAP-1260 IEEE 802.11g IEEE 802.11b IEEE 802.11i IEEE 802.3 10Base-T IEEE 802.3u 100Base-TX IEEE 802.3x Flow Control Others Protocols and Standards CSMA/CA, CSMA/CD, TCP/IP, DHCP, ICMP, NAT, PPPoE, SNTP -8- User’s Manual of WNAP-1260 Chapter 2. Hardware Interface 2.1. Overview Top View Left Side View Figure 2-1 Figure 2-2 -9- Bottom Side View User’s Manual of WNAP-1260 2.2. Front Panel and LED Indications The LEDs on the top panel indicate the instant status of System power, WPS, Wireless data activity, Ethernet port links and data activity, and help monitor and troubleshoot when needed. Figure 2-3 and Table 2-1 show the LED indications of the WNNAP-1260. Figure 2-3 LED Definition LED COLOR Green Power Red STATE FUNCTION On The device is working normally. On The system is in the process of self-inspection or fails the self-inspection. Or it is in the process of software upgrade. Off The WPS session is down. On WPS Green Quick blink Quick blink interval Multiple terminals are connecting to the WNAP-1260 through WPS at the same time. WPS sessions conflict. Slow blink The WPS session is up. with a certain The Ethernet port is in the non-communication state. The Ethernet port is in the communication state. The Ethernet port is transmitting and receiving data. The WLAN connection is in the non-communication state. The WLAN connection is in the communication state. Data is being transmitted and received in the WLAN. Off Ethernet Green On Blink Off WLAN Green The WPS indicator keeps on for 5 minutes after WPS (Wi-Fi Protected Setup) connection succeeds. A terminal is attempting to connect to the WNAP-1260 through WPS but fails. On Blink Table 2-1 -10- User’s Manual of WNAP-1260 2.3. Rear/Side Panel and Interface Description Rear Panel Figure 2-4 Side Panel Figure 2-5 Object Description If WNAP-1260 is set to the Router mode, the interface is a WAN interface which connects WNAP-1260 to WAN or uplink WAN/LAN network devices. If WNAP-1260 is set to the Repeater/Client mode, the interface is an LAN interface. Reset Press the Reset button gently for 3-6 seconds and then release it. The system restores to the factory default settings. It is used for setting WNAP-1260 to the AP, Repeater, or Client mode. AP/Repeater/Client AP mode—including the Bridge and router modes Repeater mode—to expand wireless network coverage Client mode—equivalent to a wireless network adapter WPS For enabling WPS PBC mode. For more information, refer to WPS descriptions for each mode. Table 2-2 -11- User’s Manual of WNAP-1260 Chapter 3. Operation Mode Introduction 3.1. Wireless Universal Repeater/WDS Mode In the Wireless Universal Repeater/WDS mode, WNAP-1260 expands wireless coverage of the existing AP. Computers can connect to WNAP-1260 in either a wired or wireless way. Operation Mode Switch - Repeater Mode Typical Application In the Wireless Universal Repeater/WDS mode, WNAP-1260 extends the coverage of AP, even if your AP/Router doesn't have WDS function. Figure 3-1 3.2. AP Mode In the AP (Access Point) mode, WNAP-1260 works as a wireless router to achieve wireless connection for the wired LAN. Operation Mode Switch – AP Mode Typical Application In AP Mode, the NAT (Network Address Translation) function and DHCP server are both disabled, and all wireless clients obtain the IP address from the network device connected with LAN port of the WNAP-1260. They can certainly assign the IP address for themselves as well in the Control Panel of Windows. The WNAP-1260 is supposed to bridge to the Ethernet directly by UTP cable. -12- User’s Manual of WNAP-1260 Figure 3-2 3.3. Router Mode In the Router mode, WNAP-1260 works as a domestic gateway. Operation Mode Switch – Router Mode Typical Application In Router Mode, the NAT (Network Address Translation) function and DHCP server are both enabled, and all wireless clients share the same public IP assigned by ISP through WAN port of the WNAP-1260. The WNAP-1260 is supposed to connect with the Cable / xDSL Modem by UTP cable. Figure 3-3 3.4. Client Mode In the Client mode, WNAP-1260 provides Internet access for a set-top box or a computer with a network adapter. Operation Mode Switch – Client Mode Typical Application -13- User’s Manual of WNAP-1260 In Client Mode, the WNAP-1260 is supposed to act as a wireless station for the PC. Users can site survey the available local AP and choose someone to connect with. Figure 3-4 -14- User’s Manual of WNAP-1260 Chapter 4. Installation Guide 4.1. System Requirements Before installing the device, please ensure that the following items are available: PCs with a working Ethernet Adapter and an Ethernet cable with RJ-45 connectors PC of subscribers running Windows 98/ME, NT4.0, 2000/XP, Windows Vista / Win 7, MAC OS 9 or later, Linux, UNIX or other platform compatible with TCP/IP protocols Above PC installed with WEB Browser Broadband Internet Access Service (Cable / xDSL / Ethernet connection; for Router mode only) One Cable/xDSL Modem that has an RJ-45 connector (not necessary if the WNAP-1260 is connected directly to the Ethernet.) It is recommended to use Internet Explorer 7.0 or above to access the WNAP-1260. 4.2. Before You Begin Before you install the device, please pay attention to the following items: The Ethernet cables that are used to connect the device to a computer, hub, router, or switch should be less than 100 meters. Do not place this device on an uneven or unstable surface. Do not put this device on the ground. Keep the device clean. Prevent the device from direct sunlight. Avoid any metal in the device. Place the device in the center of the area to optimize the wireless coverage. 4.3. Operation Range The operation range of WNAP-1260 WiFi repeater depends on the actual environment. The path and effect of signal transmission vary with the deployment in a house or an office. For example, the outdoor straight transmission distance for a certain device can reach 300 meters and the indoor transmission distance can reach 100 meters. 4.4. Manual Network Setup - TCP/IP Configuration The default IP address of the WNAP-1260 is 192.168.1.253, and the default Subnet Mask is 255.255.255.0. These values can be changed as you desire in the web UI of the WNAP-1260. In this section, we use all the default values for description. No matter you want to configure the WNAP-1260 via wired or wireless connection, the PC need to be assigned an IP address first. Before you connect the local PC to the WNAP-1260 via wired or wireless connection, please configure the IP address for your PC in the following two ways first. Obtain an IP address automatically Configure the IP address manually -15- User’s Manual of WNAP-1260 The following sections will introduce how to install and configure the TCP/IP correctly in Windows 7. First, make sure your Ethernet Adapter is working, and refer to the Ethernet adapter’s manual if needed. 4.4.1. Obtain an IP Address Automatically If you are sure the DHCP server of WNAP-1260 is enabled (the default setting of Router Mode), you can set up the TCP/IP Protocol in "Obtain an IP address automatically" mode on your PC. And then the WNAP-1260 built-in DHCP server will assign an IP address to the PC automatically. 1) On the Windows taskbar, click the Start button, point to Control Panel, and then click it. 2) Under the Network and Internet icon, click on the View network status and tasks. And then click Change adapter settings. Figure 4-1 3) Right-click on the Wireless Network Connection, and select Properties in the appearing window. -16- User’s Manual of WNAP-1260 Figure 4-2 4) In the prompt window shown below, double click on the Internet Protocol Version 4 (TCP/IPv4). Figure 4-3 -17- User’s Manual of WNAP-1260 5) Choose Obtain an IP address automatically, and Obtain DNS server address automatically as shown in the figure below. Then click OK to save your settings. Figure 4-4 4.4.2. Configure the IP address manually If you are sure the DHCP server of WNAP-1260 is disabled (the default setting of AP Mode and Client Mode), you can configure the IP address manually. The IP address of your PC should be 192.168.1.xxx (the same subnet of the IP address of WNAP-1260, and "xxx" is any number from 1 to 254), Subnet Mask is 255.255.255.0, and the Gateway is 192.168.1.253 (The default IP address of WNAP-1260) 1) Continue the settings from the last figure, select Use the following IP address radio button. 2) If the LAN IP address of the WNAP-1260 is 192.168.1.253, enter IP address 192.168.1.x (x is from 1 to 254), and Subnet mask 255.255.255.0. 3) Enter the LAN IP address of the WNAP-1260 (the default IP is 192.168.1.253) into the Default gateway field. 4) Select Use the following DNS server addresses radio button. In the Preferred DNS Server field, you can enter the DNS server IP address provided by your local ISP. Then click OK to save your settings. -18- User’s Manual of WNAP-1260 Figure 4-5 -19- User’s Manual of WNAP-1260 4.5. Hardware Installation STEP 1: Make sure the operation mode by hardware switch is Repeater Mode (Default Setting). STEP 2: Plug WNAP-1260 into the wall outlet, and wait about 40 seconds for WNAP-1260 to boot up. STEP 3: Using WPS Button to establish connection with AP: (1) In the existing Wireless Router or AP, push the WPS Button within 2 minutes. (2) In the WNAP-1260, push the WPS Button from the side panel within 2 minutes. (3) Wait for the connection being established. If connection is successfully established, the “WPS” LED will light for 5 minutes. -20- User’s Manual of WNAP-1260 For the first time setup, you can move WNAP-1260 close to the access point you wish to connect, after connection established, you can move WNAP-1260 to the place you wish to use. -21- User’s Manual of WNAP-1260 4.6. Starting Setup in Web UI Default SSID: WiFiRepeater-001 *Default Wireless Security: None STEP 1: Please use your PC to site survey the wireless signal of WNAP-1260, and connect your PC with it wirelessly. STEP 2: 1. Assign a static IP address to your PC which should be in the same network segment with the WNAP-1260. You may choose from 192.168.1.2 to 192.168.1.254, except the default IP address “192.168.1.253” of WNAP-1260. 2. Open the web browser on your PC, key in the IP address (http://192.168.1.253) of the WNAP-1260 in the address bar, and then press enter. 3. The default User name and Password are both “admin”. Enter them and then click OK. -22- User’s Manual of WNAP-1260 Default IP Address: 192.168.1.253 Default Username: admin Default Password: admin Default SSID: WiFiRepeater-001 STEP 3: When you have successfully logged in, select “Setup wizard”. You will then be able to select one of two options, choose “Wireless Universal repeater mode” and click next to continue. STEP 4: All wireless access points nearby will be displayed on the list. Select it and click ‘Next’ button to continue. STEP 5: You’ll be prompted to input Uplink Wireless Router/AP’s wireless security key, input it in ‘KEY’ field and click ‘Next’ to continue. -23- User’s Manual of WNAP-1260 STEP 6: WNAP-1260 provides the wireless roaming function if you select “Synchronize Wireless Universal Repeater's And Uplink AP's SSID And Security Options”. Click Finish. Then, the client can communicate with the selected network. You have already finished the wireless range extension configuration of the WNAP-1260. Now you can use your iPhone, iPad, laptop, and any other Wi-Fi devices to connect with it wirelessly and start to surf the Internet. If you change the setting of wireless universal repeater through wireless connection, the wireless clients connecting to your WNAP-1260 need connect to WNAP-1260 with new SSID and security options again. The next chapter will introduce the functions of the web UI. -24- User’s Manual of WNAP-1260 Chapter 5. Quick Mode Configuration Mode Mode Available In the Web LAN1 (Management IP Address) LAN2 Repeater (default) 192.168.1.253 WDS Bridge (default) AP Router Client Client (default) Way of connecting to PC Disable Ethernet cable /Wireless No Disable Ethernet cable /Wireless No Enable Wireless only No Disable Ethernet cable only (DHCP) Wireless Universal Repeater DHCP Server Yes No 192.168.1.253 192.168.1.253 Table 4.1 IP information of AP/Repeater/Client modes of WNAP1260 Step 1 Set the three-way switch on the case of WNAP-1260 to the mode you want. Step 2 Run the Internet Explorer (IE). Enter the management IP address of 192.168.1.253 and press Enter. In the login window that is displayed, enter the user name and password (both admin), and click Login. Figure 5-1 Step 3 Configure parameters for the mode you selected. Terminal devices can access the network through WNAP-1260 after you finish configuration by following procedures in the sections below. 5.1. Repeater Mode Configuration Step 1 Set the three-way switch on the side panel to Repeater after WNAP-1260 is powered on. Log in to the configuration page after the system is started. -25- User’s Manual of WNAP-1260 Step 2 Click Setup Wizard in the navigation bar on the left pane of the page. Select Wireless Universal Repeater Mode and click Next. Figure 5-2 Step 3 Click Site Survey to search for the wireless network you want to connect. Select a desired network. Click Next. Figure 5-3 Step 4 Configure the repeater with the same security option as its uplink network. (The following figure takes the security option of WPA2-PSK[AES] as an example.) Set the encryption password and note it down. Click Next. Figure 5-4 -26- User’s Manual of WNAP-1260 Step 5 WNAP-1260 provides the wireless roaming function if you select Synchronize Wireless Universal Repeater's And Uplink AP's SSID And Security Options. Otherwise, manually configure the SSID and security options for the repeater. Click Finish to complete setup wizard. Figure 5-5 5.2. WDS Mode Configuration 5.2.1. Repeater Configuration in the WDS Mode Step 1 Set the three-way switch on the side panel to Repeater after WNAP-1260 is powered on. Log in to the configuration page after the system is started. Step 2 Click Setup Wizard in the navigation bar on the left pane of the page. Select WDS Mode and click Next. (Note: The WDS function cannot be used if the channel is set to Auto) Manually set all WDS devices to the same channel. Figure 5-6 -27- User’s Manual of WNAP-1260 Step 3 Set the IP address of the LAN port of the repeater and enter the MAC address of the basic station. Click Next. Figure 5-7 Step 4 Set the SSID, channel, and security encryption for the repeater. The channel cannot be set to Auto. It is recommended to configure the repeater with the same security option as its base station. Set the encryption password and note it down. Click Finish to complete the settings. Figure 5-8 5.2.2. Central Base Station Configuration in the WDS Mode Step 1 Set WNAP-1260 to the Router mode. (Set the three-way switch on the side panel to AP) Step 2 Click Mode Settings and select Router Mode. (The default mode is Bridge Mode.) Step 3 Choose Wireless Settings > WDS Function, select Enable WDS Function Step 4 Enter the MAC address of the Repeater -28- User’s Manual of WNAP-1260 Figure 5-9 One basic station can connect to a maximum of 4 repeaters 5.2.3. WDS Application The following figure shows a wireless network for Humans Resource Department (marked as A in the figure), Finance Department (marked as B), and Marketing Department (marked as C) in an enterprise. If the three departments share one wireless router, signals searched by computers may be rather weak or even no signals are available. However, if each of the three departments uses a wireless router, we can use WDS to connect the three routers to provide perfect wireless coverage for the whole areas. Figure 5-10 Configure the three routers in this way: Wireless router B functions as the wireless basic station; wireless routers A and C connect to wireless router B by using WDS. (1) Configuring wireless router B as the wireless basic station Step 1 Log in to the Web management page of wireless router B. Choose Wireless Settings > Wireless Basic Settings and set the SSID, channel, and wireless encryption -29- User’s Manual of WNAP-1260 information. Write down the SSID, channel, and wireless encryption information that are required when you are configuring wirelss router A and C. Step 2 Choose Wireless Settings > WDS Function and enable the WDS function. Enter MAC addresses of repeaters (that is, wireless routers A and C in this example). Click Apply to save the settings. (2) Configuring wireless router A Do as follows to establish WDS connection between wireless routers A and B: Step 1 Set wireless router A with the same channel and encryption information as wireless router B. Step 2 Choose Wireless Settings > WDS Function and enable the WDS function. Set the IP address of wireless router B different from that of wireless router B to avoid IP address conflict (for example, change the IP address to 192.168.100.20 in the LAN Interface Settings page and log in to the Web management page again). Step 3 Enter the MAC address of the wireless basic station. Step 4 Click Apply to save the settings. Then, WDS connection is established between wireless routers A and B. (3) Configuring wireless router C Configure wireless router C in the same way as wireless router A. Note that the IP address of the LAN interface must be changed to an IP address that does not conflict with IP addresses of existing computers or devices in the network. 5.3. Bridge Mode Configuration Step 1 Set the three-way switch on the side panel to AP after WNAP-1260 is powered on. Log in to the configuration page after the system is started. Step 2 Click Setup Wizard in the navigation bar on the left pane of the page. Set the SSID and encryption password and note them down. Click Finish to complete the settings. -30- User’s Manual of WNAP-1260 Figure 5-11 -31- User’s Manual of WNAP-1260 5.4. Router Mode Configuration Step 1 Set the three-way switch on the side panel to AP after WNAP-1260 is powered on. Log in to the configuration page after the system is started. Step 2 Click Mode Settings and select Router Mode. (The default mode is Bridge Mode.) Step 3 Connect your PC to WNAP-1260 using a wireless network adapter after WNAP-1260 is restarted successfully. Log in to the configuration page. Click Setup Wizard in the navigation bar on the left pane of the page. Select Yes and click Next. WNAP-1260 will automatically detect the broadband type. Step 4 WNAP-1260 can detect three types of broadband: DHCP, Static IP, and PPPoE. Perform configurations according to the broadband type you are using. Parameter configuration for DHCP Figure 5-12 Parameter configuration for static IP -32- User’s Manual of WNAP-1260 Figure 5-13 Parameter configuration for PPPoE Figure 5-14 Step 5 Click Next. Set the SSID and password and note them down. Click Finish to complete the settings. Figure 5-15 -33- User’s Manual of WNAP-1260 5.5. Client Mode Configuration Step 1 Set the three-way switch on the side panel to Client after WNAP-1260 is powered on. Log in to the configuration page after the system is started. Step 2 Click Setup Wizard in the navigation bar on the left pane of the page. Click Site Survey to search for the wireless network you want to connect. Figure 5-16 Step 3 Enter encryption information of the selected wireless network. Click Next. Figure 5-17 Step 4 Check Synchronize Wireless Universal Repeater's And Uplink AP's SSID And Security Options if you want to sync the SSID & Security key. Click Finish to complete the settings. -34- User’s Manual of WNAP-1260 Figure 5-18 -35- User’s Manual of WNAP-1260 Chapter 6. Web Configuration for the Wireless Universal Repeater Mode 6.1. Running Status Click Running Status and the extended navigation menu is shown as follows: Click the submenu to enter a specific configuration page. 6.1.1. System Status Choose Running Status > System Status and the System Status page is displayed. Figure 6-1 In this page, you can view information about the current running status of WNAP-1260, including system information, LAN port status, wireless client information, and wireless universal repeater status. -36- User’s Manual of WNAP-1260 6.1.2. Clients List Choose Running Status > Clients List and the Clients List page is displayed. Figure 6-2 This page displays information of devices connected to WNAP-1260, including the IP address, device name, and MAC address of each device. 6.2. Setup Wizard For settings, refer to section 5.3. “Repeater Mode Configuration”. 6.3. Repeater Mode Setting Click Repeater Mode Settings and the Repeater Mode Settings page is displayed. Select Wireless Universal Repeater Mode. Figure 6-3 -37- User’s Manual of WNAP-1260 6.4. Network Settings Click Network Settings and the extended navigation menu is shown as follows: Click a submenu to perform specific parameter configurations. 6.4.1. LAN Interface Settings Choose Network Settings > LAN Interface Settings and the LAN Interface Settings page is displayed. Figure 6-4 You can modify the IP address and IP subnet mask of the LAN port as required. If you change the default IP address, you must use the new IP address to log in to the Web configuration page of the router and the default gateway of all hosts in the LAN must be set to the new IP address for internet access. The subnet mask of all hosts in the LAN must be the same as the subnet mask specified in the LAN Interface Settings page. 6.4.2. DHCP Server Choose Network Settings > DHCP Server and the DHCP Server page is displayed. DHCP refers to Dynamic Host Configuration Protocol. If Use Device as DHCP Service is selected, WNAP-1260 automatically assigns IP addresses to comupters in the LAN. Users do not need to configure TCP/IP protocol paramters such as the IP address, the subnet mask, the gateway, and the DNS server information for computers connected to the router’s LAN. -38- User’s Manual of WNAP-1260 Figure 6-5 Using the Router as a DHCP Server Use Router as DHCP Server: If you select the Use Router as DHCP Server check box, WNAP-1260 serves as a DHCP server to automatically assign IP addresses to computers connected to it. Starting IP Address/Ending IP Address: Set the starting and ending IP addresses to specify a pool of IP addresses to be assigned by the DHCP server. After you set Starting IP Address/Ending IP Address, hosts in the LAN obtain IP addresses that are in the range of the starting and ending IP addresses. DHCP Lease Time: The valid time for an IP address that is automatically assigned by the DHCP server to a host. The DHCP server does not assign the IP address to other hosts within the specified time. Using Address Reservation When you specify a reserved IP address for a computer in the LAN, the computer always receives the same IP address each time it accesses the router’s DHCP server. Reserved IP addresses should be assigned to computers or servers that require permanent IP settings. Figure 6-6 To reserve an IP address: Step 1 Click Add to enter the Address Reservation page. Figure 6-7 -39- User’s Manual of WNAP-1260 Step 2 Select one item from Address Reservation Table, or enter the IP address in the IP Address field to assign to the computer or server (Choose an IP address from the IP address pool that you have specified, for example 192.168.100.x). Enter the MAC address and device name of the computer or server. Step 3 Click Add to add a new item into Address Reservation. Step 4 Click Apply to save the settings. 6.5. Wireless Settings Click Wireless Settings and the extended navigation menu is shown as follows: Click a submenu to perform specific parameter configurations. 6.5.1. Wireless Universal Repeater In universal repeater mode, WNAP-1260 acts as the AP and client simultaneously. Choose Wireless Settings > Wireless Universal Repeater and the Wireless Universal Repeater page is displayed. Figure 6-8 SSID of Extended Interface: Set the SSID of the repeater. Security Options: Set the security encryption mode for the repeater. It is recommended to configure the repeater with the same encryption mode as that of its uplink AP. After finishing settings, click Apply to save the settings. -40- User’s Manual of WNAP-1260 6.5.2. WPS Setup WPS refers to Wi-Fi Protected Setup. You can use WPS to establish wireless connection in a quick and secure way if the uplink AP or terminal (for example, the network adapter) has the WPS function. It is suggested to first configure wireless encryption for the uplink AP. If you change the wireless encryption mode after having establishing wireless connection using WPS, you must use WPS to establish wireless connection again. Note that if the wireless client does not support WPS you must manually configure the wireless client (such as SSID, security mode, and password) to make it have the same SSID and wireless security settings as the router. In the Repeater mode with WDS disabled, WNAP-1260 can perform WPS encrypted connection to both the uplink AP and the downlink client device. The following describes how to configure WPS for the Repeater mode. Using the WPS Button WPS connection to the uplink AP In the Repeater mode with WDS disabled, press the WPS button on the side panel of WNAP-1260 in 3 seconds and release it. And press the WPS button on the uplink AP. Then they can start WPS session. WPS connection to the downlink client device In the Repeater mode with WDS disabled, press the WPS button on the side panel of WNAP-1260 for 3-10 seconds and release it. And press the WPS button on the client device. Then they can start WPS session. The SSID, authentication and pre-shared key for WNAP-1260 will automatically change to the same as those of its uplink AP after WNAP-1260 succeeds in connecting to the uplink AP through the WPS button mode. Using the Web Page You can perform WPS settings using the Web page for configuration. Choose Wireless Settings > WPS Setup to display the WPS Setup page. -41- User’s Manual of WNAP-1260 Figure 6-9 - As an AP You can perform WPS settings using the Web page for configuration. Choose Wireless Settings > WPS Setup to display the WPS page. PBC mode Step 1 Select Push Button and click Start PBC. WPS encrypted connection starts. Step 2 Press the WPS button on the network adapter or click the PBC button in the network adapter configuration tool within 2 minutes to start WPS connection. After WPS connection is established, the following page is displayed, indicating that the WPS connection is completed. PIN mode Step 1 Select PIN, enter the PIN code of the network adapter (refer to the client of the network adapter), and click Start PIN to start WPS connection. Step 2 Click the PIN button on the network adapter within 2 minutes to start WPS connection. After WPS connection is established, the following page is displayed, indicating that the WPS connection is completed. - As a client You can perform WPS settings using the Web page for configuration. Choose Wireless Settings > WPS to display the WPS page. PBC mode Step 1 Select Push Button and click Start PBC. WPS encrypted connection starts. Step 2 Start the WPS PBC process. After WPS connection is established, the following page is displayed, indicating that the WPS connection is completed. PIN mode Step 1 Select PIN, click Generate New PIN, and click Start PIN to start WPS connection. -42- User’s Manual of WNAP-1260 Step 2 Start the WPS PBC process within 2 minutes to start WPS connection. After WPS connection is established, the following page is displayed, indicating that the WPS connection is completed. 6.5.3. Wireless Client Function Choose Wireless Settings > Wireless Client Function and the Wireless Client Function page is displayed. Figure 6-10 Step 1 Click Site Survey to search for the wireless network you want to connect. Step 2 Enter encryption information of the selected wireless network. Step 3 Configure the client with the same security settings as the selected network. Click Next. Figure 6-11 Step 4 WNAP-1260 provides the wireless roaming function if you select Synchronize Wireless Universal Repeater's And Uplink AP's SSID And Security Options. Click Finish. Then, the client can communicate with the selected network. -43- User’s Manual of WNAP-1260 Figure 6-12 -44- User’s Manual of WNAP-1260 6.6. Management Function Click Management Function and the extended navigation menu is shown as follows. Click a submenu to perform specific parameter configurations. 6.6.1. Backup Settings Choose Management Function > Backup Settings and the Backup Settings page is displayed. Figure 6-13 In this page, you can export configuration information of the router to the computer in the form of XML for later use, import a previously saved or a new configuration file, and restore the factory default settings of the router. Backup Click Backup and save configuration information of the router as a local file. Before saving your configuration file, change the administrator password to the default (admin) in case you forget your password. Then change it again after you have saved the configuration file. If you forget the password, you will need to reset the configuration to factory defaults. Restore The Backup and Restore options in the Backup Settings page let you save and retrieve a file containing your router’s configuration settings. Click Browse… to select the configuration file restored in your computer and click Restore to load the file to the router. Erase Under some circumstances (for example, if you move the router to a different network or if you -45- User’s Manual of WNAP-1260 have forgotten the password) you might want to erase the configuration and restore the factory default settings. Click Erase to restore the factory default settings of the router. This operation has the same effect as pressing the Reset button on the side panel for 3-6 seconds. 6.6.2. Reboot Device Choose Management Function > Reboot Device and the Reboot Device page is displayed. Figure 6-14 Click Reboot to reboot the router. After the router is rebooted, the system jumps to the login page. 6.6.3. Set Password Choose Management Function > Set Password and the Set Password page is displayed. Figure 6-15 In this page, you can change the password of the administrator and set the page timeout time. For security, it is strongly recommended to change the default password of the administrator. If you forget the password, you can restore the router to the default settings. The default password is admin. -46- User’s Manual of WNAP-1260 6.6.4. Upgrade Choose Management Function > Upgrade and the Upgrade page is displayed. Figure 6-16 Upgrade the software of the router in the following steps: Step 1 Step 2 Click Browse… to navigate to the latest software. Select the correct upgrade file. If you select Clear Config, the router restores to the default settings after upgrade. If you do not select it, the current settings remain. Step 3 Click Upload to start upgrade. After the upgrade is completed, the router automatically reboots. After the software upgrade, WNAP-1260 returns to the factory default settings. In case of losing the previous configuration information, please save settings before updating the software. Do not power off the device during upgrade. -47- User’s Manual of WNAP-1260 Chapter 7. Web Configuration for the Bridge Mode 7.1. Bridge / AP Mode Topology 7.2. Hardware Setting Set the three-way switch on the side panel to AP after WNAP-1260 is powered on. 7.3. Running Status Log in to the configuration page after the system is started. Click Running Status and the extended navigation menu is shown as follows: Click the submenu to enter a specific configuration page. 7.3.1. System Status Choose Running Status > System Status and the System Status page is displayed. -48- User’s Manual of WNAP-1260 Figure 7-1 In this page, you can view information about the current running status of WNAP-1260, including system information, LAN port status, and wireless network status. 7.3.2. Clients List Choose Running Status > Clients List and the Clients List page is displayed. Figure 7-2 This page displays information of computers connected to the router, including the IP adress, and MAC address of each computer. 7.4. Setup Wizard For settings, refer to section 5.3. “Bridge Mode Configuration”. 7.5. Mode Setting Click Mode Settings and the Mode Settings page is displayed. -49- User’s Manual of WNAP-1260 Figure 7-3 Bridge Mode: The interface on its case is an LAN interface. Users can connect WNAP-1260 and the PC using an RJ45 cable or a wireless network card. Router Mode: Computers can connect to WNAP-1260 in a wireless way only. 7.6. Network Settings Click LAN Interface Settings and the extended navigation menu is shown as follows: Click a submenu to perform specific parameter configurations. 7.6.1. LAN Interface Settings Choose Network Settings > LAN Interface Settings and the LAN Interface Settings page is displayed. Figure 7-4 You can modify the IP address and IP subnet mask of the LAN port as required. If you change the default IP address, you must use the new IP address to log in to the Web configuration page of the router and the default gateway of all hosts in the LAN must be set to the new IP address for internet access. The subnet mask of all hosts in the LAN must be the same as the subnet mask specified in the LAN Interface Settings page. -50- User’s Manual of WNAP-1260 7.6.2. DHCP Server Choose Network Settings > DHCP Server and the DHCP Server page is displayed. DHCP refers to Dynamic Host Configuration Protocol. If Use Device as DHCP Service is selected, WNAP-1260 automatically assigns IP addresses to comupters in the LAN. Users do not need to configure TCP/IP protocol paramters such as the IP address, the subnet mask, the gateway, and the DNS server information for computers connected to the router’s LAN. Figure 7-5 Using the Router as a DHCP Server Use Router as DHCP Server: If you select the Use Router as DHCP Server check box, WNAP-1260 serves as a DHCP server to automatically assign IP addresses to computers connected to it. Starting IP Address/Ending IP Address: Set the starting and ending IP addresses to specify a pool of IP addresses to be assigned by the DHCP server. After you set Starting IP Address/Ending IP Address, hosts in the LAN obtain IP addresses that are in the range of the starting and ending IP addresses. DHCP Lease Time: The valid time for an IP address that is automatically assigned by the DHCP server to a host. The DHCP server does not assign the IP address to other hosts within the specified time. Using Address Reservation When you specify a reserved IP address for a computer in the LAN, the computer always receives the same IP address each time it accesses the router’s DHCP server. Reserved IP addresses should be assigned to computers or servers that require permanent IP settings. To reserve an IP address: Step 1 Click Add to enter the Address Reservation page. -51- User’s Manual of WNAP-1260 Figure 7-6 Step 2 Select one item from Address Reservation Table, or enter the IP address in the IP Address field to assign to the computer or server (Choose an IP address from the IP address pool that you have specified, for example 192.168.1.x). Enter the MAC address and device name of the computer or server. Step 3 Click Add to add a new item into Address Reservation. Step 4 Click Apply to save the settings. -52- User’s Manual of WNAP-1260 7.7. Wireless Settings Click Wireless Settings and the extended navigation menu is shown as follows: Click a submenu to perform specific parameter configurations. 7.7.1. Wireless Basic Settings Choose Wireless Settings > Wireless Basic Settings and the Wireless Basic Settings page is displayed. Figure 7-7 Object Description Region: Select the region where you are located. Enable SSID Broadcast: Enable Wireless Isolation: Name (SSID): If enabled, the router broadcasts its SSID in the wireless network. Wireless clients can scan the SSID and access the wireless network under the SSID. If selected, wireless clients connected to the network of the same SSID can access the Internet only, but cannot communicate with each other. Set the name for the wireless network. The SSID can contain up to 32 characters and can be letters, numerals, underlines, and any -53- User’s Manual of WNAP-1260 combinations of them. The SSID is case-sensitive Mode: Select the wireless mode. Mixed 802.11b/g/n is recommended. Channel: The channel for transmitting wireless signals. When you select Auto, WNAP-1260 automatically selects the best channel from the available channels according to actual situations. The default channel is Auto. Band Width: The bandwidth occupied for wireless signal transmission. Max Transmission Rate: The maximum transmission rate of WNAP-1260. Security Options: Set the security encryption of the wireless network, to prevent unauthorized access and listening. Security Options None Data encryption is not adopted and the network is not secure. Any stations can access the network. This option is not recommended. Figure 7-8 WEP Wired Equivalent Privacy. You can use WEP 64- or 128-bit encryption. Figure 7-9 Object Description Select the authentication type that the system adopts. Authentication Type: Three authentication types are available: Automatic, Open, and Shared keys. Automatic: -54- User’s Manual of WNAP-1260 If selected, the router uses an authentication type of Open or Shared keys according to the request of the host. Open: If selected, hosts in the wireless network can pass the authentication and connect to the wireless network without using a password. However, the password is required if you want to transmit data. Shared keys: If selected, hosts in the wireless network can pass authentication only when the correct password is entered. Otherwise, the hosts cannot connect to the wireless network. The type of the key to be set. Hexadecimal and ASCII code are available. Encryption Type: Hex: Valid characters for keys contain 0–9 and A–F. ASCII: Valid characters for keys contain all characters of the key board. The encryption strength determines the length of the key. Encryption Strength: Key 1/2/3/4: - If Encryption Strength is set to 64 bits, set the key to 10 hexadecimal digits or 5 ASCII characters. If Encryption Strength is set to 128 bits, set the key to 26 hexadecimal digits or 13 ASCII characters. Set the key based on the selected encryption type and encryption strength. WPA-PSK[TKIP] or WPA2-PSK[TKIP] WPA-PSK: Preshared key Wi-Fi protection access WPA2-PSK: Preshared key Wi-Fi protection access version 2 TKIP: Temporal Key Integrity Protocol Figure 7-10 Figure 7-11 PassPhrase: Enter 8-63 ASCII characters or 64 hexadecimal digits. -55- User’s Manual of WNAP-1260 The 802.11n mode does not support the TKIP algorithm. - WPA-PSK[AES] or WPA2-PSK[AES] WPA-PSK: Preshared key Wi-Fi protection access. WPA2-PSK: Preshared key Wi-Fi protection access version 2. AES: Advanced Encryption Standard Figure 7-12 - PassPhrase: Enter 8-63 ASCII characters or 64 hexadecimal digits. WPA-PSK/WPA2-PSK+[TKIP]/[AES] It allows the client to use either WPA-PSK[TKIP]/[AES] or WPA2-PSK[TKIP]/[AES]. Figure 7-13 PassPhrase: Enter 8-63 ASCII characters or 64 hexadecimal digits. - After you complete configuring wireless settings for WNAP-1260, only hosts that have the same wireless settings (for example, the SSID) as WNAP-1260 can connect to it. - If you configure security settings for WNAP-1260, hosts must have the same security settings (for example, the password) as WNAP-1260 in order to connect to WNAP-1260. -56- User’s Manual of WNAP-1260 7.7.2. Multiple SSID If you do not want visitors to know your wireless security key, you can use the Multiple SSID to allow them to use your Internet without knowing your wireless connection password. Choose Wireless Settings > Multiple SSID and the Multiple SSID page is displayed. Figure 7-14 Object Description Brief description of the created Multiple SSID. You can create up to four Multiple SSIDs. A network profile contains the SSID and Network Profiles: encryption mode, whether to use the Multiple SSID, and whether to broadcast SSID. You can click the radio button of a profile to view detailed information or modify settings. Enable Multiple SSID: Enable SSID Broadcast: Allow Guest to access My Local Network: If enabled, both you and visitors can connect to the network by using the SSID of the Multiple SSID. If enabled, WNAP-1260 broadcasts its SSID to all wireless stations. If enabled, visitors using the SSID of a guest network can access not only the Internet but also the LAN of WNAP-1260, like users using the primary SSID of the network. If disabled, visitors using the SSID of a guest network cannot access the LAN of WNAP-1260. Enable Wireless Isolation: If selected, wireless clients connected to the guest network of the same SSID can access the Internet only, but cannot communicate with each other. Guest Wireless Network Name (SSID): Security Options: Set the name of the Multiple SSID. Refer to security option descriptions in section “Wireless Basic Settings”. After finishing settings, click Apply to save the settings. -57- User’s Manual of WNAP-1260 7.7.3. Wireless Advanced Settings Choose Wireless Settings > Wireless Advanced Settings and the Wireless Advanced Settings page is displayed. Figure 7-15 Object Description If you disable the wireless router radio, wireless devices cannot Enable Wireless Router Radio: connect to the WNAP-1260 router. If you do not use your wireless network for a period of time, you can clear this check box and disable all wireless connectivity Enable WMM (Wi-Fi multi-media) Settings: WMM function can guarantee the packets with high- priority messages being transmitted preferentially. It is strongly recommended enabled Set the threshold of fragmentation length. If the length of a packet Fragmentation Length (256-2346): exceeds the set value, the packet is automatically fragmented into several packets. The value of Fragmentation Length cannot be too small because excessive packets reduce wireless network performance. The default value is 2346. DTIM (1-255): Beacon Interval (20-1000): Set the interval for sending DTIM frames The beacon interval is the frequency of sending Beacon frames. Set the interval for sending Beacon frames. The unit is millisecond (ms). The default value is 100 ms -58- User’s Manual of WNAP-1260 MAX Clients (0-12): Set the maximum number of clients. 0 indicates the number of connected clients is not limited Set the CTS/RTS threshold. If the length of a packet is greater than CTS/RTS Threshold (1-2347): the specified RTS value, WNAP-1260 sends an RTS frame to the destination station to negotiate. After receiving an RTS frame, the wireless station responds with a Clear to Send (CTS) frame to WNAP-1260, notifying that they can communicate with each other A preamble (especially the 802.11b High Rate/DSSS PHY field; 56 digits synchronized field for short preamble) defines the length of the CRC correction block for communication between wireless devices. Preamble Mode: Short preamble should be applied in a network with intense traffics. It helps improve the efficiency of a wireless network responding to applications that have high requirement of real-time, such as Guard Interval: streaming video and voice-over-IP telephony. Short GI: The interval is 400 ns. When short GI is enabled, WNAP-1260 can receive and send short-frame-interval packets. This helps improve the transmission rate of WNAP-1260. Long GI: The interval is 800 ns. Transmit Power Control: Set the transmit power of the wireless network. It is recommended to use the default setting of 100%. Restricting wireless access by MAC address When a wireless card access list is configured and enabled, the router checks the MAC address of any wireless device attempting a connection and allows only connections to computers identified on the trusted computer list. The MAC address is a network device’s unique 12-character physical address, containing the hexadecimal characters 0–9, a–f, or A–F only. The MAC address is in the format of XX:XX:XX:XX:XX:XX. To restrict wireless access by MAC address: Step 1 Click Setup Access List button in the Wireless Advanced Settings page to display the Wireless Card Access List page. -59- User’s Manual of WNAP-1260 Figure 7-16 Step 2 Click Add to add a wireless device to the wireless access control list. The Wireless Card Access Setup page is displayed. Figure 7-17 Step 3 If the computer you want appears in the Available Wireless Cards list, you can select the radio button of that computer to obtain its MAC address. Otherwise, you can manually enter a name and MAC address of the computer to be authorized. Generally, the MAC address is labeled on the bottom of the wireless device. Step 4 Click Add to add this wireless device to the wireless card access list. The page jumps to the list page. Step 5 Select Turn Access Control On. If selected, you can restrict PCs’ access to the wireless network, only allowing specified PCs to access your network according to their MAC addresses. Step 6 Click Apply to save your Wireless Card Access List settings. Now, only devices on this list can wirelessly connect to the WNAP-1260 router. -60- User’s Manual of WNAP-1260 7.7.4. WPS Setup WPS refers to Wi-Fi Protected Setup. You can use WPS to establish wireless connection in a quick and secure way if the uplink AP or terminal (for example, the network adapter) has the WPS function. It is suggested to first configure wireless encryption for the uplink AP. If you change the wireless encryption mode after having establishing wireless connection using WPS, you must use WPS to establish wireless connection again. Note that if the wireless client does not support WPS you must manually configure the wireless client (such as SSID, security mode, and password) to make it have the same SSID and wireless security settings as the router. The following describes how to configure WPS for the AP mode. Using the WPS Button In the AP mode with WDS disabled, press the WPS button on the side panel of WNAP-1260 and the WPS button on the client device. WNAP-1260 can perform WPS encrypted connection to the downlink client device. Figure 7-18 Using the Web Page You can perform WPS settings using the Web page for configuration. Choose Wireless Settings > WPS Setup to display the WPS Setup page. PBC mode Step 1 Select Push Button and click Start PBC. WPS encrypted connection starts. Figure 7-19 Step 2 Press the WPS button on the network adapter or click the PBC button in the network adapter configuration tool within 2 minutes to start WPS connection. -61- User’s Manual of WNAP-1260 Step 3 After WPS connection is established, the following page is displayed, indicating that the WPS connection is completed. Figure 7-20 PIN mode Step 4 Select PIN, enter the PIN code of the network adapter (refer to the client of the network adapter), and click Start PIN to start WPS connection. Figure 7-21 Step 5 Click the PIN button on the network adapter within 2 minutes to start WPS connection. Step 6 After WPS connection is established, the following page is displayed, indicating that the WPS connection is completed. -62- User’s Manual of WNAP-1260 Figure 7-22 7.8. Management Function Click Management Function and the extended navigation menu is shown as follows. Click a submenu to perform specific parameter configurations. 7.8.1. Backup Settings Choose Management Function > Backup Settings and the Backup Settings page is displayed. Figure 7-23 In this page, you can export configuration information of the router to the computer in the form of XML for later use, import a previously saved or a new configuration file, and restore the factory default settings of the router. Backup Click Backup and save configuration information of the router as a local file. Before saving your configuration file, change the administrator password to the default (admin) in case you forget your password. Then change it again after you have saved the configuration file. If you forget the password, you will need to reset the configuration to factory defaults. -63- User’s Manual of WNAP-1260 Restore The Backup and Restore options in the Backup Settings page let you save and retrieve a file containing your router’s configuration settings. Click Browse… to select the configuration file restored in your computer and click Restore to load the file to the router. Erase Under some circumstances (for example, if you move the router to a different network or if you have forgotten the password) you might want to erase the configuration and restore the factory default settings. Click Erase to restore the factory default settings of the router. This operation has the same effect as pressing the Reset button on the side panel for 3-6 seconds. 7.8.2. Reboot Device Choose Management Function > Reboot Device and the Reboot Device page is displayed. Figure 7-24 Click Reboot to reboot the router. After the router is rebooted, the system jumps to the login page. 7.8.3. Set Password Choose Management Function > Set Password and the Set Password page is displayed. Figure 7-25 In this page, you can change the password of the administrator and set the page timeout time. For security, it is strongly recommended to change the default password of the administrator. If you forget the password, you can restore the router to the default settings. The default password is admin. -64- User’s Manual of WNAP-1260 7.8.4. Upgrade Choose Management Function > Upgrade and the Upgrade page is displayed. Figure 7-26 Upgrade the software of the router in the following steps: Step 1 Click Browse… to navigate to the latest software. Step 2 Select the correct upgrade file. If you select Clear Config, the router restores to the default settings after upgrade. If you do not select it, the current settings remain. Step 3 Click Upload to start upgrade. After the upgrade is completed, the router automatically reboots. -65- User’s Manual of WNAP-1260 Chapter 8. Web Configuration for the Router Mode In the Router mode, WNAP-1260 works as a domestic gateway. 8.1. Router Mode Topology In Router Mode, the NAT (Network Address Translation) function and DHCP server are both enabled, and all wireless clients share the same public IP assigned by ISP through WAN port of the WNAP-1260. The WNAP-1260 is supposed to connect with the Cable / xDSL Modem by UTP cable. 8.2. Hardware Setting Set the three-way switch on the side panel to AP after WNAP-1260 is powered on. 8.3. Running Status Log in to the configuration page after the system is started. Click Running Status and the extended navigation menu is shown as follows: Click the submenu to enter a specific configuration page. 8.3.1. System Status Choose Running Status > System Status and the System Status page is displayed. -66- User’s Manual of WNAP-1260 Figure 8-1 In this page, you can view information about the current running status of WNAP-1260, including system information, connection status of the Internet port, LAN port status, and wireless network status. Click Show Statistics and the Statistic Information page as shown in the following figure is displayed: Figure 8-2 In this page, you can view performance statistics information of WNAP-1260, including the numbers of sent and received packets at each port. -67- User’s Manual of WNAP-1260 Set Interval: Set the interval for traffic statistics. Stop: If you click this button, this page always displays statistics information that was refreshed for the last time and it is not refreshed any more. Click Connection Status in the System Status page, and the Connection Status page is displayed. This page displays current connection information of WNAP-1260. The following takes WAN connection of DHCP as an example. Figure 8-3 Release: Click the button and WNAP-1260 sends a request to the ISP for releasing the IP address, the subnet mask, the default gateway, and DNS server settings. Renew: Click the button and WNAP-1260 dynamically obtains an IP address, a subnet mask, the default gateway, and DNS server settings from the ISP. The information will be displayed in this page. For details of WAN connection modes, refer to section “Choose Network Settings > LAN Interface Settings and the LAN Interface Settings page is displayed. Figure 8-6 You can modify the IP address and IP subnet mask of the LAN port as required. If you change the default IP address, you must use the new IP address to log in to the Web configuration page of the router and the default gateway of all hosts in the LAN must be set to the new IP address for internet access. The subnet mask of all hosts in the LAN must be the same as the subnet mask specified in the LAN Interface Settings page. -68- User’s Manual of WNAP-1260 8.3.2. Clients List Choose Running Status > Clients List and the Clients List page is displayed. Figure 8-4 This page displays information of computers connected to WNAP-1260, including the IP address and MAC address of each computer. 8.4. Setup Wizard For settings, refer to section 5.4. “ -69- User’s Manual of WNAP-1260 Router Mode Configuration”. 8.5. Mode Setting Click Mode Settings and the Mode Settings page is displayed. Figure 8-5 Bridge Mode: The interface on its case is an LAN interface. Users can connect WNAP-1260 and the PC using an RJ45 cable or a wireless network card. Router Mode: Computers can connect to WNAP-1260 in a wireless way only. -70- User’s Manual of WNAP-1260 8.6. Network Settings Click Wired Network Settings and the extended navigation menu is shown as follows: Click a submenu to perform specific parameter configurations. 8.6.1. LAN Interface Settings Choose Network Settings > LAN Interface Settings and the LAN Interface Settings page is displayed. Figure 8-6 You can modify the IP address and IP subnet mask of the LAN port as required. If you change the default IP address, you must use the new IP address to log in to the Web configuration page of the router and the default gateway of all hosts in the LAN must be set to the new IP address for internet access. The subnet mask of all hosts in the LAN must be the same as the subnet mask specified in the LAN Interface Settings page. 8.6.2. WAN Interface Settings Choose Network Settings > WAN Interface Settings and the WAN Interface Settings page is displayed. The router supports 5 modes of WAN connection, including Dynamic IP (DHCP), Static IP, PPPoE, PPTP, and L2TP. Select the WAN connection you use. Contact your ISP if you do not know your WAN connection mode. (1) Dynamic IP (DHCP) If you select dynamic IP (DHCP), WNAP-1260 automatically obtains the IP address from the ISP automatically. Select DHCP when the ISP does not provide any IP network parameters. See the following figure: -71- User’s Manual of WNAP-1260 Figure 8-7 Object Account Name: Description The account name is provided by your ISP. If the ISP does not provide it, you can leave the item blank. Select Use These DNS Servers if you know that your ISP does not Domain Name Service (DNS) Address: automatically transmit DNS addresses to the router during login. And enter the IP address of your ISP’s primary DNS server. Enter a secondary DNS server address if available MTU Size: Set the maximum transmission unit. The default value is recommended Physical address of the router. Device MAC Address: Generally, select Use Default Address. If the ISP requires MAC address authentication, Select Use Computer MAC Address or Use This MAC Address. -72- User’s Manual of WNAP-1260 If you select Use Computer MAC Address, the MAC address of the current computer serves as the MAC address of the router. If you select Use This MAC Address, you need to enter the MAC address of another computer. The format of an MAC address is XX:XX:XX:XX:XX:XX. After finishing settings, click Apply to save the settings. (2) Static IP If the ISP provides the IP address, subnet mask, and information about the gateway and DNS server, select Static IP. Contact your ISP if you do not know the information. Figure 8-8 Object Description Account Name: The account name is provided by your ISP. If the ISP does not provide it, you can leave the item blank -73- User’s Manual of WNAP-1260 IP Address: IP Subnet Mask: Gateway IP Address: Primary DNS: Secondary DNS: MTU Size: Router MAC Address: Enter the WAN IP address provided by the ISP. The parameter must be entered Enter the WAN subnet mask provided by the ISP. It varies with the network type. It is usually 255.255.255.0 (Class C) Enter the IP address of the gateway provided by the ISP. It is the IP address used for connecting to the ISP. Enter the IP address of the primary DNS server if necessary Enter the IP address of that DNS server if the ISP provides another DNS server Set the maximum transmission unit. The default value is recommended See descriptions on setting Router MAC Address for DHCP. After finishing settings, click Apply to save the settings. (3) PPPoE If the ISP provides the user name and password for PPPoE (Point-to-Point Protocol over Ethernet) dialup, select PPPoE. Figure 8-9 -74- User’s Manual of WNAP-1260 Object Description Login: Enter the user name for PPPoE dialup provided by the ISP Password: Enter the password for PPPoE dialup provided by the ISP Service Name: If several PPPoE servers are available, specify one in this field Always On: If you select it, the system automatically establishes a connection. If WNAP-1260 is disconnected from the network because of external factors when you are using the Internet access service, the system attempts connection in an interval of the specified time (for example, 10 seconds) until the connection is established. If you pay for Internet access monthly, we recommend you to use this connection mode. Connection Mode: Dial On Demand: If you select it, the system automatically establishes a connection when a network access request from the LAN is received. If no network access request is sent from the LAN within the specified time of Idle Timeout, the system automatically interrupts the connection. If you pay for Internet access by time, you are recommended to use this connection mode, which effectively saves the expense of Internet access. Manually Connect: If you select it, you need to manually set dialup connection after startup. If the system does not detect any Internet access behavior within the Idle Timeout: specified time of Idle Timeout, the system interrupts the Internet connection. Select Use These DNS Servers if you know that your ISP does not Domain Name Server (DNS) Address: automatically transmit DNS addresses to the router during login. And enter the IP address of your ISP’s primary DNS server. Enter a secondary DNS server address if available MTU Size: Router MAC Address: Set the maximum transmission unit. The default value is recommended See descriptions on setting Router MAC Address for DHCP. After finishing settings, click Apply to save the settings. -75- User’s Manual of WNAP-1260 (4) PPTP If the ISP provides the user name and password for PPTP dialup, select PPTP. Figure 8-10 Object Description Login: Enter the user name for PPTP dialup provided by the ISP Password: Enter the password for PPTP dialup provided by the ISP Always On: If you select it, the system automatically establishes a connection. If WNAP-1260 is disconnected from the network Connection Mode: because of external factors when you are using the Internet access service, the system attempts connection in an interval of the specified time (for example, 10 seconds) until the connection is established. If you pay for Internet access monthly, we -76- User’s Manual of WNAP-1260 recommend you to use this connection mode. Dial On Demand: If you select it, the system automatically establishes a connection when a network access request from the LAN is received. If no network access request is sent from the LAN within the specified time of Idle Timeout, the system automatically interrupts the connection. If you pay for Internet access by time, you are recommended to use this connection mode, which effectively saves the expense of Internet access. Manually Connect: If you select it, you need to manually set dialup connection after startup. If the system does not detect any Internet access behavior within the Idle Timeout: specified time of Idle Timeout, the system interrupts the Internet connection My IP Address: Enter your IP address. You can also leave this field blank Subnet Mask: Enter the subnet mask. You can also leave this field blank Sever Address: Gateway IP Address: Domain Name Server (DNS) Address: MTU Size: Router MAC Address: Enter the IP address of the server. You can also leave this field blank Enter the IP address of the gateway. You can also leave this field blank Select Use These DNS Servers if you know that your ISP does not automatically transmit DNS addresses to the router during login. And enter the IP address of your ISP’s primary DNS server. Enter a secondary DNS server address if available Set the maximum transmission unit. The default value is recommended See descriptions on setting Router MAC Address for DHCP After finishing settings, click Apply to save the settings. -77- User’s Manual of WNAP-1260 (5) L2TP If the ISP provides the user name and password for L2TP dialup, select L2TP. Figure 8-11 For details of parameter settings for this page, refer to previous parameter descriptions for PPTP. 8.6.3. DHCP Server Choose Network Settings > DHCP Server and the DHCP Server page is displayed. DHCP refers to Dynamic Host Configuration Protocol. If Use Device as DHCP Service is selected, WNAP-1260 automatically assigns IP addresses to comupters in the LAN. Users do not need to configure TCP/IP protocol paramters such as the IP address, the subnet mask, the gateway, and the DNS server information for computers connected to the router’s LAN. -78- User’s Manual of WNAP-1260 Figure 8-12 Using the Router as a DHCP Server Use Router as DHCP Server: If you select the Use Router as DHCP Server check box, WNAP-1260 serves as a DHCP server to automatically assign IP addresses to computers connected to it. Starting IP Address/Ending IP Address: Set the starting and ending IP addresses to specify a pool of IP addresses to be assigned by the DHCP server. After you set Starting IP Address/Ending IP Address, hosts in the LAN obtain IP addresses that are in the range of the starting and ending IP addresses. DHCP Lease Time: The valid time for an IP address that is automatically assigned by the DHCP server to a host. The DHCP server does not assign the IP address to other hosts within the specified time. Using Address Reservation When you specify a reserved IP address for a computer in the LAN, the computer always receives the same IP address each time it accesses the router’s DHCP server. Reserved IP addresses should be assigned to computers or servers that require permanent IP settings. To reserve an IP address: Step 1 Click Add to enter the Address Reservation page. Figure 8-13 Step 2 Select one item from Address Reservation Table, or enter the IP address in the IP Address field to assign to the computer or server (Choose an IP address from the IP address pool that you have specified, for example 192.168.1.x). Enter the MAC address and device name of the computer or server. Step 3 Click Add to add a new item into Address Reservation. Step 4 Click Apply to save the settings. -79- User’s Manual of WNAP-1260 8.6.4. VPN Passthrough Choose Network Settings > VPN Passthrough and the VPN Passthrough page is displayed. Figure 8-14 Object Description Certain SIP applications have special mechanisms for passing Disable SIP ALG: through the NAT firewall and SIP ALG may have conflicts with these mechanisms. In most cases, please disable SIP ALG IPSEC/PPTP/L2TP Pass-Through provides a secure communication method for remote computers in the wide area Disable IPSEC/L2TP/PPTP Pass-Through: network (WAN) (for example, the Internet). Enable the corresponding VPN pass-through function if an intra-network host needs to use a VPN protocol (such as the PPTP, L2TP, IPSEC) to connect to a remote VPN network through the router After finishing settings, click Apply to save the settings. -80- User’s Manual of WNAP-1260 8.7. Wireless Settings Click Wireless Settings and the extended navigation menu is shown as follows: Click a submenu to perform specific parameter configurations. 8.7.1. Wireless Basic Settings Choose Wireless Settings > Wireless Basic Settings and the Wireless Basic Settings page is displayed. Figure 8-15 Object Description Region: Select the region where you are located. Enable SSID Broadcast: Enable Wireless Isolation: If enabled, the router broadcasts its SSID in the wireless network. Wireless clients can scan the SSID and access the wireless network under the SSID. If selected, wireless clients connected to the network of the same SSID can access the Internet only, but cannot communicate with -81- User’s Manual of WNAP-1260 each other. Name (SSID): Set the name for the wireless network. The SSID can contain up to 32 characters and can be letters, numerals, underlines, and any combinations of them. The SSID is case-sensitive Mode: Select the wireless mode. Mixed 802.11b/g/n is recommended. Channel: The channel for transmitting wireless signals. When you select Auto, WNAP-1260 automatically selects the best channel from the available channels according to actual situations. The default channel is Auto. Band Width: The bandwidth occupied for wireless signal transmission. Max Transmission Rate: The maximum transmission rate of WNAP-1260. Security Options: Set the security encryption of the wireless network, to prevent unauthorized access and listening. Security Options - None Data encryption is not adopted and the network is not secure. Any stations can access the network. This option is not recommended. Figure 8-16 - WEP Wired equivalent privacy. You can use WEP 64- or 128-bit encryption. Figure 8-17 Object Description Authentication Type: Select the authentication type that the system adopts. -82- User’s Manual of WNAP-1260 Three authentication types are available: Automatic, Open, and Shared keys. Automatic: If selected, the router uses an authentication type of Open or Shared keys according to the request of the host. Open: If selected, hosts in the wireless network can pass the authentication and connect to the wireless network without using a password. However, the password is required if you want to transmit data. Shared keys: If selected, hosts in the wireless network can pass authentication only when the correct password is entered. Otherwise, the hosts cannot connect to the wireless network. The type of the key to be set. Hexadecimal and ASCII code are available. Encryption Type: Hex: Valid characters for keys contain 0–9 and A–F. ASCII: Valid characters for keys contain all characters of the key board. The encryption strength determines the length of the key. Encryption Strength: Key 1/2/3/4: - If Encryption Strength is set to 64 bits, set the key to 10 hexadecimal digits or 5 ASCII characters. If Encryption Strength is set to 128 bits, set the key to 26 hexadecimal digits or 13 ASCII characters. Set the key based on the selected encryption type and encryption strength. WPA-PSK[TKIP] or WPA2-PSK[TKIP] WPA-PSK: Preshared key Wi-Fi protection access WPA2-PSK: Preshared key Wi-Fi protection access version 2 TKIP: Temporal Key Integrity Protocol Figure 8-18 Figure 8-19 -83- User’s Manual of WNAP-1260 PassPhrase: Enter 8-63 ASCII characters or 64 hexadecimal digits. The 802.11n mode does not support the TKIP algorithm. - WPA-PSK[AES] or WPA2-PSK[AES] WPA-PSK: Preshared key Wi-Fi protection access. WPA2-PSK: Preshared key Wi-Fi protection access version 2. AES: Advanced Encryption Standard Figure 8-20 Figure 8-21 - PassPhrase: Enter 8-63 ASCII characters or 64 hexadecimal digits. WPA-PSK/WPA2-PSK+[TKIP]/[AES] It allows the client to use either WPA-PSK[TKIP]/[AES] or WPA2-PSK[TKIP]/[AES]. Figure 8-22 PassPhrase: Enter 8-63 ASCII characters or 64 hexadecimal digits. After you complete configuring wireless settings for WNAP-1260, only hosts that have the same wireless settings (for example, the SSID) as WNAP-1260 can connect to it. If you configure security settings for WNAP-1260, hosts must have the same security settings (for example, the password) as WNAP-1260 in order to connect to WNAP-1260. -84- User’s Manual of WNAP-1260 8.7.2. Multiple SSID If you do not want visitors to know your wireless security key, you can use the Multiple SSID to allow them to use your Internet without knowing your wireless connection password. Choose Wireless Settings > Multiple SSID and the Multiple SSID page is displayed. Figure 8-23 Object Description Brief description of the created Multiple SSID. You can create up to four Multiple SSIDs. A network profile contains the SSID and Network Profiles: encryption mode, whether to use the Multiple SSID, and whether to broadcast SSID. You can click the radio button of a profile to view detailed information or modify settings. Enable Multiple SSID: Enable SSID Broadcast: Allow Guest to access My Local Network: If enabled, both you and visitors can connect to the network by using the SSID of the Multiple SSID. If enabled, WNAP-1260 broadcasts its SSID to all wireless stations. If enabled, visitors using the SSID of a guest network can access not only the Internet but also the LAN of WNAP-1260, like users using the primary SSID of the network. If disabled, visitors using the SSID of a guest network cannot access the LAN of WNAP-1260. Enable Wireless Isolation: If selected, wireless clients connected to the guest network of the same SSID can access the Internet only, but cannot communicate with each other. Guest Wireless Network Name (SSID): Security Options: Set the name of the Multiple SSID. Refer to security option descriptions in section “Wireless Basic Settings”. After finishing settings, click Apply to save the settings. -85- User’s Manual of WNAP-1260 8.7.3. Wireless Advanced Settings Choose Wireless Settings > Wireless Advanced Settings and the Wireless Advanced Settings page is displayed. Figure 8-24 Object Description If you disable the wireless router radio, wireless devices cannot Enable Wireless Router Radio: connect to the WNAP-1260 router. If you do not use your wireless network for a period of time, you can clear this check box and disable all wireless connectivity Enable WMM (Wi-Fi multi-media) Settings: WMM function can guarantee the packets with high- priority messages being transmitted preferentially. It is strongly recommended enabled Set the threshold of fragmentation length. If the length of a packet Fragmentation Length (256-2346): exceeds the set value, the packet is automatically fragmented into several packets. The value of Fragmentation Length cannot be too small because excessive packets reduce wireless network performance. The default value is 2346. DTIM (1-255): Set the interval for sending DTIM frames Beacon Interval (20-1000): The beacon interval is the frequency of sending Beacon frames. Set the interval for sending Beacon frames. The unit is millisecond (ms). -86- User’s Manual of WNAP-1260 The default value is 100 ms MAX Clients (0-12): Set the maximum number of clients. 0 indicates the number of connected clients is not limited Set the CTS/RTS threshold. If the length of a packet is greater than CTS/RTS Threshold (1-2347): the specified RTS value, WNAP-1260 sends an RTS frame to the destination station to negotiate. After receiving an RTS frame, the wireless station responds with a Clear to Send (CTS) frame to WNAP-1260, notifying that they can communicate with each other A preamble (especially the 802.11b High Rate/DSSS PHY field; 56 digits synchronized field for short preamble) defines the length of the CRC correction block for communication between wireless devices. Preamble Mode: Short preamble should be applied in a network with intense traffics. It helps improve the efficiency of a wireless network responding to applications that have high requirement of real-time, such as Guard Interval: streaming video and voice-over-IP telephony. Short GI: The interval is 400 ns. When short GI is enabled, WNAP-1260 can receive and send short-frame-interval packets. This helps improve the transmission rate of WNAP-1260. Long GI: The interval is 800 ns. Transmit Power Control: Set the transmit power of the wireless network. It is recommended to use the default setting of 100%. Restricting wireless access by MAC address When a wireless card access list is configured and enabled, the router checks the MAC address of any wireless device attempting a connection and allows only connections to computers identified on the trusted computer list. The MAC address is a network device’s unique 12-character physical address, containing the hexadecimal characters 0–9, a–f, or A–F only. The MAC address is in the format of XX:XX:XX:XX:XX:XX. To restrict wireless access by MAC address: Step 1 Click Setup Access List button in the Wireless Advanced Settings page to display the Wireless Card Access List page. -87- User’s Manual of WNAP-1260 Figure 8-25 Step 2 Click Add to add a wireless device to the wireless access control list. The Wireless Card Access Setup page is displayed. Figure 8-26 Step 3 If the computer you want appears in the Available Wireless Cards list, you can select the radio button of that computer to obtain its MAC address. Otherwise, you can manually enter a name and MAC address of the computer to be authorized. Generally, the MAC address is labeled on the bottom of the wireless device. Step 4 Click Add to add this wireless device to the wireless card access list. The page jumps to the list page. Step 5 Select Turn Access Control On. If selected, you can restrict PCs’ access to the wireless network, only allowing specified PCs to access your network according to their MAC addresses. Step 6 Click Apply to save your Wireless Card Access List settings. Now, only devices on this list can wirelessly connect to the WNAP-1260 router. -88- User’s Manual of WNAP-1260 8.7.4. WDS Function Wireless distribution system (WDS) enables interconnection between APs in an IEEE 802.11 wireless network. It extends the wireless network through several APs, without connection of the wired backbone network. If you want to use WDS to achieve wireless repeating or bridging, enable WDS. Choose Wireless Settings > WDS Function and the WDS Function page is displayed. Figure 8-27 Object Description Enable WDS Enable the WDS function if you want to use this function. Note that Function: Enable Wireless Clients Association: the WDS function cannot be enabled if the channel is set to Auto If not selected, the wireless basic station does not transmit any signals to clients that are directly connected to it In this mode, the router serves as a basic station to communicate Central Base Station: with repeaters. The basic station forwards the data of communication between repeaters to the destination repeaters. Repeaters should be configured accordingly. Note that a wireless basic station can be configured with up to four repeaters. Repeater MAC Address 1/2/3/4: Enter the MAC address of the repeater After finishing settings, click Apply to save the settings. For WDS application description, refer to section 5.2.3. “WDS Application”. -89- User’s Manual of WNAP-1260 8.7.5. WPS Setup WPS refers to Wi-Fi Protected Setup. You can use WPS to establish wireless connection in a quick and secure way if the uplink AP or terminal (for example, the network adapter) has the WPS function. It is suggested to first configure wireless encryption for the uplink AP. If you change the wireless encryption mode after having establishing wireless connection using WPS, you must use WPS to establish wireless connection again. Note that if the wireless client does not support WPS you must manually configure the wireless client (such as SSID, security mode, and password) to make it have the same SSID and wireless security settings as the router. The following describes how to configure WPS for the AP mode. Using the WPS Button In the AP mode with WDS disabled, press the WPS button on the side panel of WNAP-1260 and the WPS button on the client device. WNAP-1260 can perform WPS encrypted connection to the downlink client device. Figure 8-28 Using the Web Page You can perform WPS settings using the Web page for configuration. Choose Wireless Settings > WPS Setup to display the WPS Setup page. PBC mode Step 1 Select Push Button and click Start PBC. WPS encrypted connection starts. Figure 8-29 Step 2 Press the WPS button on the network adapter or click the PBC button in the network adapter configuration tool within 2 minutes to start WPS connection. After WPS connection is established, the following page is displayed, indicating that the WPS connection is completed. -90- User’s Manual of WNAP-1260 Figure 8-30 PIN mode Step 1 Select PIN, enter the PIN code of the network adapter (refer to the client of the network adapter), and click Start PIN to start WPS connection. Figure 8-31 Step 2 Click the PIN button on the network adapter within 2 minutes to start WPS connection. After WPS connection is established, the following page is displayed, indicating that the WPS connection is completed. Figure 8-32 -91- User’s Manual of WNAP-1260 8.8. Network Application Click Network Application and the extended navigation menu is shown as follows: Click a submenu to perform specific parameter configurations. 8.8.1. Port Forwarding By default, the firewall function of the router hides your LAN. As a result, other users on the Internet can detect only the router, but cannot access a certain PC in the LAN directly. If you want to access a PC in an LAN, you need to configure port forwarding for the router and map the desired port to the corresponding PC in the LAN. The router forwards packets to the PC according to the port mapping rule after receiving an access request from the Internet. In this way, communication is successfully established between the Internet and the PC in the LAN. Choose Network Application > Port Forwarding and the Port Forwarding page is displayed. Figure 8-33 Service Name: Select a service type. Service IP Address: Enter the IP address of the computer that provides services. Click the Add Custom Service button and the Ports - Custom Service page is displayed: -92- User’s Manual of WNAP-1260 Figure 8-34 Object Description Service Name: Select a service type Protocol: Starting Port: The protocol used at the mapping port. You can select TCP/UDP, TCP, or UDP. It is recommended to use TCP/UDP if you do not know which protocol should be used. After the connection to the mapping port is established, the corresponding port is open and the application can initiate subsequent connection requests to the open port Ending Port: Set the end port of the mapping port range Service IP Address: Enter the IP address of the computer that provides services After finishing settings, click Apply to save the settings. 8.8.2. Port Triggering Certain applications, such as WAN network games, video conferences, and network calls, require multiple connections. Because of the firewall setting, these applications cannot work on a simple NAT router. However, certain special applications enable the applications to work on an NAT router. When an application sends a connection request to a trigger port, the corresponding ports are open for later connection and service provision. Choose Network Application > Port Triggering and the Port Triggering page is displayed. Figure 8-35 -93- User’s Manual of WNAP-1260 Object Description Enable Port If Enable Port Triggering box is not checked, all port triggering Triggering: Port Triggering Timeout: function will be disabled The timeout value controls the inactive timer at the specified ingress port. Upon timeout of the inactive timer, the ingress port is disabled Click the Add Service button and the Port Triggering – Services page is displayed: Figure 8-36 Object Description Service Name: Enter a service name Service User: Service Type: Triggering Starting Port: Triggering Ending Port: Any: Allow everybody in the user network to use the service. Single address: Enter the IP address of the network adapter on the PC. Then, the service is applied only on the specific network adapter of the PC. The protocol used at the triggering port. You can select TCP/UDP, TCP, or UDP The first port to which an application sends a connection request. All relevant ports can be open only after connection is established at this starting port. Otherwise, other relevant ports are not open. Set the end port of the triggering port range. Starting Port: The starting port of the port range Ending Port: The ending port of the port range. After finishing settings, click Apply to add a port triggering rule. -94- User’s Manual of WNAP-1260 8.8.3. UPnP By using the Universal Plug and Play (UPnP) protocol, a host in the LAN can ask the router to perform specific port conversion, to enable an external host to access resources on the internal host when necessary. For example, if MSN Messenger is installed on Windows ME and Windows XP operating systems, UPnP can be used for audio and video conversations. In this way, functions restricted by NAT can work properly. Choose Network Application > UPnP and the UPnP page is displayed. Figure 8-37 Object Description Turn UPnP On: If selected, UPnP is enabled Advertisement Set the broadcast interval. It indicates the interval for the router broadcasting its UPnP information. The value should be in the range of 1 to 1440 minutes and the default is 30 minutes Period (in minutes): Advertisement Time To Live (in hops): UPnP Portable Table: The time for the broadcast to live. It is the number of hops after each UPnP packet is sent. The number of hops is the times that each packet can be broadcast before it vanishes. The value is in the range of 1 to 255 hops and the default is 4 hops This table shows the IP addresses of UPnP devices that are connected to the router and open (internal and external) ports on the devices. It also lists the types and status of the open ports. Only applications that support UPnP can use the UPnP function. The functionality of UPnP requires support by the application and operating systems such as Windows ME, Windows XP, and Windows Vista -95- User’s Manual of WNAP-1260 8.8.4. IGMP Proxying Click Network Application > IGMP Proxying and the IGMP Proxying page is displayed. Figure 8-38 Enable IGMP proxying: IGMP proxying enables a PC in the LAN to receive desired multicast traffic from the Internet. Disable IGMP proxying if you do not need this function. After finishing the setting, click Apply to apply the setting. 8.8.5. DMZ Server DMZ (Demilitarized Zone), a special network zone that is different from the external network or the internal network. Servers that are allowed to access the external network, such as Web and e-mail, connect to the DMZ. The internal network is protected behind the Trust Zone interface, and is not allowed any user to access. Therefore, the internal and external networks are separated, which can meet user’s secrecy demand. Usually, there are some public servers in DMZ, such as Web, Mail, and FTP. Users from the external network can access services in DMZ, but they cannot obtain the company’s secret information or personal information that is stored on the internal network. Even though servers in the DMZ are damaged, it does not cause secret information loss on the internal network. Choose Network Application > DMZ Server and the DMZ Server page is displayed. Figure 8-39 Default DMZ Server: Enter the IP address of a PC that serves as the DMZ server. When PC on the internal network is set to be the DMZ host, all interfaces of the PC will be exposed to the Internet and the PC will risk great security. Unless necessary, please do not set the DMZ casually. After the DMZ host is set, mappings of all the interfaces will point to the DMZ host and the port mappings that point to other hosts will be invalid. -96- User’s Manual of WNAP-1260 8.8.6. Dynamic DNS Dynamic domain name resolution (DDNS) is mainly used to achieve resolution between fixed domain names and dynamic IP addresses. For a user that uses a dynamic IP address, after the user obtains a new IP address in the Internet access, the dynamic domain name software installed in the host sends the IP address to the DDNS server provided by the DDNS service provider and updates the domain name resolution database. When another user on the Internet tries accessing the domain name, the dynamic domain name resolution server returns the correct IP address. Choose Network Application > Dynamic DNS and the Dynamic DNS page is displayed. Figure 8-40 Object Description Use a Dynamic If you have registered with a DDNS service provider, select Use a DNS Service: Service Provider: Host Name: Dynamic DNS Service. Select your DDNS service provider. Enter the host name or domain name provided by your DDNS service provider User Name: Enter the name of your DDNS account Password: Enter the password of the DDNS account After finishing the settings, click Apply to apply the settings. 8.8.7. Static Routes Static routing is a special type of routing that can be applied in a network to reduce the problem of routing selection and data flow overload caused by routing selection so as to improve the packets forwarding speed. You can set the destination IP address, subnet mask, and gateway to specify a routing rule. The destination IP address and subnet mask determine a destination network or host to which the router sends packets through the gateway. Choose Network Application > Static Routes and the Static Routes page is displayed. -97- User’s Manual of WNAP-1260 Figure 8-41 Click Add to add a static routing rule. Figure 8-42 Object Active: Route Name: Description The static routing rule can take effect only if the Active check box is selected. Enter the name of the static route. The destination address or network that you want to access. This IP Destination IP Address: IP Subnet Mask: address cannot be in the same network segment as the IP address of the WAN or LAN interface of WNAP-1260. This IP subnet mask together with the destination IP address identify the target network The IP address of the next node to which packets are sent. The Gateway IP Address: gateway IP address must be in the same network segment as the IP address of the WAN or LAN interface of WNAP-1260. The number of other routers in the user network. The value ranges Metric: from 2 to 15. Usually, the value of 2 or 3 leads to the best performance. If the route is direct connection, set Metric to 2 After finishing settings, click Apply to save the settings. -98- User’s Manual of WNAP-1260 8.9. Security Options Click Security Options and the extended navigation menu is shown as follows: Click a submenu to perform specific parameter configurations. 8.9.1. Block Sites WNAP-1260 allows you to restrict access based on WEB addresses and WEB address keywords. When a user tries accessing a restricted website, a message is displayed, indicating that the firewall restricts access to the website. Choose Security Options > Block Sites and the Block Sites page is displayed. Figure 8-43 To block access to Internet sites: Step 1 Select Per Schedule or Always to enable keyword blocking. -99- User’s Manual of WNAP-1260 To block by schedule, be sure to specify a time period in the Schedule page. For more information about scheduling, refer to section 8.10.3. “Schedules”. Step 2 Enter keywords or domain names that you want to block in the keyword field and click Add Keyword. The keyword or domain name then appears in the Block Sites Containing these Keywords or Domain Names list. Keyword application examples: Step 3 If the keyword XXX is specified, the URL www.aabbcc.com/xxx.html is blocked. If the keyword .com is specified, only websites with other domain suffixes (such as .edu, .org, or .gov) can be accessed. You can specify one trusted user, which is a computer that has no restriction in network access. To specify a trusted user, enter the computer’s IP address in the Trusted IP Address field and select the Allow Trusted IP Address To Visit Blocked Sites check box. Since the trusted user is identified by IP address, you should configure that computer with a fixed IP address. Step 4 Click Apply to save the settings. 8.9.2. Block Services WNAP-1260 allows you to block the use of certain Internet services by computers on your network. Choose Security Options > Block Services and the Block Services page is displayed. Figure 8-44 To specify a service for blocking: Step 1 Select Per Schedule or Always to enable keyword blocking. To block by schedule, be sure to specify a time period in the Schedule page. For more information about scheduling, refer to section 8.10.3. “Schedules”. -100- User’s Manual of WNAP-1260 Step 2 Black List: Indicates to prevent service that complies with the rule in the Block Service Rules Table-Black List area from being used. White List: Indicates to allow only service that complies with the rule in the Block Service Rules Table-White List area to be available for use. Click Add to specify a service for blocking. The Block Services Setup page is displayed: Figure 8-45 Step 3 Set the parameters in this page. Object Description Select a service type. If your desired type is not in the list, select User defined. Service Type: Then, you need to select the protocol, enter the service name, and specify the port range. For services that exist in the drop-down list, the corresponding information is already preset. Protocol: Set the protocol used at service ports. If you are not sure about the protocol that the application uses, select TCP/UDP. Starting Port/Ending Port: The starting and ending ports of the port range where the specified service is blocked. If the application uses a single port number, enter the number in both fields Service Type/User Defined: Enter the service name Filter Service For: You can block the specified service for a single computer, computers within an IP address range, or all computers After finishing settings, click Add to add a new rule. Then, click Apply to save the settings. -101- User’s Manual of WNAP-1260 8.9.3. Protection Choose Security Options > Protection and the Protection page is displayed. Figure 8-46 Object Description Disable port scan Denial of service (DoS) protection protects your LAN against DOS attacks. Generally, please enable the port scanning and DOS protection function and DoS protection: Respond to Ping on Internet Port: If enabled, the router responds to ping commands from the Internet. However, like the DMZ server, enabling this function can bring about security risks. Generally, please disable this function. NAT filtering determines the way that the router deals with incoming traffic. Secured: This option provides a secured firewall to protect PCs on LAN from attacks from the Internet, but it may not allow some Internet games, point-to-point applications, or multimedia applications to work. Open: This option provides a less secure firewall that allows almost all Internet applications to work. NAT Filtering: After finishing the settings, click Apply to apply the settings. -102- User’s Manual of WNAP-1260 8.10. Management Function Click Management Function and the extended navigation menu is shown as follows. Click a submenu to perform specific parameter configurations. 8.10.1. Backup Settings Choose Management Function > Backup Settings and the Backup Settings page is displayed. Figure 8-47 In this page, you can export configuration information of the router to the computer in the form of XML for later use, import a previously saved or a new configuration file, and restore the factory default settings of the router. Backup Click Backup and save configuration information of the router as a local file. Before saving your configuration file, change the administrator password to the default (admin) in case you forget your password. Then change it again after you have saved the configuration file. If you forget the password, you will need to reset the configuration to factory defaults. Restore The Backup and Restore options in the Backup Settings page let you save and retrieve a file containing your router’s configuration settings. Click Browse… to select the configuration file restored in your computer and click Restore to load the file to the router. -103- User’s Manual of WNAP-1260 Erase Under some circumstances (for example, if you move the router to a different network or if you have forgotten the password) you might want to erase the configuration and restore the factory default settings. Click Erase to restore the factory default settings of the router. This operation has the same effect as pressing the Reset button on the side panel for 3-6 seconds. 8.10.2. Remote Management The remote management function allows you to configure the router from the WAN through the Web browser. In this way, you can manage the router on a remote host. Choose Management Function > Remote Management and the Remote Management page is displayed. Figure 8-48 Object Description Turn Remote If selected, you can perform remote Web management for the router from the WAN Management On: Remote Management Address: Port Number: IP address that is used to access the router from the Internet. The default is http://0.0.0.0:8080. When accessing the router, you need to enter an address in the form of “the WAN IP address of the router”+ “:” + “the port number” in the IE address bar. For example, if your external address is 10.0.0.123 and the used port number is 8080, enter 10.0.0.123:8080 in your browser. The port number for accessing the router through remote Web management. Set the IP address of the computer on which remote Web management is carried out to access the router. Allow Remote Access By: Only This Computer: Only the specified IP address can access the router. IP Address Range: A range of IP addresses on the Internet can access the router. You need to enter the starting and ending IP addresses to specify a range. Everyone: Everyone on the Internet can access the router. After finishing settings, click Apply to save the settings. -104- User’s Manual of WNAP-1260 8.10.3. Schedules Choose Management Function > Schedules and the Schedule page is displayed. Figure 8-49 If you already set site filtering in the Block Sites page or set sevice filtering in the Block Services page, you can set a schedule to specify the time and mode of restricting Internet access. Object Days to Block: Description Select days on which you want to apply blocking by selecting the appropriate check boxes. Select Every Day to select the check boxes for all days Time of Day to Block: All Day: To perform 24-hour blocking. Start Blocking/End Blocking: If you want to restrict access in a fixed period during the days you specify, enter the start and end time in 24-hour format. After finishing settings, click Apply to save the settings. -105- User’s Manual of WNAP-1260 8.10.4. SNTP Choose Management Function > SNTP and the SNTP page is displayed. Figure 8-50 SNTP refers to Simple Network Time Protocol. In this page, you can set time information of your router. It is strongly recommended to set the correct time on the router first. This ensures proper functioning of log, site blocking, and schedule because their time settings are based on time information in this page. Object Automatically synchronize with Internet time servers: First NTP time server: Second NTP time server: Current Router Time: Time Zone: Enable Daylight Saving: Daylight Saving Offset: Daylight Saving Dates: Description If selected automatic synchronization with the network time server is enabled Enter the IP address of the primary NTP server. The NTP server is a network time server that is used to synchronize the time of computers on the Internet. When you set the first NTP time server, the router obtains GMT time from the specified NTP server with priority after it is connected to the Internet Enter the IP address of the secondary NTP server if available Display the current system time of the router Select the time zone where you are located. Enable or disable daylight saving time (DST). Select a proper offset. If it is set to +1:00, 10:00 in the morning in standard time becomes 11:00 in the morning in DST Set the starting time and ending time of DST After finishing settings, click Apply to save the settings. -106- User’s Manual of WNAP-1260 8.10.5. Reboot Device Choose Management Function > Reboot Device and the Reboot Device page is displayed. Figure 8-51 Click Reboot to reboot the router. After the router is rebooted, the system jumps to the login page. 8.10.6. Set Password Choose Management Function > Set Password and the Set Password page is displayed. Figure 8-52 In this page, you can change the password of the administrator and set the page timeout time. For security, it is strongly recommended to change the default password of the administrator. If you forget the password, you can restore the router to the default settings. The default password is admin. 8.10.7. Upgrade Choose Management Function > Upgrade and the Upgrade page is displayed. Figure 8-53 -107- User’s Manual of WNAP-1260 Upgrade the software of the router in the following steps: Step 1 Click Browse… to navigate to the latest software. Step 2 Select the correct upgrade file. If you select Clear Config, the router restores to the default settings after upgrade. If you do not select it, the current settings remain. Step 3 Click Upload to start upgrade. After the upgrade is completed, the router automatically reboots. -108- User’s Manual of WNAP-1260 Chapter 9. Web Configuration for the WDS Mode 9.1. WDS Mode Topology In the WDS mode, WNAP-1260 expands wireless coverage of the existing AP. Computers can connect to WNAP-1260 in either a wired or wireless way. 9.2. Hardware Setting Set the three-way switch on the side panel to Repeater after WNAP-1260 is powered on. 9.3. Running Status Log in to the configuration page after the system is started. Click Running Status and the extended navigation menu is shown as follows: Click the submenu to enter a specific configuration page. 9.3.1. System Status Choose Running Status > System Status and the System Status page is displayed. -109- User’s Manual of WNAP-1260 Figure 9-1 In this page, you can view information about the current running status of WNAP-1260, including system information, LAN port status, and wireless repeating information. 9.3.2. Clients List Choose Running Status > Clients List and the Clients List page is displayed. Figure 9-2 This page displays information of devices connected to WNAP-1260, including the IP adress and MAC address of each device. 9.4. Setup Wizard For settings, refer to section 5.2. “WDS Mode Configuration”. 9.5. Mode Setting Click Mode Settings and the Mode Settings page is displayed. -110- User’s Manual of WNAP-1260 Figure 9-3 Select WDS Mode. Note that WDS function cannot be used if the channel is set to Auto. 9.6. Network Settings Click Wired Network Settings and the extended navigation menu is shown as follows: Click a submenu to perform specific parameter configurations. 9.6.1. LAN Interface Settings Choose Network Settings > LAN Interface Settings and the LAN Interface Settings page is displayed. Figure 9-4 You can modify the IP address and IP subnet mask of the LAN port as required. If you change the default IP address, you must use the new IP address to log in to the Web configuration page of the router and the default gateway of all hosts in the LAN must be set to the new IP address for internet access. The subnet mask of all hosts in the LAN must be the same as the subnet mask specified in the LAN Interface Settings page. 9.6.2. DHCP Server Choose Network Settings > DHCP Server and the DHCP Server page is displayed. -111- User’s Manual of WNAP-1260 DHCP refers to Dynamic Host Configuration Protocol. If Use Device as DHCP Service is selected, WNAP-1260 automatically assigns IP addresses to comupters in the LAN. Users do not need to configure TCP/IP protocol paramters such as the IP address, the subnet mask, the gateway, and the DNS server information for computers connected to the router’s LAN. Figure 9-5 Using the Router as a DHCP Server Object Use Router as DHCP Server: Starting IP Address/Ending IP Address: DHCP Lease Time: Description If you select the Use Router as DHCP Server check box, WNAP-1260 serves as a DHCP server to automatically assign IP addresses to computers connected to it Set the starting and ending IP addresses to specify a pool of IP addresses to be assigned by the DHCP server. After you set Starting IP Address/Ending IP Address, hosts in the LAN obtain IP addresses that are in the range of the starting and ending IP addresses The valid time for an IP address that is automatically assigned by the DHCP server to a host. The DHCP server does not assign the IP address to other hosts within the specified time Using Address Reservation When you specify a reserved IP address for a computer in the LAN, the computer always receives the same IP address each time it accesses the router’s DHCP server. Reserved IP addresses should be assigned to computers or servers that require permanent IP settings. To reserve an IP address: Step 1 Click Add to enter the Address Reservation page. -112- User’s Manual of WNAP-1260 Figure 9-6 Step 2 Select one item from Address Reservation Table, or enter the IP address in the IP Address field to assign to the computer or server (Choose an IP address from the IP address pool that you have specified, for example 192.168.1.x). Enter the MAC address and device name of the computer or server. Step 3 Click Add to add a new item into Address Reservation. Step 4 Click Apply to save the settings. -113- User’s Manual of WNAP-1260 9.7. Wireless Settings Click Wireless Settings and the extended navigation menu is shown as follows: Click a submenu to perform specific parameter configurations. 9.7.1. WDS Function Wireless distribution system (WDS) enables interconnection between APs in an IEEE 802.11 wireless network. It extends the wireless network through several APs, without connection of the wired backbone network. Enable WDS if you want to use WDS to achieve wireless repeating or bridging. Choose Wireless Settings > WDS Function and the WDS Function page is displayed. Figure 9-7 Object Description Disable Wireless Clients Association: If selected, the repeater does not transmit any signals to clients that are connected to it. Generally, clear this check box. Generally, select this check box Repeater IP Address: Set the repeater’s IP address different from the wireless basic station and other repeaters to avoid IP address conflict. We suggest setting IP addresses of the same network segment for the wireless basic station and repeaters Basic Station MAC Address: Enter the MAC address of the wireless basic station. After finishing settings, click Apply to save the settings. For WDS application description, refer to section 5.2.3. “WDS Application”. 9.7.2. Wireless Basic Settings Choose Wireless Settings > Wireless Basic Settings and the Wireless Basic Settings page is displayed. -114- User’s Manual of WNAP-1260 Figure 9-8 Object Description Region: Select the region where you are located. Enable SSID Broadcast: Enable Wireless Isolation: Name (SSID): If enabled, the router broadcasts its SSID in the wireless network. Wireless clients can scan the SSID and access the wireless network under the SSID. If selected, wireless clients connected to the network of the same SSID can access the Internet only, but cannot communicate with each other. Set the name for the wireless network. The SSID can contain up to 32 characters and can be letters, numerals, underlines, and any combinations of them. The SSID is case-sensitive Mode: Select the wireless mode. Mixed 802.11b/g/n is recommended. Channel: The channel for transmitting wireless signals. When you select Auto, WNAP-1260 automatically selects the best channel from the available channels according to actual situations. The default channel is Auto. Band Width: The bandwidth occupied for wireless signal transmission. Max Transmission Rate: The maximum transmission rate of WNAP-1260. Security Options: Set the security encryption of the wireless network, to prevent unauthorized access and listening. Security Options - None -115- User’s Manual of WNAP-1260 Data encryption is not adopted and the network is not secure. Any stations can access the network. This option is not recommended. Figure 9-9 WEP Wired Equivalent Privacy. You can use WEP 64- or 128-bit encryption. Figure 9-10 Object Description Select the authentication type that the system adopts. Three authentication types are available: Automatic, Open, and Shared keys. Automatic: If selected, the router uses an authentication type of Open or Shared keys according to the request of the host. Authentication Type: Open: If selected, hosts in the wireless network can pass the authentication and connect to the wireless network without using a password. However, the password is required if you want to transmit data. Shared keys: If selected, hosts in the wireless network can pass authentication only when the correct password is entered. Otherwise, the hosts cannot connect to the wireless network. The type of the key to be set. Hexadecimal and ASCII code are Encryption Type: available. Hex: Valid characters for keys contain 0–9 and A–F. -116- User’s Manual of WNAP-1260 ASCII: Valid characters for keys contain all characters of the key board. The encryption strength determines the length of the key. Encryption Strength: hexadecimal digits or 5 ASCII characters. If Encryption Strength is set to 128 bits, set the key to 26 hexadecimal digits or 13 ASCII characters. Set the key based on the selected encryption type and encryption strength. Key 1/2/3/4: - If Encryption Strength is set to 64 bits, set the key to 10 WPA-PSK[TKIP] or WPA2-PSK[TKIP] WPA-PSK: Preshared key Wi-Fi protection access WPA2-PSK: Preshared key Wi-Fi protection access version 2 TKIP: Temporal Key Integrity Protocol Figure 9-11 Figure 9-12 PassPhrase: Enter 8-63 ASCII characters or 64 hexadecimal digits. The 802.11n mode does not support the TKIP algorithm. - WPA-PSK[AES] or WPA2-PSK[AES] WPA-PSK: Preshared key Wi-Fi protection access. WPA2-PSK: Preshared key Wi-Fi protection access version 2. AES: Advanced Encryption Standard -117- User’s Manual of WNAP-1260 Figure 9-13 - PassPhrase: Enter 8-63 ASCII characters or 64 hexadecimal digits. WPA-PSK/WPA2-PSK+[TKIP]/[AES] It allows the client to use either WPA-PSK[TKIP]/[AES] or WPA2-PSK[TKIP]/[AES]. Figure 9-14 PassPhrase: Enter 8-63 ASCII characters or 64 hexadecimal digits. - After you complete configuring wireless settings for WNAP-1260, only hosts that have the same wireless settings (for example, the SSID) as WNAP-1260 can connect to it. - If you configure security settings for WNAP-1260, hosts must have the same security settings (for example, the password) as WNAP-1260 in order to connect to WNAP-1260. -118- User’s Manual of WNAP-1260 9.8. Management Function Click Management Function and the extended navigation menu is shown as follows. Click a submenu to perform specific parameter configurations. 9.8.1. Backup Settings Choose Management Function > Backup Settings and the Backup Settings page is displayed. Figure 9-16 In this page, you can export configuration information of the router to the computer in the form of XML for later use, import a previously saved or a new configuration file, and restore the factory default settings of the router. Backup Click Backup and save configuration information of the router as a local file. Before saving your configuration file, change the administrator password to the default (admin) in case you forget your password. Then change it again after you have saved the configuration file. If you forget the password, you will need to reset the configuration to factory defaults. Restore The Backup and Restore options in the Backup Settings page let you save and retrieve a file containing your router’s configuration settings. Click Browse… to select the configuration file restored in your computer and click Restore to load the file to the router. -119- User’s Manual of WNAP-1260 Erase Under some circumstances (for example, if you move the router to a different network or if you have forgotten the password) you might want to erase the configuration and restore the factory default settings. Click Erase to restore the factory default settings of the router. This operation has the same effect as pressing the Reset button on the side panel for 3-6 seconds. 9.8.2. Reboot Device Choose Management Function > Reboot Device and the Reboot Device page is displayed. Figure 9-17 Click Reboot to reboot the router. After the router is rebooted, the system jumps to the login page. 9.8.3. Set Password Choose Management Function > Set Password and the Set Password page is displayed. Figure 9-18 In this page, you can change the password of the administrator and set the page timeout time. For security, it is strongly recommended to change the default password of the administrator. If you forget the password, you can restore the router to the default settings. The default password is admin. -120- User’s Manual of WNAP-1260 9.8.4. Upgrade Choose Management Function > Upgrade and the Upgrade page is displayed. Figure 9-19 Upgrade the software of the router in the following steps: Step 1 Click Browse… to navigate to the latest software. Step 2 Select the correct upgrade file. If you select Clear Config, the router restores to the default settings after upgrade. If you do not select it, the current settings remain. Step 3 Click Upload to start upgrade. After the upgrade is completed, the router automatically reboots. -121- User’s Manual of WNAP-1260 Chapter 10. Web Configuration for the Client Mode 10.1. Client Mode Topology In Client Mode, the WNAP-1260 is supposed to act as a wireless station for the PC or other wired-only network device. Users can site survey the available local AP and choose someone to connect with. 10.2. Hardware Setting Set the three-way switch on the side panel to Client after WNAP-1260 is powered on. 10.3. Running Status Log in to the configuration page after the system is started. Click Running Status and the extended navigation menu is shown as follows: Click the submenu to enter a specific configuration page. 10.3.1. System Status Choose Running Status > System Status and the System Status page is displayed. -122- User’s Manual of WNAP-1260 Figure 9-20 In this page, you can view information about the current running status of WNAP-1260, including system information, LAN port status, and wireless client status. 10.3.2. Clients List Choose Running Status > Clients List and the Clients List page is displayed. Figure 9-21 This page displays information of wireless devices connected to WNAP-1260, including the IP adress and MAC address of each device. 10.4. Setup Wizard For settings, refer to section 5.5. “Client Mode Configuration”. 10.5. Network Settings Click Network Settings and the extended navigation menu is shown as follows: Click a submenu to perform specific parameter configurations. -123- User’s Manual of WNAP-1260 10.5.1. LAN Interface Settings Choose Network Settings > LAN Interface Settings and the LAN Interface Settings page is displayed. Figure 9-22 You can modify the IP address and IP subnet mask of the LAN port as required. If you change the default IP address, you must use the new IP address to log in to the Web configuration page of the router and the default gateway of all hosts in the LAN must be set to the new IP address for internet access. The subnet mask of all hosts in the LAN must be the same as the subnet mask specified in the LAN Interface Settings page. 10.5.2. DHCP Server Choose Network Settings > DHCP Server and the DHCP Server page is displayed. DHCP refers to Dynamic Host Configuration Protocol. If Use Device as DHCP Service is selected, WNAP-1260 automatically assigns IP addresses to comupters in the LAN. Users do not need to configure TCP/IP protocol paramters such as the IP address, the subnet mask, the gateway, and the DNS server information for computers connected to the router’s LAN. Figure 9-23 Using the Router as a DHCP Server Object Description Use Router as If you select the Use Router as DHCP Server check box, WNAP-1260 serves as a DHCP server to automatically assign IP addresses to computers connected to it DHCP Server: -124- User’s Manual of WNAP-1260 Starting IP Address/Ending IP Address: DHCP Lease Time: Set the starting and ending IP addresses to specify a pool of IP addresses to be assigned by the DHCP server. After you set Starting IP Address/Ending IP Address, hosts in the LAN obtain IP addresses that are in the range of the starting and ending IP addresses The valid time for an IP address that is automatically assigned by the DHCP server to a host. The DHCP server does not assign the IP address to other hosts within the specified time Using Address Reservation When you specify a reserved IP address for a computer in the LAN, the computer always receives the same IP address each time it accesses the router’s DHCP server. Reserved IP addresses should be assigned to computers or servers that require permanent IP settings. To reserve an IP address: Step 1 Click Add to enter the Address Reservation page. Figure 9-24 Step 2 Select one item from Address Reservation Table, or enter the IP address in the IP Address field to assign to the computer or server (Choose an IP address from the IP address pool that you have specified, for example 192.168.1.x). Enter the MAC address and device name of the computer or server. Step 3 Click Add to add a new item into Address Reservation. Step 4 Click Apply to save the settings. -125- User’s Manual of WNAP-1260 10.6. Wireless Settings Click Wireless Settings and the extended navigation menu is shown as follows: Click a submenu to perform specific parameter configurations. 10.6.1. WPS Setup WPS refers to Wi-Fi Protected Setup. You can use WPS to establish wireless connection in a quick and secure way if the uplink AP or terminal (for example, the network adapter) has the WPS function. It is suggested to first configure wireless encryption for the uplink AP. If you change the wireless encryption mode after having establishing wireless connection using WPS, you must use WPS to establish wireless connection again. Note that if the wireless client does not support WPS you must manually configure the wireless client (such as SSID, security mode, and password) to make it have the same SSID and wireless security settings as the router. The following describes how to configure WPS for the Client mode. Using the WPS Button In the Client mode, WNAP-1260 can perform WPS encrypted connection to either the uplink AP or the repeater. Using the Web Page You can perform WPS settings using the Web page for configuration. Choose Wireless Settings > WPS Setup to display the WPS Setup page. PBC mode Step 1 Select Push Button and click Start PBC. WPS encrypted connection starts. Figure 10-1 Step 2 Start the WPS PBC process. After WPS connection is established, the following page is displayed, indicating that the WPS connection is completed. -126- User’s Manual of WNAP-1260 Figure 10-2 PIN mode Step 1 Select PIN, click Generate New PIN, and click Start PIN to start WPS connection. Figure 10-3 Step 2 Start the WPS PBC process within 2 minutes to start WPS connection. After WPS connection is established, the following page is displayed, indicating that the WPS connection is completed. Figure 10-4 10.6.2. Wireless Client Function Choose Wireless Settings > Wireless Client Function and the Wireless Client Function page is displayed. -127- User’s Manual of WNAP-1260 Figure 10-5 Step 1 Click Site Survey to search for the wireless network you want to connect. Step 2 Enter encryption information of the selected wireless network. Configure the client with the same security settings as the selected network. Click Finish. Then, the client can communicate with the selected network. Figure 10-6 10.7. Management Function Click Management Function and the extended navigation menu is shown as follows. Click a submenu to perform specific parameter configurations. 10.7.1. Backup Settings Choose Management Function > Backup Settings and the Backup Settings page is displayed. -128- User’s Manual of WNAP-1260 Figure 10-7 In this page, you can export configuration information of the router to the computer in the form of XML for later use, import a previously saved or a new configuration file, and restore the factory default settings of the router. Backup Click Backup and save configuration information of the router as a local file. Before saving your configuration file, change the administrator password to the default (admin) in case you forget your password. Then change it again after you have saved the configuration file. If you forget the password, you will need to reset the configuration to factory defaults. Restore The Backup and Restore options in the Backup Settings page let you save and retrieve a file containing your router’s configuration settings. Click Browse… to select the configuration file restored in your computer and click Restore to load the file to the router. Erase Under some circumstances (for example, if you move the router to a different network or if you have forgotten the password) you might want to erase the configuration and restore the factory default settings. Click Erase to restore the factory default settings of the router. This operation has the same effect as pressing the Reset button on the side panel for 3-6 seconds. 10.7.2. Reboot Device Choose Management Function > Reboot Device and the Reboot Device page is displayed. Figure 10-8 Click Reboot to reboot the router. After the router is rebooted, the system jumps to the login page. -129- User’s Manual of WNAP-1260 10.7.3. Set Password Choose Management Function > Set Password and the Set Password page is displayed. Figure 10-9 In this page, you can change the password of the administrator and set the page timeout time. For security, it is strongly recommended to change the default password of the administrator. If you forget the password, you can restore the router to the default settings. The default password is admin. 10.7.4. Upgrade Choose Management Function > Upgrade and the Upgrade page is displayed. Figure 10-10 Upgrade the software of the router in the following steps: Step 1 Click Browse… to navigate to the latest software. Step 2 Select the correct upgrade file. If you select Clear Config, the router restores to the default settings after upgrade. If you do not select it, the current settings remain. Step 3 Click Upload to start upgrade. After the upgrade is completed, the router automatically reboots. -130- User’s Manual of WNAP-1260 Chapter 11. Quick Connection to a Wireless Network In the following sections, the default SSID of the WNAP-1260 is configured to “default”. Default SSID: default 11.1. Windows XP (Wireless Zero Configuration) Step 1: Right-Click on the wireless network icon displayed in the system tray Figure 11-1 Step 2: Select [View Available Wireless Networks] Step 3: Highlight and select the wireless network (SSID) to connect (1) Select SSID [default] (2) Click the [Connect] button -131- User’s Manual of WNAP-1260 Figure 11-2 Step 4: Enter the encryption key of the Wireless Router (1) The Wireless Network Connection box will appear (2) Enter the encryption key that configured in section 7.7.1 (3) Click the [Connect] button Figure 11-3 Step 5: Check if “Connected” is displayed Figure 11-4 Some laptops are equipped with an “Wi-Fi ON/OFF” hardware switch for the internal wireless LAN. Make sure the it is switched to “ON” position. -132- User’s Manual of WNAP-1260 11.2. Windows 7 (WLAN AutoConfig) WLAN AutoConfig service is built-in in Windows 7 and can be used to detect and connect to wireless network. This built-in wireless network connection tool is similar to wireless zero configuration tool in Windows XP. Step 1: Right-Click on the network icon displayed in the system tray Figure 11-5 Step 2: Highlight and select the wireless network (SSID) to connect (1) Select SSID [default] (2) Click the [Connect] button Figure 11-6 -133- User’s Manual of WNAP-1260 Figure 11-7 If you want to connect to this Wireless Router in the future, please check the box of [Connect automatically]. Step 3: Enter the encryption key of the Wireless Router (1) The [Connect to a Network] box will appear (2) Enter the encryption key that configured in section 7.7.1 (3) Click the [OK] button Figure 11-8 -134- User’s Manual of WNAP-1260 Figure 11-9 Step 4: Check if “Connected” is displayed Figure 11-10 -135- User’s Manual of WNAP-1260 11.3. Mac OS X Step 1: Right-Click on the network icon displayed in the system tray The AirPort Network Connection menu will appear Figure 11-11 Step 2: Highlight and select the wireless network (SSID) to connect (1) Select and SSID [default] (2) Double-click on the selected SSID Figure 11-12 Step 3: Enter the encryption key of the Wireless Router (4) Enter the encryption key that configured in section 7.7.1 (1) Click the [OK] button -136- User’s Manual of WNAP-1260 Figure 11-13 If you want to connect to this Wireless Router in the future, please check [Remember this network]. Step 4: Check if the AirPort is connect to the selected wireless network. If “Yes”, then there will be a “check” symbol in front of the SSID. Figure 11-14 -137- User’s Manual of WNAP-1260 There is another way to configure the MAC OS X Wireless settings: Step 1: Click and open the [System Preferences] by going to Apple > System Preference or Applications Figure 11-15 Step 2: Open Network Preference by clicking on the [Network] icon Figure 11-16 Step 3: Check Wi-Fi setting and select the available wireless network (1) Choose the AirPort on the left-menu (make sure it is ON) -138- User’s Manual of WNAP-1260 (2) Select Network Name [default] here If this is the first time to connect to the Wireless Router, it should shows “Not network selected”. Figure 11-17 -139- User’s Manual of WNAP-1260 11.4. iPhone / iPod Touch / iPad Step 1: Tap the [Settings] icon displayed in the home screen Figure 11-18 Step 2: Check Wi-Fi setting and select the available wireless network (3) Tap [General] \ [Network] (4) Tap [Wi-Fi] If this is the first time to connect to the Wireless Router, it should appears “Not Connected”. Figure 11-19 -140- User’s Manual of WNAP-1260 Figure 11-20 Step 3: Tap the target wireless network (SSID) in “Choose a Network…” (1) Turn on Wi-Fi by tapping “Wi-Fi” (2) Select SSID [default] Figure 11-21 Step 4: Enter the encryption key of the Wireless Router (1) The password input screen will be displayed (2) Enter the encryption key that configured in section 7.7.1 (3) Tap the [Join] button -141- User’s Manual of WNAP-1260 Figure 11-22 Step 5: Check if the iDevice is connected to the selected wireless network. If “Yes”, then there will be a “check” symbol in front of the SSID. Figure 11-23 -142- User’s Manual of WNAP-1260 Appendix A. Planet Smart Discovery Utility For easily list the WNAP-1260 in your Ethernet environment, the Planet Smart Discovery Utility from user’s manual CD-ROM is an ideal solution. The following install instructions guiding you for run the Planet Smart Discovery Utility. Step 1: Deposit the Planet Smart Discovery Utility in administrator PC. Step 2: Run this utility and the following screen appears. Step 3: Press “Refresh” button for list current connected devices in the discovery list, the screen is shown as follow. Step 3: Press “Connect to Device” button then the Web login screen appears. 1. In Repeater Mode, the IP address of LAN 2 (DHCP) assigned by DHCP server will be listed in the table. 2. The LAN 2 (DHCP) only supported in Repeater Mode. 3. If cannot get the IP address from DHCP server or DHCP server is not existed, it will displayed the LAN 1 (Static IP address). 4. In other Modes, WNAP-1260 only supported LAN 1 (Static IP address). -143- User’s Manual of WNAP-1260 Appendix B. FAQ Malfunction The WNAP-1260 is not responding to me when I want to access it via web browser Solution a. Please check the connection of power cord and network cable of the WNAP-1260. All cords and cables should be correctly and firmly inserted to the device. b. If all LEDs on the WNAP-1260 are off, please check the status of power adapter, and make sure it is correctly powered. c. You must configure your PC as the same IP address section with the WNAP-1260. d. Are you using MAC or IP address filter? Try to connect the WNAP-1260 by another computer and see if it works; if not, please restore the WNAP-1260 to factory default settings (Press “reset” button for over 10 seconds). e. Shift the hardware switch to Router Mode, and set your computer to obtain an IP address automatically (DHCP), and see if your computer can get an IP address. f. If you just did firmware upgrade and this happens, contact the dealer of purchase for help. a. If all above solutions don’t work, contact the dealer of purchase for help. Unable to get connected with the Internet a. Go to “Management Status” submenu, and check the WAN configuration status. Please be patient, sometime Internet is just that slow. b. If you connect your computer to the Internet directly before, try to do that again. And check if you can get connected to the Internet with your computer directly via the device provided by your local Internet service provider. c. Check the WAN access type (Static IP / Dynamic IP / PPPoE / PPTP / L2TP), user name, password, and the other parameters provided by your local ISP again. d. Call your Internet service provider and check if there is something wrong with their service. e. If you just can’t connect to one or more website, but you can still use other internet services, please check URL filter in the web UI. f. Reset the WNAP-1260 to the factory default settings and try again later. g. Reset the device provided by your Internet service provider as well. h. Try to use IP address instead of hostname. If you can -144- User’s Manual of WNAP-1260 access a remote server by an IP address but not by a hostname, please check the DNS setting. Unable to be found by the wireless clients a. Check if the “Broadcast SSID” is disabled. b. Are you too far from the WNAP-1260? Try to get closer. c. File download is very slow or breaks frequently Please remember that you have to enter SSID to your wireless client device manually, if SSID broadcast is disabled. a. Are you using QoS function? Please disable it and try again. Please be patient, sometime Internet is just that slow. b. Reset the WNAP-1260 to the factory default settings and see if it is better after that. c. Try to know what are other computers doing in your local area network. If someone is transferring big files, other people will think Internet is really slow. d. If this never happens before, call you Internet service provider to check if there is something wrong with their network. Unable to login the web management UI: password is wrong a. Make sure you are connecting to the correct IP address of the WNAP-1260. b. Password is case-sensitive. Make sure the “Caps Lock” light is not illuminated. c. The device is getting hot. If you really forget the password, please do hardware reset. a. This is not a malfunction if you can keep your hand on the case of the WNAP-1260. b. If you smell something wrong or see the smoke coming out from the WNAP-1260 or power adapter, please disconnect the device and power adapter from power (make sure it’s safe before you’re doing this!), and call your dealer of purchase for help. The date and time of all event logs are wrong a. Adjust the internal clock of the WNAP-1260. -145- User’s Manual of WNAP-1260 EC Declaration of Conformity English Hereby, PLANET Technology Corporation, declares that this 802.11n Wall Plug Universal WiFi Repeater is in compliance with the essential requirements and other relevant provisions of Directive 1999/5/EC. Lietuviškai Šiuo PLANET Technology Corporation,, skelbia, kad 802.11n Wall Plug Universal WiFi Repeater tenkina visus svarbiausius 1999/5/EC direktyvos reikalavimus ir kitas svarbias nuostatas. Česky Společnost PLANET Technology Corporation, tímto prohlašuje, že tato 802.11n Wall Plug Universal WiFi Repeater splňuje základní požadavky a další příslušná ustanovení směrnice 1999/5/EC. Magyar A gyártó PLANET Technology Corporation, kijelenti, hogy ez a 802.11n Wall Plug Universal WiFi Repeater megfelel az 1999/5/EK irányelv alapkövetelményeinek és a kapcsolódó rendelkezéseknek. Dansk PLANET Technology Corporation, erklærer herved, at følgende udstyr 802.11n Wall Plug Universal WiFi Repeater overholder de væsentlige krav og øvrige relevante krav i direktiv 1999/5/EF Malti Deutsch Hiermit erklärt PLANET Technology Corporation, dass sich dieses Gerät 802.11n Wall Plug Universal WiFi Repeater in Übereinstimmung mit den grundlegenden Anforderungen und den anderen relevanten Vorschriften der Richtlinie 1999/5/EG befindet". (BMWi) Nederlands Hawnhekk, PLANET Technology Corporation, jiddikjara li dan 802.11n Wall Plug Universal WiFi Repeater jikkonforma mal-ħtiġijiet essenzjali u ma provvedimenti oħrajn relevanti li hemm fid-Dirrettiva 1999/5/EC Hierbij verklaart , PLANET Technology orporation, dat 802.11n Wall Plug Universal WiFi Repeater in overeenstemming is met de essentiële eisen en de andere relevante bepalingen van richtlijn 1999/5/EG Eesti keeles Käesolevaga kinnitab PLANET Technology Corporation, et see 802.11n Wall Plug Universal WiFi Repeater vastab Euroopa Nõukogu direktiivi 1999/5/EC põhinõuetele ja muudele olulistele tingimustele. Polski Niniejszym firma PLANET Technology Corporation, oświadcza, że 802.11n Wall Plug Universal WiFi Repeater spełnia wszystkie istotne wymogi i klauzule zawarte w dokumencie „Directive 1999/5/EC”. Ελληνικά ΜΕ ΤΗΝ ΠΑΡΟΥΣΑ , PLANET Technology Corporation, ΔΗΛΩΝΕΙ ΟΤΙ ΑΥΤΟ 802.11n Wall Plug Universal WiFi Repeater ΣΥΜΜΟΡΦΩΝΕΤΑΙ ΠΡΟΣ ΤΙΣ ΟΥΣΙΩΔΕΙΣ ΑΠΑΙΤΗΣΕΙΣ ΚΑΙ ΤΙΣ ΛΟΙΠΕΣ Português PLANET Technology Corporation, declara que este 802.11n Wall Plug Universal WiFi Repeater está conforme com os requisitos essenciais e outras disposições da Directiva 1999/5/CE. ΣΧΕΤΙΚΕΣ ΔΙΑΤΑΞΕΙΣ ΤΗΣ ΟΔΗΓΙΑΣ 1999/5/ΕΚ Español Por medio de la presente, PLANET Technology Corporation, declara que 802.11n Wall Plug Universal WiFi Repeater cumple con los requisitos esenciales y cualesquiera otras disposiciones aplicables o exigibles de la Directiva 1999/5/CE Slovensky Výrobca PLANET Technology Corporation, týmto deklaruje, že táto 802.11n Wall Plug Universal WiFi Repeater je v súlade so základnými požiadavkami a ďalšími relevantnými predpismi smernice 1999/5/EC. Français Par la présente, PLANET Technology Corporation, déclare que les appareils du 802.11n Wall Plug Universal WiFi Repeater sont conformes aux exigences essentielles et aux autres dispositions pertinentes de la directive 1999/5/CE Slovensko PLANET Technology Corporation, s tem potrjuje, da je ta 802.11n Wall Plug Universal WiFi Repeater skladen/a z osnovnimi zahtevami in ustreznimi določili Direktive 1999/5/EC. Italiano Con la presente , PLANET Technology Corporation, dichiara che questo 802.11n Wall Plug Universal WiFi Repeater è conforme ai requisiti essenziali ed alle altre disposizioni pertinenti stabilite dalla direttiva. 1999/5/CE. Suomi PLANET Technology Corporation, vakuuttaa täten että 802.11n Wall Plug Universal WiFi Repeater tyyppinen laite on direktiivin 1999/5/EY oleellisten vaatimusten ja sitä koskevien direktiivin muiden ehtojen mukainen. Latviski Ar šo PLANET Technology Corporation, apliecina, ka šī 802.11n Wall Plug Universal WiFi Repeater atbilst Direktīvas 1999/5/EK pamatprasībām un citiem atbilstošiem noteikumiem. Svenska Härmed intygar, PLANET Technology Corporation, att denna 802.11n Wall Plug Universal WiFi Repeater står i överensstämmelse med de väsentliga egenskapskrav och övriga relevanta bestämmelser som framgår av direktiv 1999/5/EG. -146-