1
Getting Started - Single Use & Reusable
Getting Started - Single Use & Reusable
Getting Started
Single Use & Reusable
Initial Inspection
When you receive the GlideScope AVL system, Verathon recommends that a biomedical
engineer (or other qualified professional familiar with electronic medical devices) inspect
the system for any obvious physical damage that may have occurred during shipment.
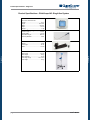
The components you receive vary depending on which configuration you ordered. To
verify that you received the appropriate components, refer to the packing list included
with your system.
If any of the components are missing or damaged, notify the carrier and Verathon Medical Customer Care or your local representative:
• 800.331.2313 (Canada and US)
• 425.867.1348 (International)
• +31.30.68.70.570 (Europe)
For additional contact information, see Contact Information.
page 21
User’s Manual
Single Use & Reusable
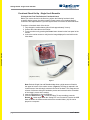
Before you can use your GlideScope AVL system for the first time, you must inspect the
components, set up the system, and perform a functional test by performing these steps
recommended by Verathon. Additional detail on each step can be found in the sections
on the following pages..
1. Inspect the system for any obvious physical damage that may have occurred
during shipment.
2. Set up the AVL System in your preferred configuration: For specific instructions on
system setup, see Setting Up the GlideScope AVL System and if using a stand
also take note of Set Up the AVL on a Mobile Stand.
3. Charge the monitor battery. You can use the system while the battery is charging.
For specific charging instructions, see Charge the Monitor Battery.
Note: The GlideScope AVL system will operate without charging the battery by using
the AVL Video Monitor 12V DC Power Adaptor that shipped with the unit.
4. Connect a video baton to the monitor.
5. If you are using the Single Use System, when preparing for intubation, insert the
®
baton into a GVL Stat. For specific instructions on connecting the baton, see
Connect the Video Baton.
6. Optional: Connect the monitor to an external source (such as a larger monitor
screen) using the HDMI to DVI cable. For specific instructions, see Connect to
External Monitor.
7. Optional: Insert a USB flash drive into the USB Port to record the video images.
8. Perform a functional check. For specific instructions, see Perform a Functional
Check.