1
Using STAR Atlas:PRO™ with the Argo Navis™
Follow this procedure to first enable the Argo Navis™ and STAR Atlas:PRO™.
1. First connect the Argo Navis™ to the telescope and ensure that all
cables are correctly positioned (the device will not work if this is not
correct).
2. Next, connect the Serial 1 port on the Argo Navis™ to the Serial
(COM: ) port on your computer using on cable supplied with the Argo
Navis.
3. Now proceed to do the star alignment with the Argo Navis™ ( as you
would normally do prior its use).
4. Start STAR Atlas:PRO™.
5. Right click the mouse on the STAR Atlas:PRO™ desktop.
6. Choose the Argo Navis menu and then the Connect option.
7. Upon successful connection to the Argo Navis™, STAR Atlas:PRO™
displays the Telescope Menu which floats on the desktop chart.
8. Following is an explanation of the main features you can now use
from the Telescope Menu and the Argo Navis option on the popup
menu.
[Centre on Scope] - receives the co-ordinates from the Argo
Navis™ and centres the STAR Atlas:PRO™ desktop chart at the
location where the telescope is pointing too.
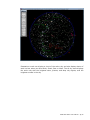
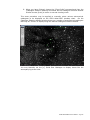
[Track Scope] - receives the co-ordinates from the Argo Navis™
with a reticle on the desktop chart. The reticle floats across the
desktop chart, indicating the position that your Telescope is pointing
too. When using the [Track Scope] feature use the Esc (escape) key
on the keyboard to stop Auto tracking, or right mouse click and
choose Stop Auto tracking from the popup menu.
[Options] – displays the telescope options window where you may
selected the default cross-hair reticle, or a Eyepiece’s field of view, or
CCD Camera’s field of view.
The [Track Scope] feature is one of the most useful features. It
allows you to see on the STAR Atlas:PRO™ desktop chart exactly
where your telescope is pointing. This makes it easy to move your
telescope to celestial objects displayed on the STAR Atlas:PRO™
desktop chart.
STAR Atlas:PRO™ User Manual – Pg 175