1
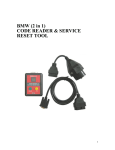
X-431 Getting Started Guide
X-431 Scanner With Open Diagnostic Platform
© 2 0 0 5 X - 4 3 1 U S A . A l l r i g ht s r e s e r v e d .
This manual, as well as the content described in it, is furnished
under license and may be used or copied only in accordance with
the te rm s of s u ch lice n se . T h e c ont e n t o f t h i s m a n u a l i s f u r n i s h e d
f o r i n f o r m a t i o n a l u s e o nl y , i s s u b j e c t t o c ha n g e w i t h o u t n o t i c e ,
and should not be construed as a commitment by X-431 USA. X4 3 1 U S A a s s u m e s n o r e s p o n s i b i l i t y o r l i a bi l i t y f o r a n y e r r o r s o r
i n a c c u r a c i e s t h a t m a y a p p e a r i n t h i s bo o k .
Except as permitted by license, no part of this publication may
b e r e p r o d uc e d , s t o r e d i n a r e t r i e va l s y s t e m , o r t r a n s m i t t e d , i n a n y
form or by any means, electronic, mechanical, recording, or
o t h e r w i s e , w i t h o u t t h e p r i o r w r i t te n p e r m i s s i o n o f X - 4 3 1 U S A .
T h i s g u i d e w a s c r e a t e d b y e Le a r n i n g , I n c . V e r s i o n 3 . 3 2 0 0 6
Table of Contents
Chapter 1: Introduction ............................................... 1-1
LAUNCH TECH CO., LTD ............................................................... 1-1
About .................................................................................................................. 1-1
X-431 USA ......................................................................................... 1-1
About .................................................................................................................. 1-1
INTRODUCING THE X-431............................................................. 1-2
Chapter 2: The X-431 Scanner .................................... 2-1
Components ........................................................................................ 2-1
Main Console ..................................................................................................... 2-2
Smartbox ..................................................................................................... 2-2
Main Unit .................................................................................................... 2-2
Mini-Printer ................................................................................................ 2-2
Cables ................................................................................................................ 2-3
Main Cable ................................................................................................. 2-3
X-431 Power Adapter ................................................................................. 2-3
X-431/CPDA Battery Cable ....................................................................... 2-3
X-431/CPDA Cigarette Lighter Cable ........................................................ 2-3
Connectors ......................................................................................................... 2-4
CF Card and Reader ........................................................................................... 2-5
Documentation ................................................................................................... 2-5
Registration Paper ........................................................................................ 2-5
CDs .............................................................................................................. 2-5
User’s Manual .............................................................................................. 2-6
Be Careful ........................................................................................... 2-6
Security Features ................................................................................. 2-6
Printer Operation - Replacing Paper ................................................... 2-6
Chapter 3: Registration................................................ 3-1
Technical Requirements...................................................................... 3-1
CF Card Reader - Operating System Requirements ........................................... 3-1
Internet Connection ............................................................................................ 3-2
©X-431 USA
1 (877) GET-X431
i
USB Port for CF Card Reader ............................................................................ 3-2
WWW.X431USA.COM...................................................................... 3-3
Registering Your X-431 Smartbox..................................................................... 3-3
Chapter 4: Downloading .............................................. 4-1
Downloading New Updates ................................................................ 4-1
Logging Into WWW.X431USA.COM ............................................................... 4-1
The Download Center......................................................................................... 4-4
Downloading to the CF Card Reader................................................................ 4-14
Updating the CF Card................................................................................. 4-15
Ejecting the CF Card ........................................................................................ 4-18
Formatting the CF Card .................................................................................... 4-19
Chapter 5: Using the X-431.......................................... 5-1
To Get Started ..................................................................................... 5-1
Turning Off the X-431........................................................................................ 5-8
Connecting to a Vehicle ...................................................................... 5-9
Your Comments Matter..................................................................... 5-13
Appendix A: Connector Usage/Chassis ID ................. A-1
Connector Usage ................................................................................ A-1
Connector Usage Guide as of November 2005 ................................................. A-2
Mercedes Benz 16PIN & 8pin Diagnostic Socket....................................... A-4
CAN BUS GUIDE ............................................................................. A-5
Use Specification of SMART OBD-II-16/OBD-II-16C & OBD-Can
Connector........................................................................................................... A-5
When is the CAN-Bus connector used? ............................................................ A-5
CAN-Bus function table (each vehicle)............................................................. A-5
Other CAN-Bus Systems................................................................................... A-8
Chassis Identification Charts ............................................................................. A-8
Mercedes-Benz Chassis Chart 1988-2005................................................... A-9
BMW Chassis Chart 1988-2005................................................................ A-12
Appendix B: Troubleshooting/F.A.Q. ..........................B-1
ii
1 (877) GET-X431
©X-431 USA
1 • Introduction
This guide will help you quickly start using your X-431. It will introduce you
to the components of the X-431 and how to properly care for it. It will then
guide you step by step through the registration process, downloading updates
from the Internet, and transferring those updates to the X-431 CF Card. This
guide will teach you how to start using your X-431 to diagnose vehicles.
LAUNCH TECH CO., LTD
About
Launch was founded in 1992 in Shenzhen, People's Republic of China. They
specialize in the research and development of automotive aftermarket
products and services.
Launch is a major provider of automobile diagnostic, test, maintenance, and
repair equipment. In 1999, Launch began to explore international markets
and is now established in North America, Europe, Asia Pacific, Central and
South America, the Middle East, North Africa, and South Africa. Launch is
supported by 2000 employees and 400 Distributors across more than 60
countries, and they are still expanding. In March of 2004, Launch opened the
Launch (Shanghai) Machinery Co., Ltd., a 68,380 square meter facility that
manufactures lifts.
X-431 USA
About
X-431 USA was established in September of 2003 to better serve our U.S.
customers. Our mission is to provide continuous customer support, including
access to advanced training so that our customers may enjoy the X-431 to the
fullest extent of its potential. From basic tech support to advanced training,
the team at X-431 USA is committed to customer satisfaction. We maintain
a continuous working relationship with LAUNCH, in order to maintain and
expand the X-431 automotive line coverage, as well as to address the needs
and concerns of our U.S. customers.
To learn more about the X431, visit our website at: www.X431USA.com.
© X-431USA
1 (877) GET-X431
1-1
Chapter 1 • Introduction
INTRODUCING THE X-431
INTRODUCING THE X-431
The X-431 is a newly developed, automobile diagnostic computer, based on
the technology of the open diagnostic platform, the most advanced
automobile diagnostic technology brought forward by Launch. The open
diagnostic platform represents the highest level of automobile diagnostic
technology today and is the developing trend for the future of this field.
The X-431 has the following characteristics:
• Covers the largest range of vehicle models in the world (with as many as
148 systems that are available)
• Full-range coverage of Mercedes Benz, BMW, VW/Audi, Volvo,
Land Rover, Fiat, Subaru, Renault, Citroen, Opel, Honda, Toyota,
Nissan, General Motors, Ford, European Mazda, Mitsubishi, European
Chrysler, Hyundai, Kia, Daewoo, and OBDII/EOBD
• Provides original programs from over 20 automobile manufacturers
• Diagnoses all of the electronic systems in a vehicle
• Supported by the largest R&D team in the world
• Displays the data stream in graphic form.
1-2
©X-431USA
Chapter 1 • Introduction
INTRODUCING THE X-431
• Comes with all of the necessary socket connectors
• Ease of use through a touch screen
• Real-time printout of test data
• Multi-language interface
• Software that is updated often and is easily downloaded through the
Internet
• Over 100 upgrades are provided each year to keep pace with the latest
models
• 1 full year of software updates are included along with a 1 year warranty
• Open-platform Diagnosis
• With the help of the SMARTBOX platform and various onboard
diagnostic sockets, the scanner can perform standard flash code, data
stream, and OBD-II tests on automotive Engines, Transmission, ABS,
and Airbags
• Capacities also extend to reading, displaying, and erasing trouble
codes, reading data streams, testing actions, and communicating with
computers
• LINUX system and Compact Flash Card facilitates simple operation
and easy upgrading
• PDA functions
©X-431USA
1-3
Chapter 1 • Introduction
1-4
INTRODUCING THE X-431
©X-431USA
2 • The X-431 Scanner
Components
The main console of the X-431 is composed of three separate pieces: the
Main Unit, the Mini-Printer, and the Smartbox. The following diagram
displays the main console and many of the connectors.
©X-431 USA
1 (877) GET-X431
1
• X-431 Main
Unit
2
• Mini-Printer
3
• CF Card
4
• Diagnostic
Connector
5
• Power
Converting
Cable
6
• Cigarette
Lighter
Cable
7
• Battery
Cable With
Single Clip
8
• Power
Adapter
9
• Main Cable
10
• Smartbox
2-1
Chapter 2 • The X-431 Scanner
Components
Main Console
The X-431 main console comes apart into three components. Should one of
your components break, you will only need to replace the broken component,
as opposed to replacing the entire console.
Smartbox
The X-431 Smartbox houses the processor. The information contained
within the CF Card is transmitted to the Smartbox, which is initialized with
the software, and can then be used to diagnose vehicles.
Main Unit
The Main Unit houses the LCD display, the on/off button, and the Hot key.
The Mini-Printer plugs into the top of the Main Unit and the Smartbox plugs
into the bottom.
Mini-Printer
The Mini-Printer uses 57mm, heat sensitive paper to provide you with
convenient print-outs of real-time data. To replace the printer paper,
see“Printer Operation - Replacing Paper” on page 2-6.
2-2
©X-431 USA
Chapter 2 • The X-431 Scanner
Components
Cables
Main Cable
The Main Cable has one end attached to the Smartbox and the other end
attached to a connector, which is then attached to the vehicle. A power
adapter cord is attached to one end of the cable to allow you to power the unit
from a standard wall outlet, the car battery, or cigarette lighter.
A 15ft extended cable is also available.
X-431 Power Adapter
The X-431 comes with a 12DC power adapter that plugs into any standard
wall outlet. Use this if you’d like to use the unit without being connected to
a car.
NOTE • If you are not connected to a car, you cannot view diagnostic data.
X-431/CPDA Battery Cable
Use this cable to get power directly from the battery.
X-431/CPDA Cigarette Lighter Cable
Use this cable to get power from the vehicle’s cigarette lighter socket.
WARNING: Do not use the power cables listed above if the unit is receiving
power from the vehicle’s diagnostic socket.
©X-431 USA
2-3
Chapter 2 • The X-431 Scanner
Components
Connectors
There are several connectors that are included with the X-431. Many of them
are designed for specific vehicle lines,
such as the 38-pin connector for Mercedes-Benz
or the 20-pin connector for BMW.
The connectors that are included are:
2-4
• Toyota -17
• Nissan-14+16
• Mitsubishi/Hyundai-12+16
• Mazda-17
• Honda-3
• Mercedes Benz-38
• Kia-20
• GM/Daewoo-12
• BMW-20
• Chrysler-6
• Ford-6+1
• Smart OBDII-16 (General use
for Honda vehicles only)
• OBDII -16C
• Fiat-3
• Universal-3
• BMW-16
• Audi/VW-4
• Daewoo
• Toyota-16
• CAN Connector
• Toyota -17F (22F)
• Volvo CAN Connector
©X-431 USA
Chapter 2 • The X-431 Scanner
Components
CF Card and Reader
The X-431 utilizes a CF Card that stores software downloaded from
www.x431.com. This software is then transferred to the Smartbox to
diagnose the vehicle.
A CF Card Reader and USB cable is included with the X-431. The Reader
connects directly to your PC as a removable disk drive.
Any compact flash card and reader can be used by the X-431.
Documentation
A packet of informational materials is included with your X-431.
Registration Paper
The registration paper contains two
important numbers you will need to
register your unit: the 12-digit Smartbox
serial number and the 8-digit secret
registration number printed inside, on the
right side.
CDs
Three CDs are included with your X-431. The Flash Card Reader Drivers
CD contains the necessary drivers for the CF Card Reader, if you are using
Microsoft® Windows® 98. The Operation Demo CD contains information
on complete visual operation of the X-431 scanner. The X-431 Open
Automobile Diagnostic Platform CD contains PDF documents for the
following car lines:
• BMW
• European Chrysler
• Honda
• European Mazda
• Mercedes Benz
• Mitsubishi
• Nissan
• OBDII
• Opel
• Volkswagen
• Toyota
These documents provide information about how to connect to vehicles and
use the X-431, including how to change the printer paper.
©X-431 USA
2-5
Chapter 2 • The X-431 Scanner
Be Careful
User’s Manual
The User’s Manual is written in eleven languages and contains basic
information about using the X-431.
Be Careful
The X-431 is durably constructed, but a level of care should be taken with its
use. Be especially careful with the connectors and cables. The pins on these
objects are delicate and can bend or break. Never force a connector or a
cable into a port.
Special attention should be given to the CF Card.
• Always eject the CF Card completely before taking the leather case off,
because it is possible to damage the ejector lever when removing the case.
• Always eject the CF Card from your PC properly (see “Ejecting the CF
Card” on page 4-19 for instructions).
• Never pull the CF Card out if the unit is on.
• Never force the CF Card into the Reader or the Unit.
Security Features
The Smartbox component of the X-431 has a 12-digit serial number assigned
to it by Launch. When the unit is registered by the owner on
www.x431.com, this serial number is coupled with the username and
password that the owner inputs. Updates downloaded using that username
and password will only work with the associated Smartbox. The CF Card is
formatted with the serial number too, and so it will only work in conjunction
with the correct Smartbox, username, and password.
Printer Operation - Replacing Paper
The MiniPrinter uses heat sensitive, 30 X 57mm (7mm core) thermal paper.
To mount the printer paper, follow the procedure outlined below:
1. Open the paper lid on the back of the printer
2. Remove the spindle and mount the paper scroll onto the spindle.
2-6
©X-431 USA
Chapter 2 • The X-431 Scanner
Printer Operation - Replacing Paper
3. Place the paper spindle into the printer with the ‘shiny’ side of the paper
facing up. The paper may not be fed correctly if the orientation in
incorrect.
4. Open the side plate, pull up the pressing road and lead the paper into the
slot. Turn the feed knob clockwise until the paper comes out of the
outlet.
5. Push down the pressing rod, mount the side plate, attach the paper lid
and re-attach the MiniPrinter to the X-431 Main unit.
©X-431 USA
2-7
Chapter 2 • The X-431 Scanner
2-8
Printer Operation - Replacing Paper
©X-431 USA
3 • Registration
Your X-431 Scanner is ready to use right out of the box. The CF Card
included with your X-431was pre-loaded with the software available at the
time of production. Keep in mind that this software could be outdated by the
time the unit gets to you, so you should update your machine before using it.
The first step is to register your Smartbox at www.x431usa.com ->
Update/Register -> ‘Register a New Tool.’ Before doing
so, read the following section on technical requirements.
Technical Requirements
CF Card Reader - Operating System Requirements
The Compact Flash Card Reader can use the default drivers for Windows®
2000, Windows® ME, and Windows® XP, as well as for Mac OS® 9.x and
Mac OS X. Just plug it in to use it.
Windows 98 Users • If your PC is running Windows 98 then you will have
to install the CF Card Reader driver from the CD, which is included in the
documentation envelope. Do not connect the compact flash reader before
installing the driver.
To install the CF Card Reader driver for Windows 98, complete the
following steps:
1. Turn on your PC.
2. Insert the CD titled Flash Card Reader Drivers.
3. In the lower left-hand corner of your screen, click the Start button and
select Run.
©X-431 USA
1 (877) GET-X431
3-1
Chapter 3 • Registration
Technical Requirements
4. Type D:\setup.exe, where D represents your CD-ROM drive. Press
ENTER.
5. The InstallShield Wizard will appear. When the Welcome screen
appears, click Next. Follow the steps the Wizard provides.
6. Reboot your PC.
7. Connect one end of the USB cable to the CF Card Reader and the other
end to a free USB port on your PC.
When the CF Card Reader is installed successfully, a Removable disk
icon will be added in the My Computer catalog.
Internet Connection
A Broadband or DSL connection is recommended. A dial-up connection
works, but it is much slower.
USB Port for CF Card Reader
A free USB port is required for the CF Card Reader. You should plug your
CF Card Reader in now, but make sure the CF Card is NOT in the Reader.
A pop-up window should appear saying “New Hardware has been found.”
3-2
©X-431 USA
Chapter 3 • Registration
X431USA.COM Registration Area
X431USA.COM Registration Area
WARNING • If your PC is running pop-up blocker software, you will
need to disable it in order to download successfully.
Registering Your X-431 Smartbox
1. Connect to the Internet.
2. Go to www.x431usa.com, click Update/Register and select the
“Register a New Tool” link at the top of the page.
3. The Terms of Service will appear. Read through it, select the ‘I agree’
check box on the bottom left, and click ‘Next’
©X-431 USA
3-3
Chapter 3 • Registration
X431USA.COM Registration Area
4. The Product info window appears.
Included in the X-431 documentation envelope is a slip of paper (see
page 2-5) that has your 12-digit Smartbox serial number printed on it.
Type that number in the Serial No. of SMARTBOX field.
5. Open the slip of paper to find the confidential, 8-digit registration
password. In the Register Password field, type that number.
6. Contact your sales distributor for the Vendor code.
3-4
©X-431 USA
Chapter 3 • Registration
X431USA.COM Registration Area
7. Click Next. The User’s info window appears. Fill in the appropriate
details. Username/Password combinations should be easy for you to
remember, yet hard for others to guess. Make sure to include all current
information, including address, telephone number and e-mail address.
IMPORTANT • You will need this Username and Password every
time you log into the X-431 Registration & Updates area. Write it down
and be sure that you do not lose it.
8. When you have finished, click Next.
©X-431 USA
3-5
Chapter 3 • Registration
X431USA.COM Registration Area
9. The Confirmation window appears notifying you that your username
and password have been registered and sent to your email. Click OK to
return to the main screen.
Now that you have registered your X-431 Smartbox, you are ready to start
downloading updates. See the next section to begin.
3-6
©X-431 USA
4 • Downloading
Downloading New Updates
Your X-431 comes preloaded with the software that was available at the time
of the unit’s production. This software may be several versions behind what
is currently available on the Internet, so you should take the time now to
update your X-431.
WARNING • If your PC is running pop-up blocker software, you will
need to disable it in order to download successfully.
Logging Into WWW.X431USA.COM
NOTE • If you have just finished registering your Smartbox, skip to step 4.
1. Connect to the Internet.
2. Go to: www.x431usa.com, click Update/Register, select the
“Download Updates” link at the top of the page
©X-431 USA
1 (877) GET-X431
4-1
Chapter 4 • Downloading
Downloading New Updates
3. You are now on the entrance page of the X-431 Updating area. If you
look to the lower left, you will see the Login/Registration area.
4. In the Username field type your username.
5. In the Password field type your password.
6. Make sure the User type is set to Customer.
7. Click Login.
4-2
©X-431 USA
Chapter 4 • Downloading
Downloading New Updates
8. You are now in the Download Center.
The Download Center
You should consider the Download Center as your primary source of
information for all X-431 software updates.
The Download Center consists of a table with the following 7 columns.
©X-431 USA
Column 1
Lists the software letter or number. Letters represent
system software. Numbers represent software for a
particular car line. Lowercase letters are required.
Column 2
Displays the software name.
Column 3
Lists the latest version of the software.
Column 4
Lists the release date of the version in Column 3.
4-3
Chapter 4 • Downloading
Downloading New Updates
Column 5
Contains information on the latest available software
version.
Column 6
Contains a pull-down menu with all of the available
languages for that software version.
Column 7
Contains the links to either view information or download
the software
The following software downloads are required: X431 SYSTEM DATA,
X431 DISPLAY PROGRAM, and X431 UPDATE TOOLS. These
downloads are grouped in the lowercase letter section.
X431 UPDATE TOOLS is an Application Download Manager that you
install on your PC and allows you to transfer downloads from your PC to the
Compact Flash Card which we discuss shortly.
The DISPLAY PROGRAM and SYSTEM DATA downloads provide
program information for the X-431. These downloads are necessary for the
X-431 to function correctly. Both of these downloads have multiple versions,
so be sure to check them once in a while to make sure you have the most
current version.
Typically though, all three of these downloads are performed infrequently.
4-4
©X-431 USA
Chapter 4 • Downloading
Downloading New Updates
The first download is the X431 Update Tools. This file can either be
downloaded from this page, as noted below, or from the ‘Update/Register’
page at www.x431usa.com. You will not save this file, you will select RUN
after clicking ‘DOWN’ (short for Download) as noted in Figure A. This
program will update your CF card when you are completed with
downloading each of the software updates. After clicking “Down”, you will
Figure A
complete the following steps.
NOTE • It’s important to note that the X431 Update Tools download is
the the only download in which you will select “Run” when the
download window appears. All subsequent downloads will utilize the
“Save” function. This is explained in step-by-step detail in the pages
ahead.
NOTE • If you click Download and nothing happens, it may be because
you have pop-up blocker software enabled. Try holding the CTRL key at the
same time as you click Download. Hold the CTRL key until you see the
download begin. If that does not work, you will have to disable your pop-up
blocker software in order to download. This may be crucial for AOL users
©X-431 USA
4-5
Chapter 4 • Downloading
Downloading New Updates
9. The File Download window appears. Be sure that File name is the file
that you just selected. Click Run.
10. The following window shows the download progress.
4-6
©X-431 USA
Chapter 4 • Downloading
Downloading New Updates
11. When the download completes, you will be shown the following dialog
box. Select Run.
12. The X431 UPDATE TOOLS install wizard appears, with the
Welcome window displayed. Click Next.
©X-431 USA
4-7
Chapter 4 • Downloading
Downloading New Updates
13. The Choose Destination Location window appears. Click Next to
accept the default destination or click Browse to choose a different
folder.
4-8
©X-431 USA
Chapter 4 • Downloading
Downloading New Updates
The Setup Complete window appears. Click Finish.
Once you click Finish, you will be returned to the Download Center.
©X-431 USA
4-9
Chapter 4 • Downloading
Downloading New Updates
NOTE • If you click ‘Download’ and nothing happens, it may be because
you have pop-up blocker software enabled. Try holding the CTRL key at the
same time as you click ‘Download’. Keep the CTRL key depressed until the
download begins. If that does not work, you will have to disable your popup blocker software in order to download. This may be crucial for AOL
users.
14. You are now ready to begin downloading the X431 DISPLAY
PROGRAM, which will be immediately followed by the downloading
of X431 SYSTEM DATA. These utilities must be downloaded. You
will click on the ‘Download’ button in the last column for each of the
files.
4-10
©X-431 USA
Chapter 4 • Downloading
Downloading New Updates
15. The File Download window appears after clicking ‘Down’. Click
Save.
Next, the Save As window appears. Here you will need to select the
folder where you will store all of your downloads. We recommend that
you create a folder on your local drive called X431 Downloads, so that
you will always know where to find all of your updates. To do this,
follow these steps. If you have already completed this step, you will
continue saving updates in this location.
16. On the left-hand side, click My Computer. Then from the Save in:
pull-down at the top, select Local Disk(C:) (most likely your local
drive is the C: drive).
©X-431 USA
4-11
Chapter 4 • Downloading
Downloading New Updates
17. The folders contained in your local drive are displayed in the main
window. Click the Create New Folder icon (as shown circled below).
A New Folder will appear in the main window underneath the other
folders. Type X431 Downloads and press ENTER.
18. You have now created your X431 Downloads folder. Select this folder
and click Open.
4-12
©X-431 USA
Chapter 4 • Downloading
Downloading New Updates
19. A new Save As window will appear. It should resemble the following
window. Click Save. The download will now begin.
©X-431 USA
4-13
Chapter 4 • Downloading
Downloading New Updates
a. The following window will appear notifying you of your
download’s progress.
Click the checkbox that reads, “Close this dialog box when
download completes” if you want to return directly to the previous
window once the download is finished.
20. Repeat steps 19-22 for the remaining software downloads.
Show All
If you need to download many car lines, and would like to see all available
car lines while downloading, click the Show All link just above vehicle car
lines. Note, the checkbox to the left is not associated with ‘Show All’.
4-14
©X-431 USA
Chapter 4 • Downloading
Downloading New Updates
NOTE • You may not need to download every car line. In the United
States, it is unlikely that you will work on Opel or Fiat. Keep in mind that
you can always come back and download anything else you might need
later.
After you have finished downloading all of the car lines that you need, your
next step is transfer the software to the CF Card.
Downloading to the CF Card Reader
If you go to your Desktop, you will notice a new icon has been added to it.
You will use this program to transfer software to the CF Card.
Updating the CF Card
1. If you have not already done so, connect one end of the USB cable to
the CF Card Reader and the other end to a free USB port on your PC.
2. Install CF Card into reader.
NOTE • If you are running Microsoft Windows 98, see “CF Card
Reader - Operating System Requirements” on page 3-1.
©X-431 USA
4-15
Chapter 4 • Downloading
Downloading New Updates
3. Double-click the X431 Update icon on your Desktop. The X431
Update program opens.
There are two areas on this window to which you need to pay attention.
In the upper left corner is the vehicle list, which is taken directly from
the X431 Downloads folder that is on your local drive. Each vehicle line
title is followed by its version number. Also notice the empty
checkboxes next to each line. You can check these off one by one to
select the lines that you want to make available to the X-431. Or at the
bottom of the list you can check off the Select all checkbox to select all
of the lines in the list. Any programs you load onto the CF Card remain
there until you manually delete them.
The second area is below the vehicle list and contains your Source
folder destination, Target folder destination, and the space statistics for
your CF Card. Your Source folder is the X431 Downloads folder that
you created previously. The Target folder is the CF Card Reader. The
space statistics will change depending on the contents of the x431
update folder and the capacity of the CF Card.
4. To change the Source folder, click the binoculars
4-16
to the right.
©X-431 USA
Chapter 4 • Downloading
Downloading New Updates
a. Select the correct folder, and click OK. (C: -> X431 Downloads)
b. If you need to change the Target folder, click the binoculars, select
the correct drive, and click OK.
You only want the outermost file in the target drive selected. For
example, if the removable drive is E:, and it has two subfolders, DATA
& GAG, you want the target to read E:, not E:\DATA or E:\GAG. The
update program will place the software into the appropriate folders
automatically.
©X-431 USA
4-17
Chapter 4 • Downloading
Downloading New Updates
NOTE • The correct drive is a Removable Disk drive. If you are not
sure which is the right drive, the way to check is when the CF Card is
inserted in the Reader, the correct drive will have two folders in it:
DATA and GAG (as shown in the previous screenshot).
5. Once you have selected your updates and determined your source and
target folders, click the X431 Update icon.
NOTE • The light on the CF Card Reader will flicker while the card
is being updated.
6. When it is finished updating, a pop-up window will appear.
Click OK.
7. Your CF Card is now updated. Click the Exit icon.
WARNING • DO NOT REMOVE THE CF CARD YET.
4-18
©X-431 USA
Chapter 4 • Downloading
Downloading New Updates
Ejecting the CF Card
If you pull out the CF Card without ejecting it, you can lose data. Always
follow these steps to eject the CF Card.
1. Open My Computer from your Desktop or the Start menu.
2. Right-click Removable Disk. A pop-up menu appears.Click Eject.
It is now safe to remove the CF Card.
Formatting the CF Card
Formatting the CF Card deletes all of the files that are stored on it. You may
experience errors while trying to update your card. Formatting your card
clears the data and allows a fresh update to complete succesfully.
To do this, follow these steps.
1. Open My Computer from your Desktop or the Start menu.
©X-431 USA
4-19
Chapter 4 • Downloading
Downloading New Updates
2. Right-click Removable Disk. A pop-up menu appears.Click Format.
The CF Card is now formatted.
NOTE • You may want to format your CF Card if you do not plan to use
all of the car lines. Format your card first and then update it.
Deleting Old Software Versions from CF Card
You can delete old versions of software from your CF card using the same
X431 Update software on your desktop.
1. Connect your CF Card to the reader
2. Double Click the X431 Update software icon on your desktop
3. Select the software versions you’d like to delete by placing a
checkmark next to its name (See Figure 4-1)
4-20
©X-431 USA
Chapter 4 • Downloading
Downloading New Updates
4. Click the trashcan icon (See Figure 4-1)
5. Select ‘Delete’ when the program asks you to confirm the delete
Figure 4-1: Software Deletion from CF Card using X431 Update software
©X-431 USA
4-21
Chapter 4 • Downloading
4-22
Downloading New Updates
©X-431 USA
5 • Using the X-431
To Get Started
Now that you have registered your unit and downloaded all of the necessary
software, you are ready to start using the X-431.
1. Begin by connecting the main cable and inserting the CF Card (the label
on the CF Card that reads “Up Side” should face up).
2. Connect the X-431 Power Adapter to the main cable’s power adapter
cord and plug the other end into a wall outlet.
3. Press the On/Off button to turn the X-431 on.
©X-431 USA
1 (877) GET-X431
5-1
Chapter 5 • Using the X-431
To Get Started
4. The LCD screen will light up and will read “Press the Hot-Key to adjust
Touch Panel.” Similar to a palm pilot, the touch screen has quadrants
that need to be initialized. If you do not press the Hot Key, you will be
taken to the X-431 Desktop, which allows you to begin diagnosing a
vehicle.
If this is the first time you are using your X-431 or if you are having
trouble with your LCD Display, then you should press the Hot Key to
initialize the quadrants.
5. The screen will read “Detecting noise...Please wait.” Then a cross-hair
cursor will appear on the screen and travel to the center of the screen.
Using the stylus, press and hold it to the cross-hair until the cross-hair
glows. Then remove the stylus from the LCD. The cross-hair moves to
another location. Repeat this procedure for the four corners.
6. The User Information screen appears. The information you input here
will be displayed on any printouts.
Unless you fill out this screen now and press OK, it will appear every
time you turn the machine on (you do not have to fill out every field).
To input information you will need to launch the Keyboard.
a. On the bottom of the screen next to the clock, is a symbol of a
Keyboard. Tap it with the stylus to launch the Keyboard (or tap it
again to close the Keyboard).
5-2
©X-431 USA
Chapter 5 • Using the X-431
To Get Started
The Keyboard appears on the bottom of the screen.
The Keyboard emulates a standard PCs keyboard.
Three of the four function buttons are used for writing Chinese with the
stylus. The last function button moves the Keyboard from the bottom of
the screen to the top of the screen (this is useful because some screens
do not have a scrolling feature).
©X-431 USA
5-3
Chapter 5 • Using the X-431
To Get Started
Tap the Shift key to access capital letters and additional punctuation.
Notice how the Keyboard changes.
b. Fill out the information that you want to appear on your printouts
(such as the company name, phone number, and address) and then
press OK.
7. The next screen to appear will say “LAUNCH” across it. On the bottom
of the screen tap Start. You are presented with the following seven
choices:
5-4
1
GAG
• Select GAG and then GD Scan to start scanning
vehicles.
2
PIM
• Personal Information Management - grants you
access to the PDA functions of the X-431
(Memo, Address, To do, and Schedule).
3
Tools
• Grants you access to the Calculator, the World
Time feature, Minidict (Chinese/English
dictionary), Picview (a picture application), and
Run.
4
Game
• You can play FIR and Reversi (tap the question
mark at the top for instructions).
5
Control
Panel
• Offers access to five systems: app, power,
clock, contrast, and language.
6
Turn off
• Turns off the X-431 (it takes 4 seconds to power
down).
7
Information
• Grants access to the User Information screen
and the About screen. The About screen displays
your Serial (Smartbox) number, Hardware
version, System Software version, and lists your
GAG Software.
©X-431 USA
Chapter 5 • Using the X-431
To Get Started
8. Select Control Panel. The following screen appears:
a. Select clock. The Date/Time screen appears.
©X-431 USA
5-5
Chapter 5 • Using the X-431
To Get Started
b. You must set the time zone first. Select Set time zone.
c. Select your time zone and click OK. The top of the screen will read,
“Updating configuration, please wait...” When it is finished, you will
be returned to the Date/Time screen.
d. Now you must set the date. Use the calendar to locate today’s date
and select it. Then select Set date. The date at the top of the screen
will change.
e. Now set the time by selecting Set time.
5-6
©X-431 USA
Chapter 5 • Using the X-431
To Get Started
f. Open the Keyboard. Select AM or PM.
g. Tap the Hours field to establish your cursor there and then use the
Keyboard to input the correct hour.
h. Repeat this procedure for Minutes and Seconds.
i. Close the Keyboard and select OK.
j. You are now back on the Date/Time screen. Select Quit to return to
the Control Panel.
9. Now select contrast.
Use the slide-scale to adjust the contrast and then select OK. Wait while
the configuration updates.
©X-431 USA
5-7
Chapter 5 • Using the X-431
To Get Started
The language screen allows you to change the language.
WARNING • To change the language, you have to download the
software updates in that language. DO NOT
ATTEMPT TO CHANGE THE LANGUAGE
WITHOUT DOWNLOADING THE CORRECT
SOFTWARE UPDATES FIRST.
10. Close the Control Panel by selecting the X in the upper right hand
corner.
You are now ready to start scanning vehicles. Turn off the unit and choose
your first vehicle. To turn off the unit, refer to the following section.
Turning Off the X-431
There are two correct ways to turn off the X-431.
• Select Start and then select Turn off. It takes 4 seconds for the unit to
power down. If possible, you should always follow this procedure to
turn off the unit.
• This method should only be used if the X-431 gets hung or is
unresponsive. Hold down the On/Off button until the screen turns off.
Never unplug the connector from the vehicle without turning the unit off
first.
5-8
©X-431 USA
Chapter 5 • Using the X-431
Connecting to a Vehicle
Connecting to a Vehicle
There are a few things to keep in mind when using the X-431.
• Always use the OEM connector that comes with the X-431, even if the
vehicle has an OBDII socket.
• If the unit is cold, the monitor may not function properly. Allow it to
warm up before using.
• The X-431 is powered by the vehicle’s battery. If the battery voltage is
less than 10, the unit will notify you by beeping.
You are now ready to connect to the car.
1. Take the appropriate connector and attach it to the free end of the main
cable. Then take that end and attach it to the car.
2. Turn on the X-431.
3. Allow it to run until you see “LAUNCH” displayed across the screen.
Then press the Hot Key (button above the power key). The following
screen will appear:
©X-431 USA
5-9
Chapter 5 • Using the X-431
Connecting to a Vehicle
4. Touch START. A screen resembling the following will be displayed.
5. Select the car line to which you are connected (we have selected
Volkswagen). From this point on, the X-431 mirrors the OEM factory
tool.
5-10
©X-431 USA
Chapter 5 • Using the X-431
Connecting to a Vehicle
6. Choose the software version that you would like to use to scan the
vehicle (keep in mind that you may have only one version because that
is all you have downloaded so far. If you would like multiple versions,
go back to www.x431.com and download previous versions).
The latest version will be listed on top. Select it and then press OK.
NOTE • If you have more than four versions stored on your CF Card,
you need to press Page Down to see the remaining versions.
©X-431 USA
5-11
Chapter 5 • Using the X-431
Connecting to a Vehicle
7. The Smartbox will now be initiliazed (that is, the software stored on the
CF Card will be uploaded to the Smartbox), as shown below.
When initialization is finished, press OK.
8. Your X-431 is now ready for diagnosis. A screen similar to the
following is displayed. (Note, for some vehicles lines, you may be
required to select the vehicle model on which you are working before
this screen is displayed.)
5-12
©X-431 USA
Chapter 5 • Using the X-431
Your Comments Matter
At this point, the X-431 becomes highly intuitive and is really very user
friendly. Choose from the systems displayed to find out which systems have
codes.
Your Comments Matter
Launch has more than 150 engineers dedicated to perfecting the software for
the X-431. In order to help them achieve this, your feedback is critical.
Should you find a system that has unidentified codes, please notify X-431
USA with the following information:
• Vehicle make, model, and year.
• The connector you used.
• The particular system in which you were working.
• Any codes that came out of the system.
• The ECU version or ID number.
• The X-431 software version.
You can contact X-431 USA at 1(877) GET-X431.
©X-431 USA
5-13
Chapter 5 • Using the X-431
5-14
Your Comments Matter
©X-431 USA
A • Connector Usage/Chassis Identification
Connector Usage
• Due to the complexity of models and years, this is compiled as a guide only.
You should refer to the manufacturer’s service infomation for complete
connector usage information.
• If the car has an OEM-style connector in conjunction with an OBD-II style
connector, the OEM style will provide the most capabilities for the OEM
software. If the car only has an OBD-II style connector, that connector will
provide both OEM and generic (OBD-II) capabilties.
©X-431 USA
1 (877) GET-X431
A-1
Chapter A • Connector Usage/Chassis Identification
Connector Usage
Connector Usage Guide as of June 2006
Manufacturer
Year Range
Connector
Up to 1995
1996 Onward
2004 Onward (Audi A8)
1996 Onward
Audi/VW 4
OBD II -16C
CAN Connector
OBD II -16C
UP to 2002
2000 Onward
1996 Onward
BMW 20
BMW 16
OBD II -16C
OBD II
Up to 1996
1996 Onward
1996 Onward
Chrysler -6
Smart OBD II -16
OBD II -16C
Daewoo
OEM
OBD II
1999 Onward (USA)
1999 Onward (USA)
OBD II -16C
OBD II -16C
Ford
OEM
UP to 1995
1996-2004
2005 Onward
1996 Onward
Ford 6+1
OBD II -16C
CAN Connector
OBD II -16C
Audi
OEM
OBD II
BMW
OEM
OBD II
Chrysler
OEM
OBD II
GM
OEM
Up to 1996
1996 Onward
1996 Onward
GM/Daewoo -12
OBD II -16C
OBD II -16C
Honda / Acura
OEM
Up to 1996
1996 Onward
1996-2005
Honda -3
Smart OBD II -16
Smart OBD II -16
Up to 1995
1996 Onward
1996 Onward
Mits/Hyun 12-16
Mits/Hyun 12-16 (OBD II Side)
Mits/Hyun 12-16 (OBD II Side)
Up to 2003
2003 Onward
1996 Onward
Kia 20
SMART OBD II-16
OBD II -16C
Up to 1995
1995 Onward
1996 Onward
N/A
OBD II -16C
OBD II -16C
OBD II
Hyundai
OEM
OBD II
Kia
OEM
OBD II
Landrover
OEM
OBD II
A-2
©X-431 USA
Chapter A • Connector Usage/Chassis Identification
Manufacturer
Mazda
Mitsubishi
Mercedes Benz
Year Range
Connector
OBD II
UP to 2004
2004 Onward
1996 Onward
Mazda -17
OBD II -16C
OBD II -16C
OEM
Up to 2004
Mitsubishi/Hyundai -12+ 16
OBD II
1996 Onwards
Mitsubishi/Hyundai -12+ 16
OEM
Up to 1993
1992 - 2000
1999 Onwards
Universal -3
Mercedes Benz -38
OBD II -16C
2003 Onwards
1996 Onwards
CAN Connector
OBD-II -16c
Up to 1999
2000 Onward
1996 Onward
Nissan -14 +16
Nissan -14 +16
Nissan -14 +16
OEM
(See CANBus Guide)
OBD II
Nissan/Infinity
Connector Usage
OEM
OBD II
Porsche
OBD II
911 & 996 ONLY
1996 Onward
OBD II -16C
Saab
OEM
OBD II
1996 Onward
1996 Onward
Smart OBD II -16
OBD II -16C
Sprinter
OEM
OBD II
1996 onwards
OBD II -16C
OBD II -16C
Subaru
OEM
OBD II
1996 Onwards
1996 Onwards
OBD II -16C
OBD II -16C
Suzuki
OEM
OBD II
1996 Onwards
1996 Onwards
Smart OBD II -16
Smart OBD II -16
DLC 1
DLC 2
DLC3
Toyota -22(17f) ABS/TRACS/AB
Toyota -17 All Sys./Blink Codes
Toyota -16 1996 UP All Sys./OBDII
Up to 1995
1996 Onward
2004 Onward (Audi A8)
1996 Onward
Audi/VW 4
OBD II -16C
CAN Connector
OBD II -16C
1996-1998
1999 Onward
1996 Onward
Smart OBD II -16
Volvo CAN
OBD II -16C
Toyota/Lexus
Volkswagen
OEM
OBD II
Volvo
OEM
OBD II
©X-431 USA
A-3
Chapter A • Connector Usage/Chassis Identification
Connector Usage
Mercedes Benz 16PIN & 8pin Diagnostic Socket
USE 3-PIN UNIVERSAL CONNECTOR
Some Mercedes-Benz models up to 1996 may have an 8 or 16 pin diagnostic connector. The diagnosis
program for these models is performed through the “Flash Fault Code” option, which is at the bottom of
the Mercedes-Benz chassis number selection menu. See the below graphics below to help with the proper
connections.
- Black Lead
- Black Lead
Red Lead
(or battery clip
connector if no
power is present)
A-4
Note: Use battery clip connector for positive (red
lead) connection.
Pin
Definition
Pin
Definition
1
Body ground - Black Lead
1
Body ground (black lead)
2
On-board diagnostic switch
2
Ignition signal/Press button
3
CIS-E/DM
3
Diagnosis percentage
4
EDS/LED
4
Engine trouble code/LED
5
ASD
5
ASD
6
AB
6
SUS trouble code
7
AC(124)/RB(129)
7
A/C trouble code
8
DI/HFM, SFI, MFI/DMS
8
Ignition control system
9
ADS/RB(124)
10
RST(129)/Speed signal
11
ATA
12
IRCL
13
EATC
14
EA(124)/ISC(124)/ESCM(129)/CC
15
Not used
16
Postive pole of power
- Red Lead (Sometimes not present- If
so, then use battery clip)
©X-431 USA
Chapter A • Connector Usage/Chassis Identification
NCVECS Hard to Find Locator Guide
NCVECS Hard to Find Locator Guide
The image above represents the actual location codes used in this Guide
Figure A-1
Manufacturer
Year
Model
Location
Acura
1996-98
Integra, CL, RL, NSX
7/open
behind console, passenger side
Acura
1999-2001
Integra, NSX
7/open
behind console, passenger side
Acura
1996-98
TL
8/cover
behind ashtray in console
Acura
1999-2001
TL, CL
8/cover
cover below radio in center console
Acura
1999-2001
RL
8/cover
behind ashtray in center console (rubber flap)
Audi
1996-1997
A6, Cabriolet
9/open
rear ashtray, behind sliding cover
1996-98
All
7/cover
behind glove box
BMW
1996-2000
3,5,& 8 series
2/cover
cover in trim panel under drivers side dash
BMW
1996-2001
7 series
8/cover
cover marked OBD below radio
BMW
2000-02
Z8
2/cover
next to kick panel, pull cover down
BMW
1996-2001
X5
2/cover
cover marked OBD below radio
Daewoo
1999-2001
Lanos
6/open
Ferrari
96-2000
All
3/open
deep under drivers dash, right side of column
Ford
1996-97
Bronco
7/cover
some-under passenger side of dash
Ford
1996-97
F series
7/cover
some-under passenger side of dash
Ford
1996-97
Thunderbird
7/cover
Ford
1999-2000
Focus
2/cover
left of hood release, behind pull-down cover
1996-98
Accord
6/cover
behind ashtray/storage compartment
Bentley
Honda
©X-431 USA
Comments
A-5
Chapter A • Connector Usage/Chassis Identification
NCVECS Hard to Find Locator Guide
Figure A-1
Manufacturer
Year
Model
Location
Comments
Honda
1996-98
Odyssey
7/cover
behind console, passenger side, rubber cover
Honda
1996-99
Del Sol
7/open
under passenger dash
Honda
1996
Prelude
8/open
above shifter, below cup holder
Honda
1997-98
Prelude
7/open
passenger side of console, behind trim panel
Honda
1997-2001
CR-V
7/open
behind console, passenger side
Honda
2001-2002
Insight (hybrid)
8/open
right edge of console
Honda
2000-02
S2000
7/open
behind console, passenger side
Hyundai
1996-99
Accent
2/open
above coin box
Land Rover
1997
Defender 90
8/cover
behind fuse box cover, under parcel tray
Land Rover
1996-2001
Range Rover
7/open
next to console
Lexus
1996-2001
SC 300/400
2/cover
Lexus
1996-2001
LS 400
1/cover
Lexus
2001
LS 430
2/cover
Lexus
2000-01
IS 300
2/cover
Lower left side of driver’s dash, next to kick
panel
Lexus
1996-97
LX 450
2/cover
Lower right edge of dash, behind fuse box
cover
Lexus
1998-2001
LX 470
2/cover
Lower right edge of dash, behind fuse box
cover
Mazda
1996-98
Miata
1/cover
behind fuse box access panel
1996
Expo
2/open
behind fuse box, slide connector alongside
panel
Mercedes-Benz
1996-99
All Vehicles
2/cover
behind trim panel
Mercedes-Benz
2000
S Class
2/cover
behind trim panel
Mercedes-Benz
2000
C Class
3/cover
Mercury
1996-97
Cougar
7/cover
Porsche
1996-2001
911
6/cover
drivers side of center console
Rolls-Royce
1996-98
All
7/cover
behind glove box
Subaru
1996-97
SVX
3/cover
right of steering column, hinged cover by
ignition
Subaru
2000-01
Forrester
2/cover
lower dash, pull-down door
Subaru
2000-02
Impreza, WRX
2/cover
lower dash, pull-down door
Subaru
1996-2002
Legacy
2/cover
left side of dash, behind hinged cover
Toyota
1996-1999
Avalon
2/cover
behind fuse box cover
Toyota
1996
Camry
2/cover
behind coin-box- remove box
Toyota
1996-99
Celica
3/cover
Mitsubishi
A-6
behind cover, above parking brake
©X-431 USA
Chapter A • Connector Usage/Chassis Identification
NCVECS Hard to Find Locator Guide
Figure A-1
Manufacturer
Year
Model
Location
Toyota
2000-01
Celica
2/cover
Toyota
2000-01
Echo
2/cover
Toyota
2002
Highlander
2/cover
Toyota
1996-2001
Land Cruiser
2/cover
Toyota
1996
MR2
n/a
Toyota
1996-99
Paseo
2/cover
behind fuse cover
Toyota
1996-97
Previa
6/cover
top of instrument panel under cover- center
latch
Toyota
1996-99
Supra
2/cover
Toyota
1996-98
Tercel
2/cover
behind fuse box cover
Volkswagen
1996-98
Cabrio, Golf, Jetta
6/cover
remove ashtray, slide cover to access
Volkswagen
1996-97
Passat, Eurovan
4/cover
“L”shaped panel behind steering wheel
Volkswagen
1996-2001
GTI
6/cover
remove ashtray, slide cover to access
Volkswagen
2001 1/2 on
Passat
4/open
Volvo
1997-98
850
7/cover
Under coin tray in center console
Volvo
1996-2000
960, C70, S70, V70,
V90
9/cover
front edge of console storage, under cover
Volvo
2000-2001
S40
6/open
Volvo
1998-2000
S80
2/cover
©X-431 USA
Comments
behind fuse cover
Use engine bay connector
under driver’s dash behind cover, left side
A-7
Chapter A • Connector Usage/Chassis Identification
CAN BUS GUIDE
CAN BUS GUIDE
Use Specification of SMART OBD-II-16/OBD-II-16C
& OBD-Can Connector
1. SMART OBD-II-16 connector is used for testing the vehicle model without a CAN Bus
system (if the 6 and 1-pin positions of 16-pin diagnostic socket doesn’t have sheet metal, it
indicates that the vehicle doesn’t have a CAN-Bus system).
2. OBD-II-16C connector is used for testing the non-CAN-Bus systems of the vehicle
model with CAN-Bus system (if the 6 and 14 pin positions of 16 pin diagnostic socket has
sheet metal, it indicates that the vehicle is a CAN-Bus system).
3. OBD CAN connector is used for testing CAN-Bus system (if the 6 and 14- pin positions
of 16-PIN diagnostic socket has sheet metal, it indicates that the vehicle is a CAN-Bus system).
When is the CAN-Bus connector used?
1. Must use CAN-Bus connector when using diagnostic software OBD CAN.
2. Must use CAN-Bus connector when testing certain CAN-Bus systems of BENZ, VW,
RENAULT, and MAZDA.
CAN-Bus function table (each vehicle)
Available models and systems tested by X-431 at present are as following:
A-8
©X-431 USA
Chapter A • Connector Usage/Chassis Identification
CAN BUS GUIDE
1. Mercedes-Benz
Table A-1
Chassis Model
System
Version Read Codes Clear Codes Data Stream Actuation
MERCEDES1988 1989 1990 1991 1992 1993 1994 1995 1996 1997 1998 1999 2000 2001 2002
2003
BENZ
190D
190E
220
260E
300CE
300CE
211
CABRIOLET
300D
300D TURBO
300E
300E 4MATIC
300SD TURBO
300SE
300SEL
300SL
300TE
300TE 4MATIC
350SD TURBO
350SDL
201 201
201
S350201
124 124
124 124
All
Model
AB
D
D
D
201
CGW201
201 D201
D
D
SDS124
124
124 D
D
D
D124
D
D
124 D124
124 124
D
124 124
140 D140
140 140
D
D
D
D
D
D
AB
124
ESM124
124
124
124 124
ABC
124 124
126
126
126
126
126 126
126
SDS126
129 129
BCM124
124
124 124
EIS126
126
CGW
124
124
D
D
D
129 129
124 D124
124 124
D
D
D
D
D
D
D
D
D
D
D
D
D
D
D
D
D
D
D
D
D
D
D
D
D
140
140 D140
129
D
D
HRA
350SDL TURBO
400E
400SE
400SEL
420SEL
500E
500SEC
500SEL
500SL
560SEC
560SEL
560SL
600SEC
600SEL
600SL
C220
C230
C230CL
C230K
C240 SEDAN
4MATIC
C240 4MATIC
WAGON
OCP126
UCP
126
126
D
LCP126
126
SCM
ICM
126
126
107
124 124
140 D
140
129 129
126
PTS126
126 126
126
126
107 PASS-SAM
DR-SAM
REAR-SAM
124
124
D140
140 140
D
129 129
D
202
D
202
202
2004
2005
203.040
203.740
203.040
203.740
203.040
203.740
D
202
D
D
DCM-RL
D
D
D
DCM-RR
D
D
D
D
203.081
203.081
203.081
DCM-RL
D
D
D
D
203.281
203.281
203.281
ESA-DR
D
D
D
D
ESA-PASS
D
D
D
D
HS
D
D
D
AAC
D
D
D
©X-431 USA
D
202
DCM-FR
D
202
202
D
202
203.7
A-9
Chapter A • Connector Usage/Chassis Identification
CAN BUS GUIDE
2. Renault
Table A-2
MERCEDES1992 1993 1994 1995 Version
1996 1997
Model1988 1989 1990 1991System
BENZ
C240 SEDAN
C240 WAGON
C280
C320 4MATIC
SEDAN
C320 4MATIC
WAGON
C320 SEDAN
II
C320 MEGANE
WAGON
C320CL
C32 AMG
C36
C43
C43 AMG
C55 AMG
C86
CL55 AMG
CL500
CL500 COUPE
CL600
CL65 AMG
CL600 COUPE
CLK320
CLK320
CABRIOLET
CLK430
Model
CLK430
CABRIOLET
CLK500
CLK500
CABRIOLET
CLK55 AMG
CLK55 AMG
CABRIOLET
E300D
E300DT GOLF 5,
E320
Audio A8 4.2L
E320 4MATIC
SEDAN
E320 4MATIC
WAGON
E320
CABRIOLET
E320 COUPE
E320 SEDAN
D
Petrol Injection
202
A.B.S.
1998 Codes
1999
Read
202
202
D
D
202
202
D
2000 Codes
2001 Read
2002Data2003Actuation
2004
Clear
D
202
203.061
202.029
D
203.061
D
203.061
203.261
D
D
D
D
Instrument Panel
D
D
D
Airbag/Pretensioners
D
D
D
202
D
202
D
202
Upc
202
Diesel Injection
D
D
D
D
140
203.064
203.284
203.284
203.284
203.064
203.064
D
203.064
203.264
203.264
203.264
203.264
203.764
203.764
Version
D
D
D
D
D
D
D
202.033
215.374
215.375
215.378
215.378
215.376
215.376
215.376
208.365
208.365
208.365
209.365
209.365
209.365
208.465
208.465
208.465
208.465
209.465
209.465
209.465
Read208.37
Codes
Clear 208.370
208.370
Codes
D
D
D
D
Parking Brake
210
210
D
D
D
210
210
210
D
Seat/Mirror Adjustment
D
Central Module
D
D
210.282
D
210.282
D
210.282
D
210.065
208.470
D
208.374
209.375
D
209.376
D
D
209.475
D
209.376
209.476
209.476
D
210.082
211.082
D
210.282
210.282
211.282
D
210.065
D
210.065
Mazda 6
A-10
2003-2004
211.082
D
211.282
211.282
D
211.065
D
211.065
Table A-4
Year
209.475
209.376
4. Mazda
Model
209.375
D
210.082
D
210.065
208.470
208.474
D
D
210.065
208.374
D
210.082
Actuation
D
D
210.082
Read
208.370
Data
208.470
D
210
D
210.082
124
215.374
215.375
208.365
Auto Transmission System
124
215.373
215.375
208.365
D
124
215.373
215.375
140
D
124
215.373
215.375
140
D
124
203.076
140
Engine System
124
203.065
D
208.470
Parking
203.065
215.379
Table A-3
Head LIght Range Control
203.084
203.064
D
D
D
3. VW (Golf 5, Audio A8 4.2L)
Electronic Control Drive Door
203.084
202
215.375
System
203.261
D
203.065
Passenger Compartment Unit
203.061
D
203.084
Variable P.A.S.
203.061
D
203.261
2005
System
Read Codes
Clear Codes
Read Data
Engine System
D
D
D
Auto Transmission System
D
D
D
Instrument Panel System
D
D
D
Actuation
©X-431 USA
211.065
Chapter A • Connector Usage/Chassis Identification
CAN BUS GUIDE
5. OBD-CAN
OBD-CAN can test engine systems according OBD-II and EOBD2 ISO15765-4(CAN) Standard, and the
1988 1989
1992 code,
1993 1994
1995trouble
1996 1997
1998
2000data 2001
2003
2004
functions
are: 1990
read1991
trouble
clear
code,
read 1999
dynamic
stream,2002
read freezing
frame2005
and
124
124
210.265
210.265
210.265
210.265
210.265
211.265
211.265
211.265
readiness test.
MERCEDESBENZ
E320 WAGON
E320 CDI
E420
E430
E430 4MATIC
E500
E500 4MATIC
SEDAN
E500 4MATIC
WAGON
E55 AMG
G500
G55 AMG
ML320
ML350
ML430
ML500
ML55 AMG
S320
S320 LWB
S320 SEDAN
S320 SEDAN
LWB
S350
S420
S430
S430 4MATIC
S500
S500 4MATIC
S55 AMG
S600
S500 COUPE
S500 SEDAN
S600 COUPE
S600 SEDAN
SL320
SL500
SL55 AMG
SL600
SL65 AMG
SLK230
SLK32 AMG
SLK320
SLK350
SLK55 AMG
211.026
124
124
210
210.070
210.070
210.070
210.083
210.070
210.083
210.070
210.083
Other CAN-Bus Systems
124
211.070
210.074
210.074
210.074
211.070
211.070
211.083
211.083
210.074
463.249
211.076
463.249
463.246
211.283
211.076
463.249
463.246
211.283
211.076
463.249
463.246
163.175
163.175
163.175
163.175
220.170
220.183
220.175
220.184
220.174
220.176
220.170
221.183
220.175
220.184
220.174
220.176
220.170
221.183
220.175
220.184
220.174
220.176
1. VW Vehicles: Diagnostic functions of all systems are being expanded. The Golf 5, Audi A8 4.2L use
the CAN-Bus system and all systems of these models can be used with CAN-Bus diagnostic communica163.154 163.154 163.154 163.154 163.154
tions mode.
163.157 163.157 163.157
163.172
163.172
2. Volvo Vehicles: Systems of almost all model years use the CAN-Bus
diagnostic
especially the
163.174 163.174
163.174 system,
163.174
140 140 140
S80, S60, and XC90. CAN-Bus 140
diagnosis
of these models140
are
different
then
general
OBD-CAN
diagnosis
140
and requires the use of special Volvo CAN connectors.
140
140
140 140
3. Nissan Vehicles: BCM and IPDM
are being developed.
140
140
140
140
140
140
140
Chassis Identification Charts
220.170
220.170
220.170
220.175
220.175
220.175
220.173
220.178
220.173
220.178
140
140
140
140
140
129
129
140
140
140
140
129
129
140
140
140
140
129
129
140
140
140
140
129
129
129
129
129.068
129.068
129.068
129
129
129
129
129
129
129.076
129.076
129.076
170.447
170.447
170.447
170.449
170.449
170.466
170.465
140
The following pages show the chassis identification charts for Mercedex-Benz and BMW from 1988
140
through MY 2005.
170.465
230.475
230.474
230.475
230.474
230.476
170.449
170.466
170.465
170.449
170.466
170.465
230.475
230.474
230.476
230.479
171.456
171.473
©X-431 USA
A-11
Chapter A • Connector Usage/Chassis Identification
CAN BUS GUIDE
BMW Chassis Chart 1988-2005
BMW
318i
318i Conv.
318is
318ti
323Ci
323Ci Conv
323i
323i Conv.
323is
325
325
325Ci Conv
325Ci
325i
325i Conv.
325i SPORT
WAGON
325is
325ix
325IX AWD
325xi SEDAN
325XI SPORT
WAGON
328Ci
328i
328i Conv.
328is
330
330Ci CONV
330Ci COUPE
330i
1988
528i sport wagon
530
X-431 USA
1990
1991
1992
1993
1994
1995
E30
E30
E36
E36
E30
E36
E36
E36
E36
E36
E36
E36
E36
E36
E36
E36
E36
E36
E36
E36/5 E36/5 E36/5 E36/5 E36/5
1996
1997
1998
E46
E46
E30
E30
E30
E30
E30
E30
1999
E46
E46
E46
2000
2001
2002
2003
E46
E46
E46
E46
E46
E46
E46
E46
E46
E46
E46
E46
E46
E46
E46
E46
E46
E46
E46
E46
E46
E46
E46
E46
E46
E46
E46
E46
E46
E46
E46
E46
E46
2004
2005
E46
E46
E46
E46
E60
E60
E60
E60
E30
E30
E30
E30
E30
E30
E36
E30
E36
E30
E36
E36
E36
E36
E30
E30
E30
E36
E36
E36
E36
E30
E30
E30
E36
E36
E36
330xi AWD SEDAN
525
525i
525i sedan
525i sport wagon
525i touring
wagon
528e
528i
1989
E34
E34
E34
E34
E34
E34
E36
E36
E36
E36
E36
E36
E46
E36
E36
E46
E46
E34
E39
E39
E39
E39
E39
E39
E34/2 E34/2 E34/2
E28
E39
E39
E39
E39
E39
A-13
Chapter A • Connector Usage/Chassis Identification
BMW
530i
530i sedan
530i touring
wagon
535i
535is
540i
540i sedan
540i sport wagon
540I
545
635csi
645
735i
735iL
740i
740iL
745i
745Li
750iL
760i
760Li
840Ci
850i
850Ci
850CSi
L6
X-431 USA
1988
1989
1990
1991
1992
1993
CAN BUS GUIDE
1994
E34
1995
E34
1996
1997
1998
1999
2000
2001
2002
2003
E39
E39
E39
E39
E39
E39
E39
E39
E39
2004
2005
E60
E60
E34/3 E34/3
E28
E28
E34
E34
E34
E34
E34
E34
E34
E39
E24
E24
E32
E32
E39
E39
E39
E39
E63/64 E63/64
E32
E32
E32
E32/2 E32/2 E32/2
E32
E32
E32/2 E32/2
E38
E38
E38
E38
E38
E38
E38
E38
E38
E38
E38
E38
E38
E65
E66
E32/2 E32/2 E32/2 E32/2 E32/2 E32/2 E32/2
E31
E38
E38
E31
E31
E31
E31
E31
E31
E31
E31
E31
E38
E38
E38
E65
E66
E66
E66
E65
E38
E31
E31
E24
E38
E65
E66
E24
A-14
E65
E66
Chapter A • Connector Usage/Chassis Identification
A-16
CAN BUS GUIDE
©X-431 USA
B • Troubleshooting/F.A.Q.
General Information
Why is my screen blank after I power on the machine?
Remove the CF card and restart the machine to see if there is a normal display. If the display is normal when the CF card is taken out, the CF card should be replaced. If the
screen is still blank, contact your local dealer for assistance.
Why won’t my unit power up?
Make sure the connector is firmly connected to both the unit and the vehicle. In addition,
make sure that the CF card is in the machine. If the unit still refuses to power up, contact
your local dealer for assistance.
Why does the LCD touch-screen respond so slowly?
It is most likely because the temperature in your location is close to the lower limit of the
operating temperature range of the unit (0°-50°C). If this is the case, warm up the unit for
10-20 minutes before operating.
Why can’t I see the information on the screen clearly when the ambient light is not
good?
Locate the light bulb icon on the lower right corner of the touch screen. Click it to turn the
backlight on/off.
Why can’t I see characters on the backlit screen?
Check to see if the power is firmly connected. If so, turn off the machine, unplug the
power connector and re-plug it back in. Turn on the machine after it has been connected
to a power source for at least 2 seconds.
The screen is too white, I cannot see the display. How do I adjust the contrast?
In the Control Panel interface, click the ‘Contrast’ icon to open the Contrast Interface.
Click the position you want, and then click ‘OK’.
Why does the screen either not respond, or respond incorrectly when I click it with the stylus (included pointing device). How do I realign the screen to correct the situation?
It is necessary to realign or recalibrate the screen. Follow these steps to initialize the calibration:
1. After switching on the machine, follow the tips to press the hot key. The calibration
interface will be opened.
2. Click the cross cursor on the screen accurately (precisely in the center of the cross),
and wait until it changes. The cross-cursor will then move to each of the four corners.
3. Repeat the process of clicking in the center of each cross-cursor until the process finishes. The screen will then return to the main interface.
eLearning, Inc.
B-1
:
Entering Information
Why can’t I input data using the Soft Keyboard (on-screen keyboard)?
Either the position where the cursor lies cannot be edited, or you haven’t activated the
cursor on the input position. Use the stylus to select the field you wish to edit. When the
cursor blinks, you can input the data.
Why is the screen inactive after the cross-cursor appears on the screen? How do I
adjust the screen?
The system is calibrating the touch screen. The machine will work after this calibration is
completed. Refer to the section “Calibrate Touch Screen” in your User’s Manual.
Why can’t I click any of the buttons on the screen? I’m pressing the ‘Start’ button,
but nothing is happening.
You need to adjust the touch screen. When the machine powers up, press the ‘Hot Key’
located just abover the ‘Power button’. You will see a cross-cursor appear on the screen.
(You may need to press the ‘Hot button’ twice on some machines) Click the center of the
cross-cursor with your stylus or pointing device. The cross-cursor will then move to each
of the four corners of the screen, continue clicking the center of each as they appear. This
completes the adjustment or calibration of the screen. You should now be able to click the
available buttons.
CF Card
How does the CF Card fit into my machine?
There is only one way for the card to fit. If you feel yourself forcing it, turn it over and try
putting it in on the other side. The end with the holes always faces down.
Why doesn’t my unit recognize my updated CF Card?
There are two possible causes for this:
1. Some programs are lost or damaged. Download the latest “System Data” from the
download page at www.x431.com, and update again.
2. CF Card is damaged. Contact your local dealer for replacement.
Why doesn’t my unit recognize my new (replacement) CF card?
There are two possible causes for this:
1. The original CF card has not been fully copied. Format the card and perform the
update again.
2. The CF card reader is not compatible with the CF card. Contact your local dealer for
assistance.
Why is the unit telling me that no CF card is found when the machine is turned on?
Check to make sure that your CF card is firmly inserted into the machine. If it is, it may be
damaged. Try formatting it and reinserting. If this doesn’t correct the problem, you may
need a new CF card. Contact your local dealer for replacement.
B-2
eLearning, Inc.
:
I’ve connected my CF Card and reader to the computer, but it’s not showing up in
“My Computer.” How can I correct this?
One possible cause is that there may not be a driver for the CF card reader in the computer. The default driver is included with most Windows operating systems as well as Mac
OS 9.x/OS X and Linux 2.4.x However, there is no such default driver included with Windows 98.
If you are using a Windows 98 system, you must install the driver from the included CDRom or from http://x431usa.com/downloads.htm. When it is installed correctly, a “removable disk” icon will appear in “My Computer.”
Usually, it is listed after the built-in drives, such as the C:\ drive. The removable drive will
be the new letter. For example, if you had a C, D, & E drive before installing the CF card
reader, afterwards you will have an F drive. This would be the removable disk.
Registering
Why can’t I access www.X431.com or www.x431usa.com?
Check your internet connection. Try connecting to www.yahoo.com or www.google.com.
If you are able to connect to either of these websites your internet connection is fine. Wait
a few minutes and try our website again.
If you are unable to view our websites or www.yahoo.com or www.google.com, and are
receiving a message that says, “Page Can Not be Displayed” or similar messages, the
problem resides within your internet connection. Contact your Internet Service Provider
(ISP) for assistance.
How do I register the X-431 Scan Tool? What if I don’t have Internet Access? What
if I only have dial-up?
In-depth instructions for registering your X431 Scan Tool are available for download at
http://x431usa.com/downloads.htm
If you don’t have Internet access, you will not be able to register the X431 scan tool nor
will you be able to download updates. Consider asking a colleague if you can utilize their
Internet connection for registering and future downloading.
If you have dial-up Internet access, you will be able to both register your X431 scan tool
as well as download updates as necessary. Consider upgrading to broadband in order to
enable faster downloads.
What is my Registration No.?
Your Registration Number is a unique identifier which is shipped with your X431 scan tool.
You’ll find this number in the sealed envelope located with your User Manuals in the X431
Kit. This number is necessary for registration.
Where is my Smartbox number listed?
Your smartbox number is listed on your CF card and on the shipping carton you received
the unit in. It is also listed on the back of the smartbox (the bottom section of the scan
tool).
eLearning, Inc.
B-3
:
What is my dealer code?
Your local dealer will provide you with this code. This code is necessary for registration.
Can I make my Username and Password anything I want?
Your Username can be anything you’d like as long as it’s between 3-16 characters. There
is no restrictions on your Password. Choose a username and password combination
that’s easy for you to remember, and hard for others to guess.
WIll the password that X431 is sending me after I click ‘submit’ be the same as the
password I created in the registration process?
Yes. We are emailing it to you for reference purposes.
Can I update my X431 scan tool immediately after I register my unit?
Yes. We encourage you to update to the latest software versions as soon as possible
before beginning work on vehicles.
Updating
What do I do if I forget my username and/or password?
If you forget your password, use the ‘Forgot my password’ link located just below the login
fields at www.x431.com. If you have forgotten your username, contact your local dealer
for assistance.
Where do I go for updates?
http://www.x431.com. Once you login, you are brought to your “Download Center” page.
Updates are downloaded from here. A comprehensive guide to Updating your tool is
located at http://x431usa.com/downloads.htm.
What car lines/coverage does the X431 cover?
The most up-to-date list of vehicles is at the “Download Center” accessible when you
login to your account at www.x431.com. Additionally, you can access http://
www.x431.com/diag/x431List_en.htm for more information. Check back often as this list
is updated frequently.
Why won’t my computer download the updates?
Your Internet browser may have a pop-up blocker enabled. You may have seen a gold bar
appear at the top of your browser window entitled “Information Bar.’ This signifies a popup blocker is active.
To override the pop-up blocker settings, you must press and hold the ‘Ctrl’ key on your
keyboard while clicking the link for the download. Keep the ‘Ctrl’ key depressed until you
see the “Save As” dialog box appear for the download. You may need to do this for each
download.
Another possible reason for not being able to download the updates is an expired subscription. Contact your local dealer for current subscription rates and/or to purchase.
What is the X431 Update software, and where/how do I download it? Should I ‘Save’
it or ‘Open’ it after clicking the download link?
The X431 Update software is the program that transfers your newly downloaded software
updates from your hard drive on the computer, to the CF card for use with your scan tool.
B-4
eLearning, Inc.
:
This software utility is downloaded from the “Download Center” accessible after logging
into www.X431.com. When the ‘Save As’ dialog box opens, select ‘Open’ and follow the
on-screen instructions to install. After successful installation, you will notice a new icon on
your desktop called X431 Update.
Comprehensive, in-depth instructions detailing this and the entire update process are
available for download in the ‘Getting Started Guide’ located at http://x431usa.com/downloads.htm.
Do I need to use the X431 Software update utility?
Yes. If you attempt to simply copy the software onto the CF card, you will render the card
unusable, and will have to format it. The X431 Software utility has integrated copy-protection which “authenticates” your updates and puts them in the proper place on the CF card
for use with the scan tool.
Comprehensive instructions detailing this and the entire update process are available for
download in the ‘Getting Started Guide’ located at http://x431usa.com/downloads.htm.
There are many ‘system’ downloads on the download page. Which do I need to
download?
Most users only need to download X431 Update Tools, X431 Display Program, and X431
System Data. If you have PC-Link hardware, you may also need to download X431 PCLink Display.
Comprehensive instructions detailing this and the entire update process are available for
download in the ‘Getting Started Guide’ located at http://x431usa.com/downloads.htm.
Can I download more than one update at a time?
You may download as many files at a time as you wish, however most Internet browsers
only allow for a maximum of two downloads at a time.
What folder do I save the updates to as I download them?
The very first update you should download is the X431 Update Tools update. You must
select ‘Open’ when the ‘Save As’ dialog box appears after clicking the download link. You
will then follow the on-screen instruction to install this program. This is the X431 Update
software which is the “main” update you will download.
All subsequent downloads should be saved when the ‘Save As’ dialog box opens after
clicking the download link. The first time you select ‘save’, it will ask you where to save it.
You must create a new folder in your C:\ drive called X431 Downloads. You will be saving
all your updates into this folder.
Comprehensive, in-depth instructions detailing this and the entire update process are
available for download in the ‘Getting Started Guide’ located at http://x431usa.com/downloads.htm.
How do I create a new folder called ‘X431 Downloads’ in my C:\ drive?
When the “Save As” dialog box opens, choose ‘My COmputer’ from the selection bar on
the far left of the dialog box. Next choose the C:\ drive or your local drive from the list by
double-clicking it. When the window open, right-click on any blank area in the window
and select new and then select folder. Name this folder X431 Downloads and click
‘Open’. Save all future updates into this folder.
eLearning, Inc.
B-5
:
Comprehensive, in-depth instructions detailing this and the entire update process are
available for download in the ‘Getting Started Guide’ located at http://x431usa.com/downloads.htm.
How do I select a ‘source’ & ’target’ folder in the X431 Update software?
You will notice a small icon of binoculars next to both the ‘source’ folder and ‘target’ folder.
Clicking this icon allows you to select the appropriate folder where your updates have
been downloaded to. If you have followed the directions to create a folder in your C:\ drive
called ‘X431 Downloads’, your updates are downloaded to this folder. This should be
selected as your ‘source’ folder.
The ‘target’ folder should be set as the CF card or removable disk drive, located in ‘My
Computer.’ Do not select a subfolder of the CF card. The ‘target’ folder should only be set
as the “letter” of the drive. For example, if your removable disk drive has been labeled as
the F:\ drive, your ‘target’ folder should simply be F:\.
When updating with X431 Software update, should I use the ‘Select All’ checkbox
to download all of the updates from my computer to the CF card?
In most cases, you should use the ‘Select All’ checkbox if you want to download every
update in your X431 downloads folder, or every update you’ve downloaded. If you are
only interested in transferring a few updates from your computer to the CF card, use the
individual checkboxes next to the updates to select them.
In both cases, to complete the update process, you would click the ‘update’ icon on the
other side of the screen once you’ve selected the updates that you’d like to transfer.
How can I see all the available vehicle updates at one time?
At the bottom of the “Download Center’ page, you will notice a link called ‘Download
Shortcut’. Clicking this link will open a window showing every available download. You
may then begin the download process from there.
Why are some of the updates I downloaded not listed in the X431 Update software
window with all my other downloads?
There are two possible reasons for this:
1. When saving the downloads, you may have not saved them in the same folder, X431
Downloads (folder you created for downloads).
2. You may need to scroll to the right to see the remaining downloads. Note the scroll
bar at the bottom of the window showing the individual downloads. Place your mouse
on that scroll bar and drag to the right. You will then see the remaining downloads.
Why can’t I download updates after logging in?
Your Internet browser may have a pop-up blocker enabled. You may have seen a gold bar
appear at the top of your browser window entitled “Information Bar.’ This signifies a popup blocker is active.
To override the pop-up blocker settings, you must press and hold the ‘Ctrl’ key on your
keyboard while clicking the link for the download. Keep the ‘Ctrl’ key depressed until you
see the “Save As” dialog box appear for the download. You may need to do this for each
download.
Another possible reason for not being able to download the updates is an expired subscription. Contact your local dealer for current subscription rates and/or to purchase.
B-6
eLearning, Inc.
:
When I try to download updates, the screen flashes and a gold “Information Bar”
appears at the top of my browser window. What’s going on?
Your Internet browser has a pop-up blocker enabled. You may have seen a gold bar
appear at the top of your browser window entitled “Information Bar.’ This signifies a popup blocker is active.
To override the pop-up blocker settings, you must press and hold the ‘Ctrl’ key on your
keyboard while clicking the link for the download. Keep the ‘Ctrl’ key depressed until you
see the “Save As” dialog box appear for the download. You may need to do this for each
download.
Why am I getting an error when using the X431 Update software? Should I format
the CF card?
There are various types of errors that can occur while transferring updates from your hard
drive to your CF card. Decompression errors are common, and they occur because of a
corrupt file system in the card, or the card my be full.
Reformatting the CF card will correct these errors. The process for a CF card reformat is
as follows:
1. Insert your card reader into an available USB port and insert the CF card into the
reader
2. Open ‘My Computer’ and right-click on the removable disk (CF card)
3. Select Format from the menu
4. Select “Quick Format” and let it run
5. The CF card is now ready for use with the X431 Update software.
If this doesn’t correct the situation, you may need a new CF card, Contact your local
dealer for assistance.
Why do I get the message “Please contact your local dealer” after downloading the
diagnostic program from the CF card to the X431?
The X431 has authentication built-in and will not allow software to run if smartbox numbers on the software and the hardware don’t match. There are a few reasons why you
may receive this message:
1. When logging into www.X431.com to download software updates, you may have
selected the wrong smartbox number from the pull-down list.
2. You may have more than one X431 scan tool, and you may have put the wrong CF
card into the wrong unit.
If you have corrected the situation and still receive this message, contact your local
dealer for assistance.
Vehicle Coverage
What kind of coverage does the X431 scan tool have in regards to vehicle lines?
eLearning, Inc.
B-7
:
The tool provides coverage for the most popular German vehicles and the most popular
Asian vehicles: Mercedes, BMW, VW/Audi, Toyota, Honda, Nissan, Mitsubishi.
Launch X431 also provides coverage for the following manufacturers: Chrysler, Daewoo,
Fiat, Ford (USA), GM, Hyundai, Kia, Land Rover, Lexus, Mazda, Peugeot, Porsche,
Renault, Subaru, and Volvo.
How can I tell if the tool covers the vehicles I work with?
The most up-to-date list of vehicles is at the “Download Center” accessible when you
login to your account at www.x431.com. Additionally, you can access http://
www.x431.com/diag/x431List_en.htm for more information. Check back often as this list
is updated frequently.
Connectors/Cables
Does the X431 Scan Tool come with all the connectors/cables I need to begin working immediately?
Yes. The X431 scan tool ships with all necessary accessories.
What happens if I break or lose a connector or a cable? Is this covered under warranty?
If the breakage occurred due to a manufacturer’s defect within one year, it is covered by
our warranty.
How do I know which connector/cable works for which vehicle?
Each connector has the vehicle’s manufacturer printed on it’s housing.
Where do I plug these connectors in on the vehicle? How do I find out?
Popular shop software such as Alldata® includes sections on scan tool connections and
the locations in each vehicle.
Printer
Why is my printer only printing unreadable symbols?
Check if the printer module is well-connected with the main unit. Unplug the printer module by grasping it firmly and pulling it apart from the main unit, and then re-connecting it.
This should correct the problem. If you are still experiencing unreadable printing, contact
your local distributor for assistance.
Does the X431 Kit include extra printer paper?
Yes. It includes one extra roll.
What type of paper does the printer use?
The printer uses thermal, calculator-sized paper.
Can I purchase this paper in my local office supply store?
If you can find the correct size thermal paper (30 x 57mm, 7mm bore diameter) by all
means, purchase it yourself locally.
B-8
eLearning, Inc.
:
How do I replace the printer paper?
The below steps are also outlined with pictures in the X431’s User Manual, pages 7-8.
1. Open the paper lid on the back of the printer.
2. Take out the spindle and mount the paper scroll onto the spindle.
3. Put the paper spindle into the printer making sure to feed it in the proper direction.
4. Open the side plate, pull up the pressing rod and lead the paper into the slot. Turn the
feed knob clockwise until the paper comes out of the outlet at the top.
5. Push down the pressing rod, replace the side plate, attach the paper lid and reconnect the printer module to the main unit.
What are the functions of the two buttons on the printer module?
1. SEL key. When the LED next to this button is lit, the printer is selected and available
to print.
2. FL key: Paper-feed button
Can I print anything at any time?
You can print whatever is on the screen when the ‘Print’ button is selectable on the touch
screen. If the ‘Print’ button is grayed out or not showing, you cannot print the screen at
that time.
Why doesn’t my printer work? When I select print, it doesn’t do anything.
There are a few reasons why this may happen:
1. The SEL key next to the printer may not be selected. This button enables the printer.
When it is off, the printer will not print.
2. You may be out of paper. Check the paper and try again
3. The printer may not be connected to the main unit fully. Disconnect the printer module
and re-connect.
If these solutions don’t remedy the situation, contact your local dealer for assistance.
Troubleshooting
My screen froze in the middle of a diagnosis, how can I reset the unit?
Press and hold the power button until the unit powers itself off. Wait 30 seconds and
press the power button again to restart the unit.
Why does my unit power off when it has been sitting for a while?
The machine has a built-in energy saver function. Automatic shutdown will take place if
the machine is not operated for a specified period of time. Refer to the “Power Management” section of the X431 User Manual to set the “power-off time” to “none” or to select a
longer standby time.
Why is the time in the lower corner of the screen incorrect? How can I fix this?
Refer to the “Clock” section in the X431 User Manual to set the correct time.
Why can’t I access the diagnostic interface upon powering up the unit?
There are a few reasons why this may happen:
eLearning, Inc.
B-9
:
1. The CF card is not inserted
2. The CF card is inserted incorrectly.
3. A CF card from another X431 unit may be inserted
4. The CF card may also be damaged. If you insert the CF card correctly and you still
cannot access the diagnostic programs, contact your local dealer for assistance.
Why won’t the unit power on when I have it connected to a vehicle? Shouldn’t the
power button work?
If the unit is not powering up once connected to a vehicle, check the connection between
the vehicle and the X431. Some vehicle connections don’t provide power.
Check the power pin of the vehicle diagnostic socket with a multimeter for power. The
location of this power pin varies from one vehicle to another. Please refer to your repair
information database to find the power pin. If there is no power supply from the diagnostic
socket, use the cigarette lighter attachment for power**.
**WARNING: DO NOT USE THE CIGARETTE LIGHT ATTACHMENT IF THE UNIT IS
ALREADY POWERED UP. YOU CAN DAMAGE THE VEHICLE AS WELL AS THE UNIT!
Why does the system freeze when reading a data stream?
It may be due to a loose connector. Turn off the machine, firmly connect the connector,
and switch the machine back on again.
Upon first glance, it looks as if my tool only has 9 vehicle lines. Are there more
lines? How can I access them from the main screen with the manufacturer’s logos?
It looks as if you only have 9 lines because that’s all that can fit on the screen at one time.
Press the ‘Page Down’ button on the lower right of the touch screen. You can scroll
through all available vehicle lines in this manner.
The Mercedes-Benz 38-pin connector doesn’t fit onto the port under the hood. The
fender gets in the way. How do I fix this issue?
The base of the 38-pin connector swivels to allow access to tight spaces. Grasp the top of
the conector firmly, and twist the stem. This should give you sufficient access to the port.
Purchasing updates
Can I purchase a year’s worth of updates at any time?
Yes.
I ordered an update, but the ‘Download Center’ won’t allow me to download anything. It says “Sale of Unit has not been Recorded”.
If you get this message, contact your local dealer for assistance.
Does X431USA offer a tutorial or video on Registering and Updating?
Yes. Visit http://x431usa.com/downloads.htm to download this step-by-step video fully
outlining every step of the registering and downloading process.
B-10
eLearning, Inc.
USA Warranty
This warranty is expressly limited to persons who purchase LAUNCH
products for purposes of resale or use in the ordinary course of the buyer's
business.
The LAUNCH electronic product is warranted against defects in materials
and workmanship for one year (12 months) from date of delivery to the user.
This warranty does not cover any part that has been abused, altered, used for
a purpose other than for which it was intended, or used in a manner
inconsistent with instructions regarding use. The exclusive remedy for any
automotive meter found to be defective is repair or replacement, and
LAUNCH shall not be liable for any consequential or incidental damages.
Final determination of defects shall be made by LAUNCH in accordance
with procedures established by LAUNCH. No agent, employee, or
representative of LAUNCH has any authority to bind LAUNCH to any
affirmation, representation, or warranty concerning LAUNCH automotive
meters, except as stated herein.
Disclaimer
The above warranty is in lieu of any other warranty, expressed or implied,
including any warranty of merchantability or fitness for a particular purpose.
Customer Service
If you have any questions on the operation of the unit, please contact us and
have your smartbox number available for verification:
Tel: 1.877.GET.X431
Fax: 631.357.3304
Email: contact@x431usa.com
If your unit requires repair service, call X-431USA at 1-877-GET-X431 for
an RMA number (please do not send any units without contacting us) and
return it freight prepaid. If the unit is determined to be in warranty, it will be
repaired or replaced at no charge via ground freight prepaid. If the unit is
determined to be out of warranty, it will be repaired for a nominal service
charge plus return freight on your behalf. Send the unit, freight pre-paid to:
X-431USA
RMA#:[insert assigned RMA # here]
116 Spring Road
Huntington, NY 11743