1
Chapter 7 - Printing Other Items
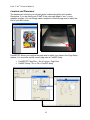
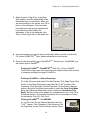
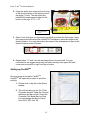
3. Select Layout > Page Size. In the Page
Size window, enter the height/width of the
Non-textile item you measured. When you
are done entering in the values, click OK to
return to the workspace. The non-textile
item dimensions are now be represented
by a black box located within the
workspace. If this is not displayed, click
View > Show Page Size to view black box.
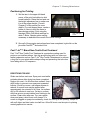
4. Import the image you intend to print, positioning it where you like it on the item.
For further FastARTISTTM help, please reference the user manual.
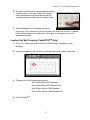
5. Once you are done setting up in FastARTISTTM, Photoshop or CorelDRAW, you
will need to print to FastRIPTM.
Printing to FastRIPTM - FastARTISTTM Click File > Print to FastRIP.
Position the image, then click the printer icon located in the printer tool box
to complete sending the image to FastRIPTM.
Printing to FastRIPTM - Adobe Photoshop
Go to the File menu and select Print with Preview. Click Page Setup. Click
Printer. In the Page Setup menu select the Fast T-Jet® 3 printer. Click
Properties. Click Advanced. Set the Page Size. Go the Printer Features
section. Bring the Print Mode menu down to select the Color Print Mode.
Bring the Underbase Mode menu down to select the Underbase Print
Mode. Set the number of ink passes for underbase and color. Click OK in
Advanced Options. In Document Properties set to Landscape or Portrait
for orientation. Click OK. Click Print.
Printing to FastRIPTM –CorelDRAW
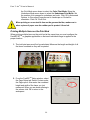
Go to File> Print. On the General tab select the Fast
T-Jet® 3 printer. Click Properties. Click Advanced. Set
the Page Size. Go the Printer Features section. Bring
89