1
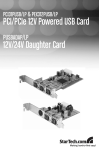
2 Port 12V 24V PoweredUSB Adapter Card USB PlusPower
PUSBADAP/LP
PCI312PUSB/LP
PEX312PUSB/LP
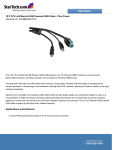
*actual product may vary from photos
DE: Bedienungsanleitung - de.startech.com
FR: Guide de l'utilisateur - fr.startech.com
ES: Guía del usuario - es.startech.com
IT: Guida per l'uso - it.startech.com
NL: Gebruiksaanwijzing - nl.startech.com
PT: Guia do usuário - pt.startech.com
For the most up-to-date information, please visit: www.startech.com
Manual Revision: 11/16/2011
FCC Compliance Statement
This equipment has been tested and found to comply with the limits for a Class B digital
device, pursuant to part 15 of the FCC Rules. These limits are designed to provide reasonable
protection against harmful interference in a residential installation. This equipment generates,
uses and can radiate radio frequency energy and, if not installed and used in accordance with
the instructions, may cause harmful interference to radio communications. However, there
is no guarantee that interference will not occur in a particular installation. If this equipment
does cause harmful interference to radio or television reception, which can be determined by
turning the equipment off and on, the user is encouraged to try to correct the interference by
one or more of the following measures:
• Reorient or relocate the receiving antenna.
• Increase the separation between the equipment and receiver.
• Connect the equipment into an outlet on a circuit different from that to which the receiver
is connected.
• Consult the dealer or an experienced radio/TV technician for help.
Use of Trademarks, Registered Trademarks, and other Protected Names and
Symbols
This manual may make reference to trademarks, registered trademarks, and other
protected names and/or symbols of third-party companies not related in any way to
StarTech.com. Where they occur these references are for illustrative purposes only and do not
represent an endorsement of a product or service by StarTech.com, or an endorsement of the
product(s) to which this manual applies by the third-party company in question. Regardless
of any direct acknowledgement elsewhere in the body of this document, StarTech.com hereby
acknowledges that all trademarks, registered trademarks, service marks, and other protected
names and/or symbols contained in this manual and related documents are the property of
their respective holders.
Instruction Manual
Table of Contents
Introduction.............................................................................................1
Features......................................................................................................................................................... 1
Package Contents...................................................................................................................................... 1
Hardware Guide......................................................................................2
PCI312PUSB/LP, PEX312PUSB/LP......................................................................................................... 2
Jumper Settings.......................................................................................................................................... 2
PUSBADAP/PUSBADAPLP....................................................................................................................... 3
Jumper Settings.......................................................................................................................................... 4
Hardware Installation............................................................................................................................... 4
PCI312PUSB/LP or PEX312PUSB/LP Only.......................................................................................... 5
PUSBADAP/PUSBADAPLP Only............................................................................................................. 6
Software Installation..............................................................................6
Specifications...........................................................................................7
Technical Support...................................................................................8
Warranty Information.............................................................................8
Instruction Manual
i
Introduction
Thank you for purchasing a StarTech.com Powered USB 2.0 Adapter Card (available in
both PCI and PCI Express formats as well as Standard and Low Profile). Now, adding
Powered USB capability to a computer has never been easier!
Fully compatible with USB1.1 OHCI and USB2.0 ECHI specifications, the cards support
data speeds of up to 480 Mbps and provide power to Powered USB devices through
industrial standard Powered USB connectors.
Features
•
•
•
•
•
Supplies power and data signals over hot-pluggable USB cable
Mainboard can be linked to daughter board
Daughter board and Main board can be used as stand alone devices
Selectable power input
Connectors offer cable locking mechanism
Package Contents
•
•
•
•
PCI312PUSB/LP: 1 x Powered USB Mainboard Card
or
PEX312PUSB/LP: 1 x Powered USB Mainboard Card
or
PUSBADAP/LP: 1 x Powered USB Daughter Board
Instruction Manual
Driver CD (PCI312PUSB/LP and PEX312PUSB/LP only)
9-Pin USB Header Cable (PUSBADAP/LP Only)
Please note that the Powered USB ports are color coded based on voltage
capabilitythey support, as follows:
Yellow
5V
Green
12V
Red
24V
Instruction Manual
1
Hardware Guide
PCI312PUSB/LP, PEX312PUSB/LP
J4:
USB Ports 4, 5
(for Expansion)
+5
DD+
G
+5
DD+
G
JP2:
+12V Selector
J5: AUX Power
J1~J3:
External
Powered
USB Ports (x3)
JP1:
+5V Selector
Jumper Settings
JP1 (+5V Selector)
Settings
Default: The USB2.0 Bus Power is
supplied by the motherboard PCI slot
(DC+5V supplied from PCB)
The USB2.0 Bus Power is supplied by the
AUX power connector (J5).
This option provides more power for
Powered USB devices, but requires a
connection to the computer power
supply.
Instruction Manual
2
JP1 (+5V Selector)
Settings
Default: The 12V power source of the
Powered USB connectors are supplied
by the PCI slot into which the card is
installed
The 12V power source of the Powered
USB connectors are supplied by the AUX
power connector (J5). This will require
that a power cable be connected from
the computer power supply to J5. This
option provides more power for the
Powered USB devices over the USB2.0
cable.
PUSBADAP/PUSBADAPLP
JP1: +24V Power
Source Selector
(from Regulator or
External Power DIN
connector)
J3: External
Input Power
DIN Connector*
J1:
USB Input Connector
(from Host USB port)
+5
DD+
G
+5
DD+
G
J5:
AUX Power
Connector
J4:
24V-keyed
Connector
J2:
12V-keyed
Connector
Instruction Manual
*J3:
Power DIN
Connector Pin
Assignment
3
Jumper Settings
JP2 (24V Selector)
Settings
Default: The power source of the
24V-keyed PoweredUSB connector
is supplied from the internal step-up
switching regulator (jumpers must be
set identically, both at INT or EXT.
The power source of the 24V-keyed
Powered USB connector is supplied
from the external Power DIN input
connector, in this case, a 24V AC adapter
will be required. Please see http://www.
startech.com for more information.
Hardware Installation
PCI312PUSB/LP, PEX312PUSB/LP & PUSBADAP/LP
1. Remove the computer cover. For more detailed instruction on how to perform this
step, please refer to the documentation that was included with your computer at
the time of purchase.
2. Locate an empty PCI/PCI Express slot and remove the metal bracket covering the
accompanying empty port/socket.
3. Connect one end of the 9-pin Header Cable (provided by PUSBAD/LP) to the
expansion port (depicted on pg. 2 as J4:USB Ports 4, 5).
4. Position the card above the open PCI/PCI Express slot, ensuring that the card is
properly aligned with the slot. Insert the card firmly into the slot, distributing
force evenly across the length of the board, then fasten the metal bracket to the
computer case (using the screw removed in step #2).
5. Remove a metal bracket that is adjacent to or near the one remove in step #2, and
fasten PUSBADAP/PUSBADAPLP directly to the metal rear panel of the computer
case.
6. Connect the remaining end of the 9-Pin USB Header Cable used in step #3, to the
USB IN connector, denoted as J1: USB Input Connector (from Host USB port) (see
diagram, pg.3) on the PUSBADAP board.
Instruction Manual
4
7. PCI312PUSB/PEX312PUSB: By default, JP2 (see pg. 3) is set to PCI. The card
will draw power via the PCI/PCI Express slot into which it is installed; as such, if
you’ve left the JP2 jumper in the default position, there will be no need to connect
PCI312PUSB to the computer power supply.
If JP2 has been switched to INT (Internal), you must connect PCI 312PUSB/
PEX312PUSB to the computer power supply, by inserting an available LP4 connector
into the AUX Power Connector.
PUSBADAP: By default, JP2 is set to INT, commanding the card to draw power from
the computer power supply. As such, insert an LP4 power connector from the power
supply, into the AUX Power Connector.
If JP2 has been set to EXT, the PUSBADAP will draw power through the External
Input Power DIN Connector, and will require an external power source (see http://
www.startech.com for accessories).
8. Once both cards have been properly positioned, and the necessary link has been
made between them, close the computer case and power on the computer.
PCI312PUSB/LP or PEX312PUSB/LP Only
This section details how to install PCI312PUSB/PEX312PUSB as a stand alone card.
1. Remove the computer cover. For more detailed instruction on how to perform this
step, please refer to the documentation that was included with your computer at
the time of purchase.
2. Locate an empty PCI/PCI Express slot and remove the metal bracket covering the
accompanying empty port/socket.
3. Position the card above the open PCI/PCI Express slot, ensuring that the card is
properly aligned with the slot. Insert the card firmly into the slot, distributing
force evenly across the length of the board, then fasten the metal bracket to the
computer case (using the screw removed in step #2, if necessary).
4. By default, JP2 (see pg. 3) is set to PCI, commanding the card to draw power via the
PCI slot into which it is installed. As such, if you’ve left the JP2 jumper in the default
position, there will be no need to connect PCI312PUSB to the computer power
supply.
If JP2 has been switched to INT (Internal), you must connect PCI312PUSB to the
computer power supply, by inserting an available LP4 connector into the AUX
Power Connector.
5. Once the card is properly seated, and secured to the computer case, close the
computer case and power on the computer.
Instruction Manual
5
PUSBADAP/PUSBADAPLP Only
This section details how to install PUSBADAP as a stand alone card.
1. Remove the computer cover. For more detailed instruction on how to perform this
step, please refer to the documentation that was included with your computer at
the time of purchase.
2. Connect one end of the 9-Pin USB Header Cable (provided) to the USB IN connector,
denoted as J1: USB Input Connector (from Host USB port) (see diagram, pg.3) on the
PUSBADAP board.
3. By default, JP2 is set to INT, commanding the card to draw power from the
computer power supply. As such, insert an LP4 power connector from the power
supply, into the AUX Power Connector.
If JP2 has been set to EXT, the PUSBADAP will draw power through the External
Input Power DIN Connector.
4. Connect the remaining end of the 9-Pin USB Header Cable (see step #2), to the
USB Header connector on the host motherboard. For further instructions on how
to locate the appropriate connection on the motherboard, please consult the
documentation that was included with your motherboard/computer at the time of
purchase.
Software Installation
PCI312PUSB/LP and PEX312PUSB/LP are natively supported by Windows® XP (SP2)
2000 (SP4) and Vista™. As such, no driver installation is required, as long as the
necessary updates have been made to the operating system(s).
For Windows 98SE or Windows ME installations, however, driver installation is required.
To install the drivers necessary for PCI312PUSB/LP or PEX312PUSB/LP to function
properly:
1. With the host computer powered on, insert the Driver CD that accompanied your
purchase of PCI312PUSB/PCI312PUSBLP into the CD/DVD-ROM drive.
2. On the Driver CD, browse to the 2. X:\USB 2.0\NEC folder, (where X de notes the
designated CD/DVD-ROM drive on the host computer) and locate the folder that
corresponds with the host computer operating system.
3. Open the appropriate folder and locate the 3. U2v2_1 application file. Execute the
file by double clicking on the icon/listing, to begin installation.
4. Follow the installation through until you are asked if you would like to reboot the
computer. Select Yes, I want to restart my computer now and click on Close.
Once the computer has rebooted, the operating system will detect the presence of
the card - installation is complete.
Instruction Manual
6
Specifications
PCI312PUSB
PEX312PUSB
3 x 12V Powered USB male
Connectors
(LxW)
1x 12v Power USB Connector
connectors
1x 24v Power USB Connector
1 x LP4 Connector
1x 4 pin Power Din Connector
1 x Internal USB (9 pin) Header
1x Internal USB Connector
Connector for expansion
1x Jumper Connector
1x Jumper Connector
1x LP4 Connector
OS Support
Dimensions
PUSBADAP
Windows 2000 / 2003 / XP / Vista
81.2mm x 66.7mm
120mm x 66.7mm
(3.2in x 2.63in)
(4.72in x 2.63in)
Regulatory
Certified
CE, RoHS, FCC
Maximum
Data
Transfer
Rate
480Mbps
Chipset
Instruction Manual
NEC
D720101GJ
NEC
D720101GJ +
TI XIO2000A
PCI Express
to PCI Bus
Translation
Bridge
7
N/A
Technical Support
StarTech.com’s lifetime technical support is an integral part of our commitment to
provide industry-leading solutions. If you ever need help with your product, visit
www.startech.com/support and access our comprehensive selection of online tools,
documentation, and downloads.
For the latest drivers/software, please visit www.startech.com/downloads
Warranty Information
This product is backed by a lifetime warranty.
In addition, StarTech.com warrants its products against defects in materials
and workmanship for the periods noted, following the initial date of purchase.
During this period, the products may be returned for repair, or replacement with
equivalent products at our discretion. The warranty covers parts and labor costs only.
StarTech.com does not warrant its products from defects or damages arising from
misuse, abuse, alteration, or normal wear and tear.
Limitation of Liability
In no event shall the liability of StarTech.com Ltd. and StarTech.com USA LLP (or their
officers, directors, employees or agents) for any damages (whether direct or indirect,
special, punitive, incidental, consequential, or otherwise), loss of profits, loss of business,
or any pecuniary loss, arising out of or related to the use of the product exceed the
actual price paid for the product. Some states do not allow the exclusion or limitation
of incidental or consequential damages. If such laws apply, the limitations or exclusions
contained in this statement may not apply to you.
Instruction Manual
8
Hard-to-find made easy. At StarTech.com, that isn’t a slogan. It’s a promise.
StarTech.com is your one-stop source for every connectivity part you need. From
the latest technology to legacy products — and all the parts that bridge the old and
new — we can help you find the parts that connect your solutions.
We make it easy to locate the parts, and we quickly deliver them wherever they need
to go. Just talk to one of our tech advisors or visit our website. You’ll be connected to
the products you need in no time.
Visit www.startech.com for complete information on all StarTech.com products and
to access exclusive resources and time-saving tools.
StarTech.com is an ISO 9001 Registered manufacturer of connectivity and technology
parts. StarTech.com was founded in 1985 and has operations in the United States,
Canada, the United Kingdom and Taiwan servicing a worldwide market.