1
SD9 - Getting Started
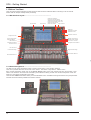
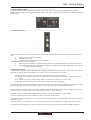
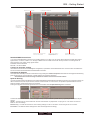
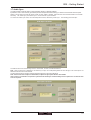
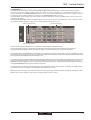
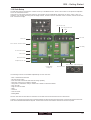
Clear All Buttons : When changing routing, you have the option of clearing any non-default routing or processing (EQ, dynamics
etc) from the channels in the session. This is especially useful when restructuring an existing session to make a new session.
The clear snapshots, clear automation and clear macro’s perform similar operations.
Rebuild Banks : When changing the session structure, there are two possible scenarios. If you restructure the session without
rebuilding banks, any additional channels you have allocated are not “placed” on the worksurface, and need to be manually
assigned to faders. If however, you restructure a session with Rebuild Banks enabled, the worksurface will be built with all
channels available on the worksurface.
Banks can be laid out horizontally or vertically according to the button selected
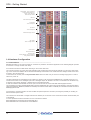
Aux Sends and Direct Sends : By toggling the state of the Aux Sends and Direct Sends Buttons in the Input Channels section, it is
possible to change the default operation of the Aux Sends and Direct Sends. These functions toggle between “Post Fader”, “Pre-Fader”
and “Pre-Mute”. These buttons can only be used in conjunction with the clear all function.
Auto-Route : The Auto-route functions automatically routes consecutive inputs for input channels, and consecutive outputs for busses.
For example, auto-routing 32 inputs will route the first physical input (eg 1:Mic 1) to input channel 1, the second physical input (1:Mic 2) to
input channel 2… until you either run out of inputs or channels. Auto-routes are as follows :
Input Channels auto-route with physical inputs
Aux, Group and Matrix Channels auto route to physical outputs
Matrix Inputs auto-route with group outputs
NOTE : Auto-Routing can only be used in conjunction with the “Clear All” button.
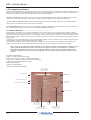
1.5.2 Assigning Faders to the Worksurface ...............................
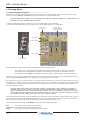
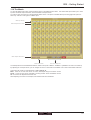
If, after a Session Restructure where the Rebuild Banks button was not pressed, you find that newly created channels do not appear on
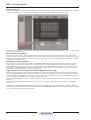
the worksurface, open the Layout>Channel List panel on the Master screen and you will see a full list of all input and output channels
that are present in the session.
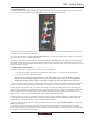
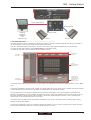
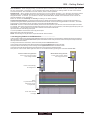
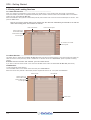
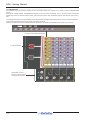
To assign channels to the worksurface, select a bank and press the LCD Function button.
Then press the Channel Select button below the display labelled Copy Bank From to enter that mode.
Now press the first channel that you wish to assign on the Layout/Channel List on the Master screen.
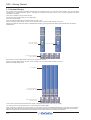
Consecutive channels will be assigned to the worksurface for each channel in the selected bank.
Now press the LCD Function button again and return to the standard mode by pressing the LCD button labelled Solo
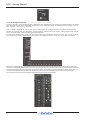
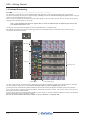
Custom Fader Assignments:
Press LCD Function button
then Assign Faders
Whole Bank Assignments:
Press LCD Function button
then Copy Bnk From
Press LCD button(s)
for Assignment
Open
Layout/Channel List
Click down arrow
to expand list
Touch first channel
to assign
1-11