1
Setting up a workspace
Guide to setting up a space in your classroom for animation. It would be useful if
teachers set aside a few minutes to familiarize themselves with the Stop Motion Pro
application. It is very easy to use - follow the “Quick start tutorial” in Stop Motion
Pro.
An environment for animation need not be complicated or expensive. Stop Motion Pro
has been designed to work with many different types of hardware; it is highly likely
that your school already has some or all of the following tools that can be used to
make animations:
A small corner or desk can be used to set up an animation area. The following ideas
for workspaces are recommended:
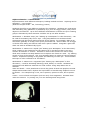
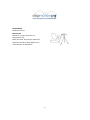
Diorama – See the diagram below for a typical “diorama” setup. This arrangement
can be used for most of the exercises in this guide.
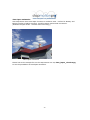
Tripod – The standard animation tool. Tripods are essential for holding the camera
still while filming.
Copy stand – many schools may have one of these tucked away in a storeroom
somewhere. They were often used in the 70’s and 80’s for presentations, and have a
standard tripod thread that will fit any camera. Copy stands are still available; a
tripod pointing a camera vertically will substitute for one. Great for animating sand,
beads and flipbooks.
Lights
Desk lamps, halogen lights or ambient light (for indoor work it is a good idea to be
away from outdoor light as this can fluctuate in brightness)
Computer
Microsoft Windows based PC
Camera
Web cam, video camera or digital still camera
Alternative Input devices
Document Scanner
Copy stand
Diorama setup
-4-