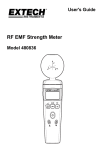
1
® ® Certificate of Calibration We hereby certify that this product has been calibrated and found to be in accordance with the applicable SPECIFICATIONS and STANDARDS. Accuracies of the standard equipment used in this calibration are traceable to the National Standards. MECO METERS PVT. LTD. Plot No. EL-60, MIDC Electronic Zone, TTC Industrial Area, Mahape, Navi Mumbai - 400710 (INDIA) Tel : 0091-22-27673311-16, 27673300 (Board) Fax : 0091-22-27673310, 27673330 E-mail : sales@mecoinst.com Web : www.mecoinst.com SR. NO. ELECTROSMOG METER : CHECKED BY : DATE : MODEL : 9720 MODEL NO. : USER MANUAL Contents 1. Safety Information ........................................................... 0 2. Introduction ...................................................................... 0 SAFETY INFORMATION CAUTION • Before making a measurement, check if the low battery symbol ( ) is shown on the display as soon as the meter is switched on. Change the battery if the symbol is displayed. • In the case of prolonged storage, it is preferable to remove the battery from the meter. • Avoid shaking the meter, particularly in the measurement mode. • The accuracy and function of the meter may be adversely affected by the specified limits outside and improper handling. 2.1 Fundamentals 2.2 Application 2.3 Features 3. Specifications .................................................................. 0 3.1 General Specifications 3.2 Electrical Specifications 4. Operations ....................................................................... 0 4.1 Front panel control description 4.2 LCD display description 4.3 Use E-field sensor 4.4 Explanatory notes 4.5 Setting the meter DANGER • In some cases, work in the vicinity of powerful radiation sources can be a risk of your life. • Be aware that persons with electronic implants(e.g. cardiac pacemakers) are subject to particular dangers in some cases, 4.6 Making measurements 4.7 Manual data memory storeing individual measured values 5. • Observe the local safety regulations of the facility operation. • Observe the operating instructions for equipment which is used to generate, conduct or consumer electromagnetic energy. • Be aware that secondary radiators (e.g. reflective objects such as a metallic fence) can cause a local amplification of the field. • Be aware that the field strength in the near vicinity of radiators increases proportionally to the inverse cube of the distance. This means that enormous field strengths can result in the immediate vicinity of small radiation sources (e.g. leak in waveguides, inductive ovens). • Field strength measuring device can underrate pulsed Measurement preparation 5.1 Battery loading 5.2 Battery replacement 2 3 9720 : 28-09-2012 signals. Particularly with radar signals, significant measurement errors can arise. • 2. INTRODUCTION 2-1 Fundamentals All field strength measuring devices have a limited specified frequency range. Fields with spectral components outside of this frequency range are generally incorrectly evaluated and tend to be underrated. Before using field strength measuring devices, you should thus be certain that all field components to be measured lie in the specified frequency range of the measuring device. Electromagnetic pollution : This Meter used to indicate electromagnetic pollution generated artificially. Wherever there is a voltage or a current, the electric (E) and magnetic (H) fields arise. All types of radio broadcasting and TV transmitters produce electromagnetic fields, and they also arise in industry, business and the home, where they affect us even if our sense organs perceive nothing. Electric field strength (E) : A field vector quantity that represents the force (F) on an infinitesimal unit positive test charge (q) at a point divided by that charge. Electric field strength is expressed in units of volts per meter (V/m). Use the units of electric field strength for measurements in the following situations : • In the near-field area of the source. • Where the nature of the electromagnetic field is unknown. Magnetic field strength (H) : A field vector that is equal to the magnetic flux density divided by the permeability of the medium, Magnetic field strength is expressed in units of amperes per meter (A/m). The meter uses of magnetic field strength for measurements only in the far-field area of the source. Power density (S) : Power per unit area normal to the direction of propagation, usually expressed in units of watts per square meter W/m2) or, for convenience, units such as milliwatts per square centimeter (mW/cm2). 4 The characteristic of electromagnetic fields Electromagnetic fields propagate as waves and travel at the speed of light (c). The wavelength is proportional to the frequency. c (speed of light) l (wavelength) = f (frequency) If the distance to the field source is less than three wavelength, then we are usually in the near-field. If the distance is more than three wave length, the far-field conditions usually hold. In the near-field, the ratio of electric field strength (E) and magnetic field strength (H) is not constant, so we have to measure each separately. In the far-field, however, It is enough to just measure one field quantity, then the other could be computed accordingly. 2-2 Application Quite often routine operation, maintenance and service work has to be done in areas where active electromagnetic fields are present, e.g. in broadcasting stations, etc. Additionally, other employees may be exposed to electromagnetic radiation. In such cases, it is essential that personnel are not exposed to dangerous levels of electromagnetic radiation, such as : l High frequency (RF) electromagnetic wave field strength measurement. l Mobil phone base station antenna radiation power density measurement. l Wireless communication applications (CW, TDMA, GSM, DECT). l RF power measurement for transmitters. l Wireless LAN (Wi-Fl) detection, installation. l Spy camera, wireless bug finder. l Cellular/Cordless phone radiation safety level. l Microwave oven leakage detection. l Personal living environment EMF safety. 5 2.3 Features The meter is a broadband device for monitoring highfrequency radiation in the range from 50MHz to 3.5GHz. The non-directional electric field and high sensitivity also allow measurements of electric field strength in TEM cells and absorber rooms. The unit of measurement and the measurement types have been selected to expressed in units of electrical and magnetic field strength and power density. At high frequencies, the power density is of particular significance. It provides a measure of the power absorbed by a person exposed to the field. This power level must be kept as low as possible at high frequencies. The meter can be set to display the instantaneous value, the maximum value measured or the average value. Instantaneous and maximum value measurements are useful for orientation, e.g. when first entering an exposed area. l 50MHz to 3.5GHz Frequency range. l For isotropic measurements of electromagnetic fields. l Non-directional (isotropic) measurement with threechannel measurement sensor. l High dynamic range due to three-channel digital results processing. l Configurable alarm threshold and memory function. l Easy & safety to use. 6 7 9720 : 28-09-2012 3. SPECIFICATIONS 3-1 General Specifications • Measurement method : Digital, triaxial measurement. • Directional characteristic : Isotropic, triaxial. • Measurement range selection : One continuous range. • Display resolution : 0.1mV/m, 0.1mA/m, 0.1mW/m 2, 0.001m W/cm2 • Setting time : Typically 1s (0 to 90% of measurement value). • Display refresh rate : Typically 0.5 seconds • Display type : Liquid-crystal (LCD), 4 digit. • Audible alarm : Buzzer, • Units : mV/m, V/m, mA/m, mA/m, mW/m2, mW/m2, W/m2, mW/cm2, mW/cm2 • Display value : Instantaneous measured value, maximum value, or maximum average value. • Alarm function : Adjustable threshold with ON/OFF. • Calibration factor CAL : Adjustable. • Manual data memory and read storage : 99 data sets. • Dry batteries : 9V NEDA 1604/1604A • Battery life : > 15 hours • Auto power off : 15 minutes • Operating temperature range : 0°C to +50°C • Operating humidity range : 25% to 75%RH • Storage temperature range : -10°C to +60°C • Storage humidity range : 0% to 80%RH • Dimensions : 60 x 60 x 237 mm (approx.) • Weight : 200gms including battery (approx.) • Accessories : Instruction manual x 1, 9V battery (installed) x 1, carrying case x 1. 3-2 Electrical Scecifications l Unless otherwise stated, the following specifications hold under the following conditions : • The meter is located in the far-field of a source, the sensor head is pointed towards the source. • Ambient temperature : +230C±30C • Relative air humidity : 25% to 75% l Sensor type : Electrical field (E) l Frequency range : 50MHz to 3.5GHz l Specified measurement range : • CW signal (f> 50MHz) : 20mV/m to 108.0V/m, 53mA/m to 286.4mA/m, 1mW/m2 to 30.93W/m2 0mW/cm2 to 3.093mW/cm2 l Dynamic range : Typically 75dB l Absolute error at 1 V/m and 50 MHz : ±1.0dB l Frequency response : • Sensor taking into account the typical CAL factor : ±1.0dB (50MHz to 1.9GHz) ±2.4dB (1.9GHz to 3.5GHz) • Isotropy deviation : Typically ±1 .0dB (f>5OMHz) • Overload limit : 10.61mW/cm2 (200V/m) • Thermal response (0 to 50°C) : ±0.2dB 8 4 9 OPERATION (4) 4-1 Front panel controls description 1 (5) 2 3 5 4 6 7 (1) E-field sensor. (2) LCD display. (3) MAX-AVG Keys : 8 1. Press this key to change sequential “Instantaneous” → “Max. instantaneous” → “Average” → “Max. average”. 2. In the read mode, press this key to exit. 3. In the alarm setting mode, press this key to store the setting value. 10 (6) (7) 4. Press and hold this key while turning the meter on to disable the audible sound. Then the “ ” symbol will disappear. (8) ALARM MODE key : 1. Press this key to change sensor axis selector: “All axis” → “X axis” → “Y axis” → “Z axis”. 2. Press and hold this key while turning the meter on to switch the device to the alarm setting mode. 3. Press this key for 2 seconds to switch the alarm function on or off. Unit key : 1. Press this key to change units selector : “mV/m or V/m” → “mA/m or mA/m” → “mW/m 2 , mW/m 2 or W/m2 →“mW/cm2 or mW/cm2 2. Press this key for 2 seconds to turn the backlight on. The backlight turns off automatically in 15 seconds later. 3. Press and hold this key and turn on the meter again to disable the backlight auto off function. key : Press this key to turn the meter on or off. MEM key : 1. Press this key momentarily to store one data set to memory. 2. Press and hold this key while turning the meter on to enter the clear manually recorded data mode. 3. In the manual data reading mode, press this key to read the next stored data. 4. In the alarm setting mode, press this key to increase the setting value. READ key : 1. Press this key to switch to the manual data reading mode. 2. Press and hold this key while turning the meter on to disable the auto power off function. 3. In the manual data reading mode, press this key to read the previous stored data. 4. In the alarm setting mode, press this key to decrease the setting value. 11 9720 : 28-09-2012 4-2 LCD display description (11) ALM : Alarm function on /off or alarm setting indication. (12) : When the alarm function is on the instantaneous measured value exceeds the limit value indication. (13) : Analog bargraph of each axis (X,Y or Z) measured dynamic range indication for observing trends. (14) X : X axis measured value displayed. (15) Y : Y axis measured value displayed. (16) Z : Z axis measured value displayed. 4-3 Use E-field sensor (1) Auto power off function on / off. (2) Displayed : Audible sound function on / off. (3) MAX : Maximum measured value displayed. MAX AVG : Maximum average value displayed. (4) AVG : Average measured value displayed. (5) : Low battery indication. (6) Units : mV/m and V/m : Electric field strength. μA/m and mA/m : Magnetic field strength. μW/m2, mW/m2, W/m2, μW/cm2 and mW/cm2 : Power density (7) : Measured value displayed as per selected mode and selected units. (8) : Manual data memory mode indication. (9) : Manual data memory address number (1 ~ 99) : The manual data memory clear mode. (10) : Stored measured value to memory indication. 12 The actual 3-channel sensor is located in the head part of the meter. The three voltages generated by the sensor are fed back to the meter. In far-fields, an E-field sensor is preferable due to the greater bandwidth. The E-field sensor for frequencies is from 50MHz to 3.5GHz. The meter is a small portable instrument that measures the electric field presented in the atmosphere of the measurement sensor surroundings. The measurement of the field is done by moving the aerial Of the sensor in the desired measured environment. You obtain a direct wide band measurement of the field that the measurement sensor is subjected to. To find the value of the field emitted by a source of interference, simply point the aerial towards it and get as close as possible (the value of the field is inversely proportional to the distance of the sensor/emission source). The operator must take care not to be between the source of disturbance and the zone to be checked : the human body shields electromagnetic fields. The E-field sensor is isotropic, it does not require special handing. Its sensitive part measures the field according to 3 axes without the aerial having to be moved in the 3 planes. Simply point it at the target to make the measurement. 13 4-4 Explanatory notes Field strength 4-4-1 Units of measurement The meter measures the electrical component of the field, the default units are those of electrical field strength (mV/m, V/m). The meter converts the measurement values to the other units of measurement, i.e. the corresponding magnetic field strength units (μA/m, mA/m) and power density units (μW/m2, mW/m2, W/m2, μW/cm2 and mW/cm2) using the standard far-field formulate for electromagnetic radiation. The conversion is invalid for near-field measurements, as there is no generally valid relationship between electrical and magnetic field strength in this situation. Always use the default units of the sensor when making near-field measurements. 4-4-2 Result modes The bar graph display always shows each axis (X, Y or Z) the instantaneous measured dynamic range value. The digit display shows the instantaneous or result according to one of four modes which can be selected l Instantaneous : The display shows the last value measured by the sensor, no symbol is displayed. l Maximum instantaneous (MAX) : The digital display shows the highest instantaneous value measured, the “MAX” symbol is displayed. l Average (AVG) : The digital display shows the average value measured, the “AVG” symbol is displayed. l Maximum average (MAX AVG) : The digital display shows the highest average value measured, the “MAX AVG” symbol is displayed. 4-4-3 Calibration factor (CAL) The calibration factor CAL serves to calibrate the result display. The field strength value measured internally is multiplied by the value of CAL that has been entered and the resulting value is displayed. The CAL setting range is from 0.20 to 5.00. The CAL factor is often used as a means of entering the sensitivity of the field sensor in terms of its frequency response in order to improve measurement accuracy. Frequency-dependent sensor calibration factors are provided for this application, In many cases, the measurement accuracy will be sufficient even if the frequency response of sensor calibration factor is ignored. CAL can be set to 1.00 in such cases. 14 15 9720 : 28-09-2012 E-Field typically calibration data : 4-5 Setting the meter Frequency CAL 4-5-1 Setting the units of measurement 50MHz 1.45 With the UNIT key as follows. 100MHz 1.75 200MHz 1.78 300MHz 1.80 433MHz 1.84 500Mhz 1.87 600MHz 1.84 700MHz 1.89 800MHz 1.78 900MHz 1.84 (a) Electric field strength (V/m), 1GHz 1.75 (b) Computed magnetic field strength (mA/m). 1.2GHz 2.01 (c) Computed power density (mW/m2). 1.4GHz 1.80 (d) Computed power density (mW/cm2). 1.6GHz 1.37 1.8GHz 1.44 2GHz 1.42 Instantaneous result mode is automatically set when the meter is turned on. 2.2GHz 1.40 With the MAX-AVG key as followings : 2.5GHz 1.46 4-5-2 Setting the result mode 4-4-4Alarm limit value (ALM) The alarm limit value is used to monitor the display value automatically. It controls the alarm indication function. The alarm limit value can be edited in the displayed V/m unit. The smallest value that can be set to 0.05V/m. l Alarm limit function is only used for total three axial value comparator. 16 17 4-5-3 Setting the alarm limit value (ALM) 4-5-4 Setting the calibration factor (CAL) 1. Press key turn off the meter. 2. Press and hold down MEM- and READ- keys, then press key to turn on the meter, the display then shows “CA” (The Calibration factor setting mode). There are four digits flashing which can be changed. 3. Press MEM- or READ- key to increase or decrease the value. 4. Press MAX-AVG key to store the new setting value and exit. 4-5-5 Switching the alarm function on or off 1. Press ALARM-MODE key for 2 seconds to switch the alarm function on or off. The “ALM” and “ ” symbols in the display indicates that the alarm function is on. 1. Press key to turn off the meter. 2. Press and hold on ALARM-MODE key, then press key to turn on the meter. (The Alarm setting mode). The units and four digits flashing which can be changed. 2. When the alarm function is on, the display will show “” if the instantaneous measured value exceed the limit value. 4-5-6 Setting the audible sound function off 3, Press MEM- or READ- key to increase or decrease the value. 18 4. Press MAX-AVG key to store the new setting value and exit. 19 9720 : 28-09-2012 When the meter is normally turned on, the audible sound function is on. 1. Press “ ” key to turn off the meter. 2. Press and hold MAX-AVG key and turn on the meter again to disable the audible sound, then the “ ” symbol will disappear from the display. 4-5-7 Setting the auto power off function off When the meter is normally turned on, the auto power off function is on. 1. Press “ ” key to turn off the meter. 2. Press and hold READ key and turn on the meter again to disable the auto power off function, the “ ” symbol will disappear from the display. 4-5-8 Setting the backlight auto off function off 1. Press “ ” key to turn off the meter. 2. Press and hold “ UNIT” key and turn on the meter again to disable the backlight auto off function. 4-6 Making measurements Important : The following effect will be noted with all field strength meters If move the sensor quickly, excessive field strength values will be displayed which do not reflect the actual field conditions. This effect is caused by electrostatic charges. Recommendation : Hold the meter steady during the measurement. 20 4.7 4-6-1 Short-term measurements Application : Use either the “Instantaneous” or the “Max. instantaneous” mode, if the characteristics and orientation of the field are unknown when entering an area exposed to electromagnetic radiation. Procedure 1. Hold the meter at arm’s length. 2. Make several measurements at various locations around your work place or the interested areas as described above. This is particularly important if the field conditions are unknown. 3. Pay special attention to measuring the vicinity of possible radiation sources. Apart from active sources, those components connected to a source may also act as radiators. For example, the cables used in diathermy equipment may also radiate electromagnetic energy. Note that metallic objects within the field may locally concentrate or amplify the field from a distant source. 4-6-2 Long-term exposure measurements Location Place the meter between yourself and the suspected source of radiation. Make measurements at those points where parts of your body are nearest to the source of radiation. Note : Use the “Average” or “Max average” modes only when the instantaneous measurement values are fluctuating greatly. You may fix the meter to a wooden or plastic tripod. 4-6-3 Alarm function Use this feature in the “Instantaneous”, “Max. instantaneous”, “Average” or “Max. average” modes. When the instantaneous measured value exceeds the limit value, a sequence of warning beeps sounded. 21 Manual data memory storing individual measured values 1. Press READ key, the display shows “R” (reading mode). 2. Press MEM- and READ- key to select the desired memory location. The meter includes a non-volatile manual data memory function which can store a maximum of 99 measured values. 3. Press UNIT key to select the desired reading units. 4-7-1 Storing individual measured values 4. Press MODE key to select the desired sensor axis reading. 5. Press MAX-AVG key to exit. 4-7-3 Deleting manual data memory measured values Once the memory is full, you can clear the entire contents of the manual data memory. The current memory location number appears in the lower right small display. Once you press the MEM key, it will store a displayed value and plus “one” for the memory location number. Each flash of the “M” symbol display indicates one storage. The memory location number shows “99”, to indicate the manual datamemory is full, then you must clear the entire contents of the manual data memory before you store any new values. 1. Press to turn off the meter. 2. Press and hold MEM and turn on the meter again, the display then shows “M ” and “ ” 3. Press READ- to select “ 4-7-2 Reading individual measured values ” to clear memory. 4. Press MEM- to clear memory. 5. MEASUREMENT PREPARATION 5-1 Battery Loading Remove the battery cover on the back and put a 9V battery inside. 5-2 Battery Replacement When the battery voltage drops below the operating voltage, the mark appears and flashes, If it appears, the battery should be replaced with a new one. 22 23 9720 : 28-09-2012