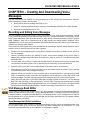
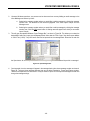
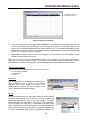
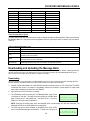
1
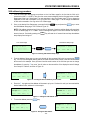
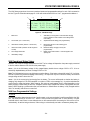
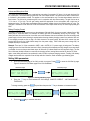
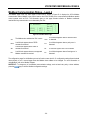
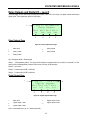
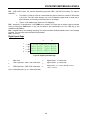
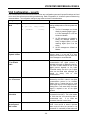
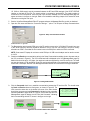
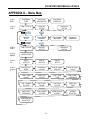
VOICECOM USER MANUAL ISSUE 4 VAA addressing procedure: 1. From the VCA’s Main Status page, arrow down to the Line Status page for the line that the VAA unit is connected to (LINE 1 or LINE 2). Note from the menu structure diagram that the first page below the Main Status page is the Line 1 Status page. The next page down is the Line 2 Status page. To set or change the addresses of VAA units connected to Line 1 go to the Line 1 Status page. To set or change the addresses of VAA units connected to Line 2 go to the Line 2 Status page. 2. Once on the desired Line Status page, press and hold the the VAA Address Setup page. This is shown in Figure 15. ESC key and press the ENTER key to enter NOTE: VAA address programming will time out after 10 seconds of inactivity and the display will revert back to the Line Status page. A ** time out** message will appear on the third line when the display is about to time out. Continually pressing the setup display from timing out. FUNC ............................................................................. key will reset the 10 second timer and stop Line 1 Status Page the address VAA Address Setup Page 2 Line 1 [ 1] VAA’s PSW RQ o/o OPo/o ----- ----- --------- ----- ----- - ESC 2 L1 Address Setup Accept:Ent < [esc] > + ENTER S/n: 0100 Adr [ 1] Figure 15 - Entering VAA Address Setup Page 3. From the Address Setup page you can cycle through all the connected VAA units by pressing the ENTER key. The VAA units will appear starting with the unit with the lowest serial number. VAA serial number 0100 will be used in this example. Once you have found the serial number of the VAA that you want to change the address of, press the key once. You will notice on the second line of the display the text will change from “Accept” to “SetAdr”, as shown in Figure 16. 2 L1 Address Setup SetAdr:Ent < [esc] > 2 L1 Address Setup SetAdr:Ent < [esc] > S/n: S/n: 0100 Adr [ 1] 0100 Adr [ 1] Figure 16 – Locating the VAA to address by serial number 4. Press the key again and the address will increment up by one. Continue this until you have reached the desired address value, address 4 in this example. 2 L1 Address Setup Accept:Ent < [esc] > 2 L1 Address Setup SetAdr:Ent < [esc] > S/n: S/n: 0100 Adr [ 1] 0100 Adr [ 4] Figure 17 - Setting the VAA address value 5. To save the address press the ENTER key. 2 L1 Address Setup SetUp:Ent < [esc] > S/n: 0100 Adr [ 1] 2 L1 Address Setup Accept:Ent < [esc] > ENTER Figure 18 - Saving the VAA address -22- S/n: 0100 Adr [ 1]