1
T E
4 2
5 2 X
6 2
6 2 X
a n d
5 0 X
U s e r
M a n u a l
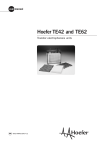
TE 42 and TE 62
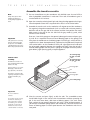
1 Install the safety lid. The cassettes and electrode panels are color coded to
Note
The two red caps on the lid
accommodate the banana
plugs on the SE 600 model
immersible heat exchanger
(irrespective of the orientation).
match the leads in the lid: Orient the lid so that the grey half of the cassettes
and the grey anode panel face the anode (+), or red lead, and the black half of
the cassettes and the black cathode panel face the cathode (-), or black lead.
2 Use only an approved power supply such as the Hoefer EPS 2A200. Make sure the
power supply is off and all controls are set to zero. Plug the red lead into the red
output jack and the black lead into the black output jack. In most systems, the
red lead is the anode (+), and the black lead is the cathode (–).
3 Set the power supply. Constant current mode is recommended. If constant
voltage mode is selected, carefully monitor the current (increased current
increases Joule heating). If the current exceeds 1 A, decrease the voltage. If available, set the power supply timer for no more than two hours.
TE 52X, TE 62X, or TE 42 with the TE 50X power lid
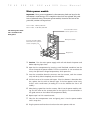
1 Turn off (o) the power switch located at the back of the power lid and turn the
knob into the fully counter-clockwise position. Install the power
lid, making sure the banana plugs on the color-coded electrode panels seat into
the connectors in the underside of the power lid. (The anode, +, is at the right
rear of the lid and connects to the grey electrode panel.)
ADJUST CURRENT
2 Plug the power cord into a properly grounded outlet and then turn on (–) the
power switch.
3 Set the current level. Flip the METER READ switch to the AMPS position. Turn the
ADJUST CURRENT knob until the desired setting is displayed.
The cathode (–) plug, (underside,
front), fits onto the connector on the
black electrode panel.
The anode (+) plug, underside, rear) fits onto the connector on the grey electrode
panel.