1
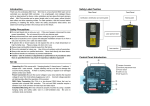
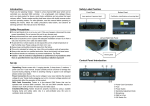
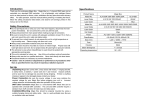
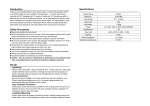
Introduction Safety Label Position Thank you for purchasing Club II. Club II is a three-channel DMX laser can be controlled via a standard DMX controller. It is a lightweight, mini intelligent fixture and is an ideal product for discos, clubs, exhibitions and any place that need visionary effect. Club II provides red, green, yellow laser effect and three operating modes. For safe operation, read this manual before powering or installing the fixture, follow the safety precautions listed below, and observe all warnings printed in this manual and on the fixture. Rear Panel Left and Right Side Front Panel Total 8 laser apertures Safety Precautions Do not spill liquids into or onto your unit. If this ever happens, disconnect the main power immediately. Do not connect this unit to any dimmer pack. Always disconnect from main power before making any type of connection. Be sure to locate this unit in a place with adequate ventilation at least 15 cm from a wall, and mount this unit in safe and stable matter. To prevent fire or shock hazard, do not expose this unit to a high temperature or high humidity area. Please unplug unit when not in use. Always keep combustible materials away from the fixture. This unit is intended for indoor use. Use of this unit outdoors voids all warranties. Always refer service to a qualified technician. Never look directly into laser beam. Occasional breaks are necessary to prevent breakdowns. Caution - Use of controls or adjustments or performance of procedures other than as specified herein may result in hazardous radiation exposure! Set Up Unpacking Club II comes with: 2 hanging brackets, 4 clamp levers, 4 washers, 1 adapter and 1 user manual. Unpack carefully and be sure that no damage has occurred during shipping. If there is anything missing or appear to be damaged please contact your dealer. Power Connection Be sure the source voltage in your area matches the required voltage for your Club II before plugging your unit in. Incorrect voltage selection will detrimentally affect the operation of this product. DMX Cable Connection Club II is a three-channel DMX fixture that can be operated with universal DMX controller. This unit and DMX controller require a standard 3-pin XLR connector for data input and data output. Installation/Mounting Club II should be properly mounted by using a suitable hanging clamp and safety cable. Use in a well-ventilated area. Be sure no ventilation slots are blocked. Certification, identification and warning label Warning label Laser aperture label Control Panel Introduction 4 5 1 Adapter Connection 2 Sensitivity Adjustment Knob 3 Power Switch 4 DMX In & Out 5 DIP Switch Pin 3 2 1 Operating Modes (Cont.) Operating Modes (Cont.) DMX Signal Levels (Cont.) DMX Signal Levels Channel-2 Channel-1 Range 0-255 Range 0-255 Colors and Lines Selection 226-255 Colors and Lines change every 5 seconds 208-225 Colors and Lines change every 3 seconds 196-207 Red + Yellow + Green, dotted line2 183-195 Red + Green, dotted line2 170-182 Green, dotted line2 157-169 Red, dotted line2 144-156 Red +Yellow + Green, line 131-143 Red + Yellow, line 118-130 Green + Yellow, line 105-117 Red + Green, line 92-104 Red + Yellow + Green, dotted line 79-91 Red + Green, dotted line 66-78 Yellow, dotted line 53-65 Green, dotted line 40-52 Red, dotted line 27-39 Yellow, line 14-26 Green, line 1-13 Red, line 0 OFF Channel-3 Laser up/down movement selection Range 0-255 Laser up/down preset movement selection 228-255 216-227 Sound Active 255 ×4 times Laser lights continuously move downward 213-215 201-212 ×3 times Stop Laser continuously ×2 times move upward 0-200 Laser position selection ×1 time Starting Point ×1 time ×2 times ×3 times 56 0-55 ×4 times Not Used Trouble Shooting Operating Modes If there is no light from the unit, please check the main power supply and fuse. If unit does not respond to DMX, please check the DMX cables are connected properly and are wired correctly. If unit does not response to the music please check the sound-activation adjustment. If problems cannot be solved please contact your dealer for service You can adjust the position of green and red light by follow steps to make the best yellow light effect (FOR AL18 TRI-COLOR UNITS ONLY) Step1: Set the DIP switch 12 to ON, others to OFF Step2: Open the case (Before you open the case please project light on to the wall. Never look into the beam directly.) Knob1: Control green light vertically. Knob2: Control green light horizontally. Step3: control knob1 to vertically adjust green light line to the same position of height with red light line 1. Stand-Alone Operation (Auto, Sound Active Mode) Auto mode The unit runs built-in program to change the laser effects automatically. Set DIP switch pin 10 to ON, other pins to OFF to run Auto mode Sound Active mode This unit has built-in program that will react to sound and music under Sound Active mode. Set all DIP switch pins to OFF to run Sound Active mode 2. Master-Slave Operation (Auto, Sound Active Mode) This mode allows user to link up to 32 units to run the Master-Slave operation. In the Master-Slave operation one unit will act as the controlling unit and the others will react to the controlling unit. Daisy chain your units via the standard XLR microphone cables in the following configuration: ‘Out’ from the first unit to ‘In’ on the second, ‘Out’ from the second to ‘In’ on the third and so on. Auto mode To set the master: Set DIP switch pin 10 and 11 to ON, other pins to OFF. To set the slaves: Set pin 1 to ON, other pins to OFF Sound Active mode To set the master: Set DIP switch pin 11 to ON, other pins to OFF. To set the slaves: Set pin 1 to ON, other pins to OFF 3. DMX Operation DMX operation gives the users freedom to create their own programs tailored to their own individual needs. To run this unit in DMX mode, connect the unit to any standard DMX controller via XLR connectors. Please consult DMX controller manual to determine address. Function Selection Chart DIP SWITCHES CHART 1 2 3 4 5 6 7 8 9 FUNCTION 10 11 12 OFF OFF OFF OFF OFF OFF OFF OFF OFF OFF ╳ OFF Step4: control knob2 to overlap the green light line and red light line OFF OFF OFF OFF OFF OFF OFF OFF OFF ON ╳ OFF SET SOUND / AUTO MODE ON OFF ON OFF OFF OFF OFF OFF OFF OFF OFF OFF OFF OFF SET ADDRESS OFF OFF OFF OFF OFF OFF OFF OFF OFF OFF OFF OFF OFF OFF ON SOUND MODE AUTO MODE MASTER SLAVE DMX MODE TEST MODE Cleaning Use a soft cloth and normal glass cleaner to clean the outside casing. Cleaning frequency depends on the environment in which the fixture operates. Be sure to dry all parts before plugging the unit back in. AL18 Series User Manual Specifications Product Name Club II Model No. AL18-5R/ 30R/ 50R/ 100R/ 200R AL18-05G/ 20G/ 30G Laser Diode 4.9/ 30/ 50/ 100/ 200mW 4.9/ 20/ 30mW Laser Color Red Green Model No. Laser Diode 5R5G 20R10G 50R20G 100R30G 200R50G 4.9mW x 20mW + 50mW + 100mW + 200mW + 2 10mW 20mW 30mW 50mW Laser Color Red, Green and Yellow Net Weight 4.5Kgs Power Club II UL Adapter (Input 120V 60Hz & Output DC 12V) or CE Adapter (Input 220-240V 50Hz & Output DC 12V) Classification 4.9~20mW: 3R/ 30~200mW: 3B Size (mm) L140 x W120 x H500 Housing Metal Beam Divergence < 1.5 mrad Operating Temperature 18~25°C Your Best Mate in Laser Lighting! ©2007 ACTOR-MATE CO., LTD. No.15, Lane 83, Lungshou Street, Taoyuan City, Taiwan 330, R.O.C. Tel:+886 3 3791326 / Fax:+886 3 3791919 www.actlaser.com.tw active@actlaser.com.tw