Transcript
VESTIL MANUFACTURING CORPORATION
2999 North Wayne St., Angola, IN 46703
Phone (260) 665-7586 • Fax (260) 665-1339
E-mail: sales@vestil.com • www.vestil.com
Revised 10-07
A company dedicated to solving ergonomic and
material handling problems since 1955.
Drum Handling Equipment
INSTRUCTION
GUIDE
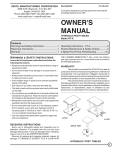
DELUXE ROTATING DRUM CART • RDC-1000
DRIP PAN INSTALLATION INSTRUCTIONS
Contents
Warnings and Safety Instructions ................ 1
Replacement Parts and Receiving .............. 1
WARNINGS & SAFETY INSTRUCTIONS
• Ensure that all employees understand and follow
the following instructions.
• Failure to read and understand these instructions
before assembling the unit constitutes a misuse of
the product. All persons involved in performing this
task must be familiar with this material.
• Maintenance and repairs are to be done only by
personnel qualified to perform the required work.
Consideration will not be given for warranty repair
charges without prior written authorization from the
manufacturer.
REPLACEMENT PARTS
We take pride in using quality parts on the equipment
we manufacture. We are not responsible for equipment
problems resulting from the use of unapproved replacement
parts.
To order replacement or spare parts for this
equipment, contact the factory.
In any communication with the factory please be
prepared to provide the model and serial number of the unit.
What you will need .......................................... 1
Installation Instructions ................................... 1
DRIP PAN INSTALLATION INSTRUCTIONS
STEP ONE
Remove rear
inside nut and
bolt from both
swivels casters.
STEP TWO
Using original nuts and
bolts, install drip pan
brackets.
RECEIVING INSTRUCTIONS
It is possible that this unit could incur damage during
transit.
Inspect the parts and packaging closely when it
arrives. If you see evidence of damage or rough handling to
either the packaging or to the unit when it is being received,
immediately make a note of it on the packing slip!
It is important that you remove the unit’s packaging
upon its arrival to ensure that there is no concealed damage
or to enable a timely claim with the carrier for freight damage.
Also verify that the unit and its specifications are as
ordered.
STEP THREE
Tilting drip pan forward
slightly to clear bracket
fingers, slide drip pan into
brackets.
Slide drip pan in or out to
align with spout of drum.
FOR DRIP PAN INSTALLATION,
YOU WILL NEED:
1. Phillips Screwdriver
2. Crescent Wrench
Approximate installation time: 10 minutes
NOTE: All drip pan installations use existing hardware from the
front swivel casters of the unit. (No hardware is shipped with
the brackets.)