1
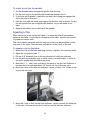
8. Move the X-axis so that the dial test indicator’s point wipes across the width
of the fixed jaw of the vise.
9. Take a reading when the point of the dial test indicator reaches the far end
of the vise jaw.
10. Move the Z-axis to raise the dial test indicator so that the point is above the
vise jaws.
11. Tap the vise with a dead-blow hammer to rotate it in the appropriate
direction to reduce the reading on the dial test indicator.
12. Repeat steps 5 through 11 until the reading on the dial test indicator is
acceptable to you. You should be able to reduce the reading to 0.001" or
less.
13. Tighten the vise mounting bolts.
Using Parallels
Precision parallels are used to raise the workpiece off the bed of the vise to a
position where you can mill the top surface. Parallels come in sets of graduated
heights. Choose a pair of parallels that position the top surface of the work
above the top of the vise jaws, while keeping enough material between the
jaws of the vise for effective clamping.
Clamping with a Clamping Kit
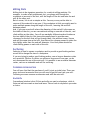
The clamping kit is the “Erector Set” of the milling machine. Use it to clamp
large workpieces, fixtures, and even vises to the mill table.
Use 1-2-3 blocks as part of your “Erector Set.” They can be used to hold
workpieces up off the table so you won’t drill into the table. They can be used
to mount workpieces, and they can be used to set work up perpendicular to the
mill table.
20