1
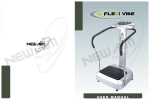
Model No. NTEVVB14808.0
Serial No.
Write the serial number in the
space above for reference.
Serial
Number
Decal
QUESTIONS?
As a manufacturer, we are committed to providing complete customer
satisfaction. If you have questions,
or if there are missing parts, please
contact us:
Call: 08457 089 009
Outside UK: 0 (44) 113 3877133
Fax: 0 (44) 113 3877125
Email: csuk@iconeurope.com
Write:
ICON Health & Fitness, Ltd.
Unit 4
Revie Road Industrial Estate
Revie Road, Beeston
Leeds, LS11 8JG
UK
CAUTION
Read all precautions and instructions in this manual before using
this equipment. Keep this manual
for future reference.
USERʼS MANUAL
TABLE OF CONTENTS
WARNING DECAL PLACEMENT . . . . . . . . . . . . . . . . . . . . . . . . . . . . . . . . . . . . . . . . . . . . . . . . . . . . . . . . . . . . . .2
IMPORTANT PRECAUTIONS . . . . . . . . . . . . . . . . . . . . . . . . . . . . . . . . . . . . . . . . . . . . . . . . . . . . . . . . . . . . . . . .3
BEFORE YOU BEGIN . . . . . . . . . . . . . . . . . . . . . . . . . . . . . . . . . . . . . . . . . . . . . . . . . . . . . . . . . . . . . . . . . . . . . .5
PART IDENTIFICATION CHART . . . . . . . . . . . . . . . . . . . . . . . . . . . . . . . . . . . . . . . . . . . . . . . . . . . . . . . . . . . . . .6
ASSEMBLY . . . . . . . . . . . . . . . . . . . . . . . . . . . . . . . . . . . . . . . . . . . . . . . . . . . . . . . . . . . . . . . . . . . . . . . . . . . . . . .7
HOW TO USE THE VIBRATION PLATFORM . . . . . . . . . . . . . . . . . . . . . . . . . . . . . . . . . . . . . . . . . . . . . . . . . . .13
TROUBLESHOOTING . . . . . . . . . . . . . . . . . . . . . . . . . . . . . . . . . . . . . . . . . . . . . . . . . . . . . . . . . . . . . . . . . . . . .17
PART LIST . . . . . . . . . . . . . . . . . . . . . . . . . . . . . . . . . . . . . . . . . . . . . . . . . . . . . . . . . . . . . . . . . . . . . . . . . . . . . .18
EXPLODED DRAWING . . . . . . . . . . . . . . . . . . . . . . . . . . . . . . . . . . . . . . . . . . . . . . . . . . . . . . . . . . . . . . . . . . . .19
ORDERING REPLACEMENT PARTS . . . . . . . . . . . . . . . . . . . . . . . . . . . . . . . . . . . . . . . . . . . . . . . . . .Back Cover
WARNING DECAL PLACEMENT
This drawing shows the location(s) of the warning
decal(s). If a decal is missing or illegible, see the
front cover of this manual and request a free
replacement decal. Apply the decal in the location
shown. Note: The decal(s) may not be shown at actual
size.
NordicTrack is a registered trademark of ICON IP, Inc.
2
IMPORTANT PRECAUTIONS
WARNING:
To reduce the risk of serious injury, read all important precautions and
instructions in this manual and all warnings on the vibration platform before using the vibration
platform. ICON assumes no responsibility for personal injury or property damage sustained by or
through the use of this product.
1. Before beginning any exercise program,
consult your physician. This is especially
important for persons over the age of 35 or
persons with pre-existing health problems.
10. It is recommended that you use the vibration
platform no more than 15 minutes per day
and no more than 3 times per week.
3. The vibration platform is intended for home
use only. Do not use the vibration platform
in a commercial, rental, or institutional setting.
12. The following is a list of factors and conditions that may make exercising on the vibration platform inadvisable (this list is not
exhaustive; it is intended only for reference).
If one or more factors or conditions apply to
you, consult your physician before using the
vibration platform.
• Knee or hip implant
• Pacemaker
• Recently placed screws, pins, bolts, or
spirals
• Acute hernia, discopathy, or spondylitis
• Serious heart or vascular disease
• Acute thrombosis
• Tumor
• Serious migraine
• Epilepsy
• Serious diabetes
• Recent wound due to operation
• Fresh inflammation
• Pregnancy
11. Be careful when stepping down from the
vibration platform; your muscles will feel different after you exercise on the vibration
platform.
2. It is the responsibility of the owner to ensure
that all users of the vibration platform are
adequately informed of all precautions.
4. Keep the vibration platform indoors, away
from moisture and dust. Place the vibration
platform on a level surface, with a mat
beneath it to protect the floor or carpet. Do
not place the vibration platform in a garage
or covered patio, or near water.
5. Inspect and properly tighten all parts regularly. Replace any worn parts immediately.
6. Keep children under age 12 and pets away
from the vibration platform at all times.
7. The vibration platform should not be used
by persons weighing more than 300 lbs.
(136 kg).
8. Never allow more than one person on the
vibration platform at a time.
13. If you feel pain or dizziness while exercising,
stop immediately and cool down.
9. Keep your back straight while using the
vibration platform; do not arch your back.
When standing on the vibration platform,
bend your knees slightly and balance your
weight on the balls of your feet.
14. Make sure that the dumbbells are secure in
the weight rests when they are not in use.
15. Always remove the dumbbells from the
vibration platform before moving the vibration platform.
3
16. Use the vibration platform and the included
dumbbells only as described in this manual.
20. Never leave the vibration platform unattended while it is running. Always unplug the
power cord and switch the reset/off circuit
breaker to the off position when the vibration platform is not in use. (See the drawing
on page 5 for the location of the circuit
breaker.)
17. When connecting the power cord (see page
14), plug the power cord into an earthed circuit. No other appliance should be on the
same circuit. When replacing the fuse, an
ASTA approved BS1362 type should be fitted
to the fuse carrier. A 13 amp fuse should be
used.
21.
18. If an extension cord is needed, use only a 3conductor, 14-gauge (1 mm2) cord that is no
longer than 5 ft. (1.5 m).
19. Keep the power cord away from heated surfaces.
4
DANGER: Always unplug the power
cord when the vibration platform is not in
use and before cleaning the vibration platform. Servicing other than the procedures in
this manual should be performed by an
authorized service representative only.
BEFORE YOU BEGIN
product model number and serial number before contacting us. The model number and the location of the
serial number decal are shown on the front cover of
this manual.
Thank you for selecting the revolutionary NORDICTRACK® V7 vibration platform. The V7 vibration platform offers whole body vibration options designed to
make your workouts effective and enjoyable.
For your benefit, read this manual carefully before
you use the vibration platform. If you have questions after reading this manual, please see the front
cover of this manual. To help us assist you, note the
Before reading further, please familiarize yourself with
the parts that are labeled in the drawing below.
Console
Handlebar
Dumbbell
Weight Rest
Reset/Off Circuit Breaker
Dumbbell
Power Cord
Start Button
Stop Button
Wheel
Base
5
PART IDENTIFICATION CHART
See the drawings below to identify small parts used in assembly. The number in parentheses by each drawing is
the key number of the part, from the PART LIST near the end of this manual. Note: Some small parts may
have been preattached. If a part is not in the hardware kit, check to see if it has been preattached.
M10 Locknut (32)
M4 x 16mm
Round Screw (26)
M10 Split
Washer (38)
M5 x 38mm Screw (40)
M10 x 20mm
Patch Screw (28)
M4 x 19mm
Screw (45)
M10 x 35mm Screw (34)
M10 x 55mm Patch Screw (20)
M10 x 50mm Patch Screw (51)
M10 x 62mm Patch Screw (37)
M10 x 68mm Bolt (55)
M10 x 114mm Bolt (33)
6
ASSEMBLY
• For help identifying small parts, see the PART
IDENTIFICATION CHART on page 6.
Make Assembly Easier
This manual is designed to ensure that the
vibration platform can be assembled successfully by almost anyone. Most people find that if
they set aside plenty of time, assembly goes
smoothly.
• Tighten all parts as you assemble them, unless
instructed to do otherwise.
• Assembly may require the following tools (not
included):
Before beginning assembly, carefully read the
following information and instructions:
one adjustable wrench
one rubber mallet
• Assembly requires two persons.
one Phillips screwdriver
• Place all parts in a cleared area and remove the
packing materials. Do not dispose of the packing
materials until assembly is completed.
Assembly will be more convenient if you have a
socket set, a set of open-end or closed-end
wrenches, or a set of ratchet wrenches.
1. Attach a Rubber Spacer (29) and a Foot (13) to
the Lower Upright (1) with an M10 x 35mm
Screw (34).
1
43
Next, locate the Wire Harness (43) inside the
Lower Upright (1). Connect the Wire Harness to
the base wire as shown. Then, pull the Wire
Harness out of the top of the Lower Upright.
1
Base
Wire
7
43
29
13
34
2. Note: For clarity some parts are not shown.
2
Tip: Be careful not to pinch the wires during
this step.
1
32
With the help of a second person, carefully tip
the Base (5) onto its side.
55
Attach the Lower Upright (1) to the Base (5)
with two M10 x 55mm Patch Screws (20), two
M10 Split Washers (38), two M10 x 68mm Bolts
(55), and two M10 Locknuts (32).
5
20
3. Tip: Orient the Wheel Bracket (35) so that
the arrow sticker is pointing upward.
38
3
Attach the Wheel Bracket (35) to the Lower
Upright (1) with two M10 x 20mm Patch Screws
(28).
1
28
35
4. Attach the Wheel (30) to the Wheel Bracket (35)
with an M10 x 114mm Bolt (33) and an M10
Locknut (32). Do not overtighten the Locknut;
the Wheel must rotate freely.
4
Note: If the Wheel (30) rattles when the
vibration platform is in use, tighten the M10
Locknut (32) until the rattling stops.
32
35
8
33
5. Attach the Weight Rest (42) to the Weight Rest
Frame (41) with eight M5 x 38mm Screws (40).
Do not tighten the Screws yet.
5
42
41
6. Locate the wire tie inside the Upper Upright (36).
Insert the wire tie through the hole in the Weight
Rest Frame (41).
6
Next, attach the Upper Upright (36) to the
Weight Rest Frame (41) with two M10 x 50mm
Patch Screws (51) and two M10 Split Washers
(38).
36
Wire Tie
Hole
41
38
51
7. Have a second person hold the Upper Upright
(36) near the Lower Upright (1).
7
See the inset drawing. Tie the lower end of the
wire tie to the Wire Harness (43) as shown.
Then, pull the upper end of the wire tie until the
Wire Harness is routed through the Upper
Upright (36).
43
36
Wire Tie
43
9
1
8. Tip: Be careful not to pinch the wires during
this step.
8
Attach the Upper Upright (36) to the Lower
Upright (1) with four M10 x 20mm Patch Screws
(28) and four M10 Split Washers (38).
36
See step 5. Tighten the eight M5 x 38mm
Screws (40).
28
38
38
28
9. Tip: Orient the Handlebar (39) so that the
sticker marked with an “R” is in the location
shown.
9
Attach the Handlebar (39) to the Upper Upright
(36) with two M10 x 62mm Patch Screws (37)
and two M10 Split Washers (38).
37
38
39
36
10. Remove the four M4 x 12mm Self-tapping
Screws (27) from the back of the Console (3).
Set the Self-tapping Screws aside until step
13.
1
“R”
10
3
10
27
27
11. Attach the back of the Console (3) to the Upper
Upright (36) with two M4 x 16mm Round
Screws (26). Do not tighten the Round
Screws yet.
11
3
26
36
12. While a second person holds the front of the
Console (3) near the Upper Upright (36), connect the console ground wire to the Ground
Wire (52). Next, connect the console wire to the
Wire Harness (43). Then, insert the wires into
the Upper Upright.
12
3
Console
Wire
43
36
13. Tip: Be careful not to pinch the wires during
this step.
13
Attach the front of the Console (3) to the back
of the Console with the four M4 x 12mm Selftapping Screws (27) you removed in step 10
and an M4 x 19mm Screw (45).
Console
Ground Wire
52
3
27
3
See step 11. Tighten the two M4 x 16mm
Round Screws (26).
27
45
11
14. Set ten weight plates into the indicated slots in
the right side of the Weight Rest (42). Next, lift
the two selector pins on a Dumbbell (44), and
slide the selector pins to the adjustment holes
marked “1.1.” Place the Dumbbell on the weight
plates. Then, lift the two selector pins and slide
them to the adjustment holes marked “6.8.”
14
Selector
Pins
44
44
Repeat this step with the other Dumbbell (44).
Weight
Plates
Slots
42
15. Plug the Power Cord (17) into the Receptacle
(18) located on the Base (5).
15
17
18
16. Make sure that all parts are properly tightened before you use the vibration platform.
12
5
HOW TO USE THE VIBRATION PLATFORM
HOW TO MOVE THE VIBRATION PLATFORM
Before moving the vibration platform, unplug
the power cord and remove the dumbbells from
the weight rest.
Handlebar
Hold the handlebar and place one foot against the
wheel. Tilt the vibration platform until it rolls freely
on the wheel. Carefully move the vibration platform
to the desired location. To reduce the risk of
injury, use extreme caution while moving the
vibration platform. Do not move the vibration
platform over an uneven surface.
Wheel
Dumbbell
Dumbbell
HOW TO USE THE ADJUSTABLE-WEIGHT
DUMBBELLS
Each dumbbell handle can be used with two, four,
six, eight, or ten weight plates; each dumbbell handle can also be used without weight plates.
Selector
Pin
To select the desired number of weight plates, first
set a dumbbell on the weight rest as shown. Next,
lift one of the selector pins, slide the selector pin to
one of the adjustment holes, and then release the
selector pin. Rock the selector pin from side to side
to make sure that it is fully inserted into one of the
adjustment holes. Adjust the other selector pin on
the dumbbell in the same way. Always attach the
same number of weight plates to both sides of
each dumbbell handle.
Handle
Weight
Rest
To use the dumbbell, lift it straight upward off the
weight rest, making sure that the unattached weight
plates remain on the weight rest.
13
Weight
Plates
HOW TO PLUG IN THE POWER CORD
This product must be earthed. If it should malfunction or break down, earthing provides a path of least resistance for electric current to reduce the risk of electric shock. This product is equipped with a power cord having
an equipment-earthing conductor and an earthing plug. IMPORTANT: If the power cord is damaged, it must
be replaced with a manufacturer-recommended power cord.
1. Plug the indicated end of the power cord into the socket on the
vibration platform.
2. Remove the two screws from the adapter, and open the
adapter cover. Next, press the pins on the power cord into the
metal clips in the adapter as shown. Then, close the adapter
cover over the end of the power cord, and tighten the screws
into the adapter. IMPORTANT: Make sure that the adapter
cover is secure and that the screws have been tightened
before you use the power cord.
3. Plug the power cord into an appropriate outlet that is properly
installed and earthed in accordance with all local codes and
ordinances. Important: The vibration platform is not compatible with RCD-equipped outlets.
DANGER:
1
Socket on
vibration platform
2
Adapter
Cover
Screws
Adapter
3
Pins
Metal
Clips
Outlet
Improper connection of the equipment-earthing conductor can result in an
increased risk of electric shock. Check with a qualified electrician or serviceman if you are in doubt
as to whether the product is properly earthed. Do not modify the plug provided with the product—if it
will not fit the outlet, have a proper outlet installed by a qualified electrician.
14
CONSOLE DIAGRAM
CONSOLE FEATURES
you do not do this, the console or other electronic
components may become damaged.
The console offers a selection of features designed to
make your workouts more effective and enjoyable.
You can change the time and frequency of your vibration sessions with the touch of a button.
Plug in the power
cord (see page 14).
Next, locate the
Reset
reset/off circuit breakPosition
er on the vibration
platform near the
power cord. Make
sure that the circuit
breaker is in the reset position.
The console also features the new iFit Interactive
Workout System. The iFit Interactive Workout System
is compatible with iFit cards containing workout programs designed to help you achieve specific fitness
goals. IFit programs control the time and frequency of
the vibration platform while the voice of a personal
trainer coaches you and motivates you through your
workouts. IFit cards are available separately. To purchase iFit cards, go to www.iFit.com or see the
front cover of this manual. iFit cards are also
available at select stores.
EXERCISE FORM
See the accompanying exercise DVD to learn the correct form for several exercises that can be performed
on the vibration platform. When standing on the vibration platform, bend your knees slightly and balance
your weight on the balls of your feet.
HOW TO TURN ON THE POWER
IMPORTANT: If the vibration platform has been
exposed to cold temperatures, allow it to warm to
room temperature before turning on the power. If
15
HOW TO USE THE MANUAL MODE
HOW TO USE AN IFIT PROGRAM
1. Turn on the power.
1. Turn on the power.
See HOW TO TURN ON THE POWER on page
15.
See HOW TO TURN ON THE POWER on page
15.
2. Select the desired vibration time.
2. Insert an iFit card and select a program.
Press the desired time button to select a vibration
time of 30, 45, or 60 seconds. The display will
show which length of time you have selected.
To use an iFit program, insert an iFit card into the
iFit slot; make sure that the iFit card is oriented so
the metal contacts are face down and are facing
the slot. When the iFit card is properly inserted,
the indicator next to the slot will light and the number of the iFit program will appear in the display.
3. Select the desired vibration frequency.
Press the desired frequency button to select a
vibration frequency of 25, 30, or 35 hertz. The display will show which frequency you have selected.
4. Start a vibration session.
Press the start button on the platform
to start a vibration
session.
Stop
Button
iFit Slot
Start
Button
iFit Card
Next, select the desired program on the iFit card
by pressing the increase and decrease buttons
next to the iFit slot.
A moment after you select a program, the voice of
a personal trainer will begin guiding you through
your workout.
5. Stop or pause a vibration session.
Press the stop button (see the drawing above) on
the platform to stop or pause a vibration session.
Press the start button to continue the vibration session if desired.
3. When you are finished exercising, remove the
iFit card.
Remove the iFit card when you are finished exercising. Store the iFit card in a secure place.
Note: When the session ends, a tone will sound to
alert you, and the vibration platform will automatically stop.
6. Start additional vibration sessions as desired.
Repeat steps 2–5 for as many additional vibration
sessions as desired. IMPORTANT: It is recommended that you use the vibration platform for
no more than 15 minutes per day and no more
than 3 times per week.
7. When you are finished, switch the reset/off
switch to the “off” position and unplug the
power cord.
16
TROUBLESHOOTING
Inspect all parts of the vibration platform regularly. Replace any worn parts immediately. Outer surfaces of the vibration platform can be cleaned with a damp cloth and a mild, non-abrasive detergent; do not use solvents to clean
the vibration platform.
Most vibration platform problems can be solved by following the simple steps below. Find the symptom
that applies, and follow the steps listed. If further assistance is needed, see the front cover of this manual.
PROBLEM: The power does not turn on
SOLUTION: a. Make sure that the power cord is plugged into a properly earthed outlet. (See page 14.) If an
extension cord is needed, use only a 3-conductor, 14-gauge (1 mm2) cord that is no longer than 5
ft. (1.5 m). IMPORTANT: The vibration platform is not compatible with RCD-equipped outlets.
b. Check the reset/off circuit breaker located on the
vibration platform base near the power cord. If the
switch protrudes as shown, the circuit breaker has
tripped. To reset the circuit breaker, wait for five
minutes and then press the switch back in.
PROBLEM: The power turns off during use
c
Tripped
Reset
SOLUTION: a. Check the reset/off circuit breaker (see the drawing above). If the circuit breaker has tripped,
wait for five minutes and then press the switch back in.
b. Make sure that the power cord is plugged in. If the power cord is plugged in, unplug it, wait for
five minutes, and then plug it back in.
c. If the vibration platform still will not run, please see the front cover of this manual.
17
PART LIST—Model No. NTEVVB14808.0
Key No. Qty.
1
2
3
4
5
6
7
8
9
10
11
12
13
14
15
16
17
18
19
20
21
22
23
24
25
26
27
28
29
30
31
32
33
1
1
1
1
1
1
1
1
2
1
1
1
5
4
4
4
1
1
1
2
2
2
2
4
8
2
4
6
1
1
14
3
1
Description
Lower Upright
Platform Cover
Console
Platform Plate
Base
Vibration Platform
Stop Button
Start Button
Controller Box
Transformer
Controller
Motor
Foot
Shock Absorber Cover
Shock Absorber
Platform Cap
Power Cord
Receptacle
Reset/Off Circuit Breaker
M10 x 55mm Patch Screw
Copper Plate
Spring
M8 x 16mm Screw
M10 x 46mm Flat Head Screw
M8 x 30mm Screw
M4 x 16mm Round Screw
M4 x 12mm Self-tapping Screw
M10 x 20mm Patch Screw
Rubber Spacer
Wheel
M4 x 12mm Screw
M10 Locknut
M10 x 114mm Bolt
Key No. Qty.
34
35
36
37
38
39
40
41
42
43
44
45
46
47
48
49
50
51
52
53
54
55
56
57
58
59
60
*
*
*
*
*
5
1
1
2
10
1
8
1
1
1
1
1
4
4
4
1
1
2
1
2
2
2
1
1
1
4
1
–
–
–
–
–
Description
R1008A
M10 x 35mm Screw
Wheel Bracket
Upper Upright
M10 x 62mm Patch Screw
M10 Split Washer
Handlebar
M5 x 38mm Screw
Weight Rest Frame
Weight Rest
Wire Harness
Dumbbell (Pair)
M4 x 19mm Screw
M8 Washer
M8 Split Washer
Frame Cover
Motor Mounting Bracket
Motor Cover
M10 x 50mm Patch Screw
Ground Wire
M4 x 12mm Screw
Grommet
M10 x 68mm Bolt
Switch Wire Harness
Base Bracket
Filter
M4 x 16mm Screw
Power Cord Adapter
Wiring Tie
Hex Key
Userʼs Manual
DVD
iFit Demo Card
Note: Specifications are subject to change without notice. See the back cover of this manual for information about
ordering replacement parts. *These parts are not illustrated.
18
EXPLODED DRAWING—Model No. NTEVVB14808.0
24
48
24
48
7
8
37
37
38
24
22
48
39
3
38
27
48
23
4
60
46
47
25 54
50
25
59
40
53
31
31
31
19
20
58
31
9
32
31
18 19
38
10
31
31
40
28
38
28
14
13
40
38
17
16
41
59 38
51
31
9
34
25
40
54
15
47
25
44
11
6
46
53
42
57
12
52
36
21
49
27
45
26
2
24
R1008A
30
32
1
29
33
35
28
15
13
55
34
5
14
16
43
13
34
56
ORDERING REPLACEMENT PARTS
To order replacement parts, please see the front cover of this manual. To help us assist you, be prepared to
provide the following information when contacting us:
• the model number and serial number of the product (see the front cover of this manual)
• the name of the product (see the front cover of this manual)
• the key number and description of the replacement part(s) (see the PART LIST and the EXPLODED
DRAWING near the end of this manual)
Part No. 272935 R1008A
Printed in China © 2008 ICON IP, Inc.