1
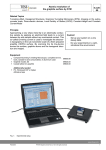
Atomic resolution of
the graphite surface by STM
5.3.2000
PHYWE Compact-STM set
1
1
1
1
1
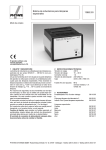
Control unit with mounted scan head
Magnifying cover glass (10X Magnification)
USB cable
Power cord and adapter
MeasureNano Software
(1)
(2)
(3)
(4)
(5)
PHYWE STM Tool Box
1
1
1
1
1
1
1
1
4
Wire cutter
Flat nose pliers
Pointed tweezers
Rounded tweezers
Pt/Ir-wire, d = 0.25mm, l = 30 cm
Sample Holder
Graphite sample (HOPG)
Gold sample
Spare sample support
(6)
(7)
(8)
(9)
(10)
(11)
(12)
(13)
(14)
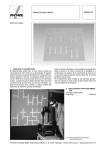
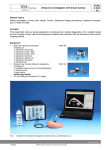
Fig. 2:
STM set.
User Manual
1
Scanning Tunneling Microscopy (STM) –
Operating Instruction and Experiments
(15)
Tasks
1. Prepare a Pt-Ir tip and the graphite (HOPG) sample and approach the tip to the sample.
2. Investigate the topography of clean terraces and the step height between neighboring terraces in
constant-current mode.
3. Image the arrangement of graphite atoms on a clean terrace by optimize tunneling and scanning parameters. Interpret the structure by analyzing angles and distances between atoms and atomic rows
and by using the 2D and 3D graphite model.
4. Measure and compare images in the constant-height and constant-current mode.
Set-up and Procedure
To prepare a fresh tip for STM measurements follow the steps mentioned here or have a look in the
Quick-Start-Guide or chapter 5 of the PHYWE STM user manual respectively. Make sure you have already set up your microscope on a very steady table in a quiet environment with a low level of building
vibrations (e.g. basement). Your microscope should be set up on a separate table than your PC or laptop. Keep some free space on the table to prepare the sample and the measurement tips. Have a look in
the STM user manual, make sure the software starts cleanly
and that you have set appropriate parameters to do measurements on the graphite HOPG sample (Chapter: 5.3.3. in the
user manual / e.g. Set point=1 nA, Tip voltage=50 mV).
Start the tip and sample preparation by taking the necessary
tools out of the toolbox. You will need parts 6 to 12 from the list
mentioned above and some adhesive tape (scotch tape, not included).
Tip preparation
- Use the pointed tweezers to carefully remove the old tip
from the tip holder.
- Hold the end of the wire tightly with the pliers.
- Holding the wire with the pliers, move the cutters at a
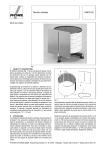
Fig. 3:
length of approximately 4 mm, as obliquely
2
PHYWE Systeme GmbH & Co. KG © All rights reserved
Sketch of the tip preparation.
P2532000