1
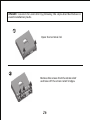
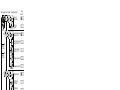
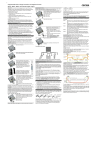
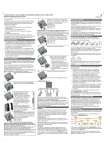
Mount the controller to the wall with
screws that fit to the wall material. Use
screws with 4 to 5 mm shaft and max.
9 mm head diameter, no counter sink.
Mind that the screws have to carry also
the force applied by the wiring.
Mind also the minimum required
distance to floor and ceiling, this is
necessary for ventilation reasons.
A DIN Rail mounting plate is available
as an accessory (CX-DR2). This allows
mounting the controller on a standard
35mm DIN rail. Use the screws supplied
with the mounting plate to fix it to the
controller.
Connect the wires leading to the battery with
correct polarity. To avoid any voltage on the wires,
first connect the controller, then the battery.
Mind the recommended wire length (min 30 cm to
max approx. 100 cm) and the wire size:
CXN10: min 2.5 mm2
CXN20: min 4 mm2
CXN40: min 10 mm2
Wrong polarity will cause a permanent warning
sound.
27