1
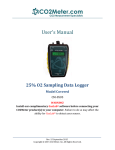
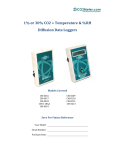
User Manual CO2 Sampling Data Logger CO2 Sample Draw Meter Models Covered CM-0001 CM-0002 CM-0003 CM-0004 CM-0005 CM-0006 CM-0050 CM-0051 CM-0056 CM-0057 Copyright © 2014 CO2 Meter. All Rights Reserved. Sample Draw/Data Logger– Manual Rev. 1.3. Aug 2014 CO2Meter.com Pg. 2 of 23 Sample Draw/Data Logger– Manual CO2Meter.com Table of Contents MODELS COVERED........................................................................................... 1 WELCOME ....................................................................................................... 4 IMPORTANT SAFEGUARDS .............................................................................. 5 PACKAGE CONTENTS ....................................................................................... 6 OPTIONAL ACCESSORIES ........................................................................................ 6 GASLAB ® SOFTWARE ...................................................................................... 7 MINIMUM SYSTEM REQUIREMENTS ......................................................................... 7 PRODUCT OVERVIEW ...................................................................................... 9 POWER SOURCE ................................................................................................... 9 SETUP ................................................................................................................ 9 POWERING THE UNIT .......................................................................................... 11 LCD DISPLAY (IF APPLICABLE) ............................................................................... 11 USAGE (PUMP ONLY) .......................................................................................... 12 THEORY OF OPERATION ....................................................................................... 15 CALIBRATION ..................................................................................................... 15 CALIBRATION PROCEDURE .................................................................................... 16 DEVICE SPECIFICATIONS ................................................................................ 18 TROUBLESHOOTING GUIDE ................................................................................... 19 SUPPORT ....................................................................................................... 19 WARRANTY ................................................................................................... 20 RETURNS ....................................................................................................... 20 LIABILITY ....................................................................................................... 21 CONTACT US .................................................................................................. 22 Rev. 1.3. Aug 2014 Pg. 3 of 23 Sample Draw/Data Logger– Manual CO2Meter.com Welcome Thank you for purchasing our meter. CO2Meter, Inc. is a Florida based business specializing in the design and manufacturing of gas detection and monitoring devices – mainly CO2. Our approach is one based in the science of gas and how best to accurately and repeatedly measure that gas for the end users purposes. Our business partners in Agriculture, Medical, Pharmaceuticals, Science, Beverage, and other fields find our devices to be highly accurate and cost effective. We approach each customer’s application as a unique opportunity to understand, educate, and provide product solutions that meet the customers’ needs while exceeding their expectations for reliability and service. Our continued product innovation in combination with our “customer first” focus allows CO2Meter, Inc. to continue to provide solutions for the future. Based in Ormond Beach, FL, CO2Meter, Inc. is committed to the success of our customers; the health, welfare, and prosperity of our talented employees; and the continued development of our local community. CO2Meter, Inc. appreciates your business and looks forward to working with you and your team in the future. Please take some time to read through this manual in order to become familiar with the meter. Also, please pay special attention to the important safeguards shown on the next page. Rev. 1.3. Aug 2014 Pg. 4 of 23 Sample Draw/Data Logger– Manual CO2Meter.com Important Safeguards To reduce the risk of fire, electrical shock and/or injury to persons, basic safety precautions should always be followed when using electrical appliances, including the following: 1. READ ALL INSTRUCTIONS BEFORE USING THIS METER. 2. INSTALL GasLab ® SOFTWARE BEFORE CONNECTING METER TO A COMPUTER. 3. Do not use rechargeable AA batteries. 4. For models using AA batteries, do not store the meter with the AA Alkaline batteries installed to prevent the potential for battery leakage. 5. Use only the supplied 6VDC international wall power supply adapter. Precisely 6V must be applied to the meter. Other voltages can cause permanent damage. 6. The meter is not designed for outdoor use. 7. Do not allow the meter to be exposed to water. 8. Do not operate the meter with the enclosure opened. 9. Do not operate the meter if it is malfunctioning. SAVE THESE INSTRUCTIONS! Rev. 1.3. Aug 2014 Pg. 5 of 23 Sample Draw/Data Logger– Manual CO2Meter.com Package Contents Please verify that your package contains the following items before using the meter: All units: (1) Meter (1) Rubber Boot (1) 6-foot USB Cable (1) Power supply (1) User manual Sampling units only: (1) 10-foot length 1/8” tubing (2) 1/8” Barb tubing bulkhead fitting (2) 1/8” Barb 10-32 fittings (2) Particle Filter (CM-0118) (2) Hydrophobic Filter (CM-0117) (2) Moisture Trap (CM-0112) Shown with case above Optional Accessories If not included, you can purchase an Extreme Moisture Filter separately. These filters are ideal for high-humidity environments to allow air flow while keeping humidity out. Use in anywhere humidity is very high (> 95%). SKU # CM-0103. Rev. 1.3. Aug 2014 Pg. 6 of 23 Sample Draw/Data Logger– Manual CO2Meter.com GasLab ® Software Visit CO2Meter.com and go to the “Downloads” page (see link below) to download our GasLab® software free or for more information on how to connect, configure, and calibrate your meter. For general information about the program, please see the GasLab ® User Instruction Manual included with your meter/sensor. Additional copies of the GasLab® user manual is available at http://www.co2meter.com/pages/downloads IMPORTANT: MAKE SURE TO INSTALL SOFTWARE BEFORE CONNECTING YOUR DEVICE TO YOUR COMPUTER By installing our GasLab ® software first, you will ensure that the proper driver necessary for your unit is installed on your computer before connecting your meter. Click on the “Install Now” link and then select “Run” when prompted by your browser (as shown on Figure 1 below). Minimum System Requirements To utilize our free software, your computer must meet the following requirements: Windows XP SP3 or higher Microsoft .Net Framework 3.5 SP1 Pentium 4 (or newer) operating at 2.4Ghz or faster 1GB of Random Access Memory (RAM) Hard disk space with at least 20 Megabytes (MB) free (200+MB recommended for logs and application files) Software is compatible with 64-bit operating systems and is fully tested with Windows 7. Rev. 1.3. Aug 2014 Pg. 7 of 23 Sample Draw/Data Logger– Manual CO2Meter.com Figure 1: Install GasLab® online (Internet Explorer 9 shown) Rev. 1.3. Aug 2014 Pg. 8 of 23 Sample Draw/Data Logger– Manual CO2Meter.com Product Overview Display Shows CO2 concentration level and data logging status (optional). Removable Protective Boot Gently peel boot from top of unit to access batteries and USB connector for connection to PC. Power Switch If the unit has data logging capabilities, it disables/enables data logging. Otherwise, it turns the unit on/off. Barb Fittings Connect to sampling system for closed loop sampling. Figure 2: Components Power Source All units can be powered by four (4) AA size batteries (not included) but sampling units can also be powered by the included 6VDC International wall power supply. Setup Our sampling device will require minimal setup since it is designed to be portable. The most important aspect of the setup involves connecting the sampling hoses and ensuring proper setup. Figure 2 above shows the labeled components of the unit, as referenced throughout the rest of this manual. Rev. 1.3. Aug 2014 Pg. 9 of 23 Sample Draw/Data Logger– Manual CO2Meter.com Sampling-Only Models These models are used for sampling of closed-loop CO2 systems and collection of real-time data. There is no initialization required for these models. Units may be powered by the AC Adapter or batteries. While sampling, these units may be connected to a personal computer and used with our GasLab® software to record samples or it can be used as a stand-alone sampling device. Data Logger Models These models feature an internal memory capable of storing data when not attached to a personal computer. These units will allow you to simultaneously read and store CO2 concentration level data. Due to the nature of their design, these units should be connected to your personal computer first, before operation, to initialize and set the logging period, and real-time clock. Insert four (4) AA size batteries into this unit, or connect the unit to the included power supply. In order to initialize data logging functionality, the unit MUST be connected to the computer with data logging switched to off, and the GasLab® software started. Once the unit has been connected, click on the “Configure Sensor” button in the GasLab® interface, set the data logging interval and pump periods as desired. We recommend leaving the pump interval to the default 10-second period. For the pump period, we recommend 10 or more seconds. Error! Reference source not found. Error! Reference source not found. shows the available settings. The pump PWM period can also be tweaked for advanced applications, with 1 being full duty cycle, and values approaching 255 being the Rev. 1.3. Aug 2014 Pg. 10 of 23 Sample Draw/Data Logger– Manual CO2Meter.com shortest duty cycle. The pump mode should always be set to “Data logging” for proper operation of the unit. All models have an internal coin cell CR-2032 3V battery backup for the real-time clock. This battery is inserted in the factory for your convenience and should last the lifetime of the product. Powering the Unit These meters can be powered either by four (4) AA size batteries or by the included power supply. These units CANNOT be powered from the included USB cable. Testing has shown that USB power tends to produce inconsistent supply voltage and degrades sensor accuracy. In the units without data logging, the switch on the front will turn the power ON or OFF, allowing for storage with the batteries installed for long periods of time. In units with data logging, the switch on the front has been dedicated to enabling/disabling data logging. As long as the unit has good batteries or the power adapter is connected, the unit will be operating. If the unit is not going to be used for an extended period of time, batteries should be removed from the unit. LCD Display (if applicable) The Liquid Crystal Display (LCD) screen shows the following features: CO2 in parts-per-million (ppm) for 1% and 5% models CO2 in percentage format (##.##%) for 30%, 65%, 100% Logging On/Off Percentage of memory free Rev. 1.3. Aug 2014 Pg. 11 of 23 Sample Draw/Data Logger– Manual CO2Meter.com Quick Start Guide IMPORTANT: MAKE SURE TO INSTALL SOFTWARE BEFORE CONNECTING YOUR DEVICE TO YOUR COMPUTER 1. Install new batteries (Duracell recommended) or connect the included power supply. 2. Install filters and tubing included as shown on Figure 3. (open loop or close loop) 3. For sample draw meters turn the switch ON to begin sampling 4. For sampling data logging turn on the switch to begin collecting data. 5. Ones sampling is complete, data can be downloaded to your computer through GasLab® 6. For more details on how to download the data, refer to the included GasLab® manual. Usage (Pump only) In order to use the unit, hoses/tubing must be attached to the inlet and outlet fittings on the front of the unit. The pump will draw air from the inlet in a vacuum configuration, push it through the sensing chamber, and exhaust the air out through the outlet. Rev. 1.3. Aug 2014 Pg. 12 of 23 Sample Draw/Data Logger– Manual CO2Meter.com Figure 3: Filters setup We recommend installing the included humidity/particulate filter to ensure the sensing chamber and pump baffle stays clear and corrosion free. Replacements filters are available on CO2meter.com http://www.co2meter.com/collections/co2-sensors/products/sensorpump-kit-filters-traps . Rev. 1.3. Aug 2014 Pg. 13 of 23 Sample Draw/Data Logger– Manual CO2Meter.com Closed Loop Operation Figure 4: Closed loop sampling setup Open Loop with Environmental Exhaust Figure 5: Opened loop sampling setup Rev. 1.3. Aug 2014 Pg. 14 of 23 Sample Draw/Data Logger– Manual CO2Meter.com Theory of Operation The CO2 sensor inside this device uses non-dispersive infrared technology to sense, as a function of transmitted light, the concentration of CO2 in the air. It has been factory-calibrated to operate within the specified range and precision. Calibration The calibration process varies depending on the type of unit and whether it has optional data logging functionality or not. All units are factory-calibrated with multiple reference points of gas, and have been verified to be accurate within their specific functionality before shipment. However, if the unit is severely jolted or otherwise mechanically disturbed, the sensor can drift requiring recalibration. All calibration procedures follow a single-point calibration routine that effectively shifts the zero-point of the CO2 sensor. 0-1% or 0-30% Sample Draw Unit Calibration can be performed using either 0% CO2 calibration gas (typically nitrogen, Argon, etc.), or using a fresh source of air, assumed to be approximately 400ppm. Attach calibration gas to the unit and connect the unit to a personal computer. Open the calibration screen in the GasLab® software. Click the “Calibrate” button in the calibration tab for the desired gas, located in the “Configure Sensor” screen. As long as the gas concentration is stable, the unit should instantly reflect the calibrated value. This can be confirmed by watching the display. To see the calibration value in real time, click in the “Collect Real time” button to capture these values before opening the configuration screen. Rev. 1.3. Aug 2014 Pg. 15 of 23 Sample Draw/Data Logger– Manual CO2Meter.com 0-1% or 0-30% Sampling Unit with Data Logging Calibration can be performed using either 0% CO2 calibration gas (typically nitrogen, Argon, etc.), or using a fresh source of air, assumed to be approximately 400ppm. Calibration Procedure To calibrate your unit, follow these steps: 1. Expose the unit to ambient air (assumed to be at 400ppm) or connect it to a calibration gas bottle/cylinder (100% nitrogen or argon) with the appropriate demand regulator. 2. Wait 25 seconds to collect a sample. Write down this value as the “before” value. 3. Click the “Calibrate” button after selecting your calibration gas. 4. Wait 25 seconds again. This time, the unit will take a sample and use this data to adjust zero values. The displayed measurements will reflect the new calibration value (0 or 400ppm). 5. Disconnect the Calibration gas and wait 25 seconds. The newly displayed data will now reflect the new sensor calibration. If the sensor is still operating outside of its specified range, repeat this procedure. When the readings vary too greatly, the calibration will silently fail and may need to be performed again. Rev. 1.3. Aug 2014 Pg. 16 of 23 Sample Draw/Data Logger– Manual CO2Meter.com 0-5%, 65, 100% Sampling Unit with or without Data Logging The 0-100% units do not feature Automatic Background Calibration (ABC) algorithm due to the CO2 scale they measure. To ensure the highest accuracy, we recommend calibrating these units with calibration gas (Nitrogen for ZERO or CO2), close to the concentration being measured. Alternatively, a 0% or ambient calibration can be performed. To perform a calibration, attach the unit to your computer, power it with the wall adapter and either expose it to atmosphere or supply it with your calibration gas, fed with a demand-based regulator. Open the GasLab® software on your personal computer and click the “Configure Sensor” button. For data logging units, click the “Turn Pump on Continuously” button to ensure continuous flow. (To apply any change has to power cycle the unit) Zero or Fresh Air Calibration Apply gas and select the appropriate concentration in the screen shown in Figure 10. Click the “Calibrate” button. The sensor reading should instantly reflect the calibration. High-Concentration Calibration Write down the original Zero Value before adjustment for future reference. Apply the desired concentration calibration gas; adjust the Zero Value in increments of 10 pressing the large “Save” button on the right until the unit displays the correct concentration. Rev. 1.3. Aug 2014 Pg. 17 of 23 Sample Draw/Data Logger– Manual CO2Meter.com Device Specifications Measuring Range: 1% CO2 5%, 30%, 65%, 100% CO2 Repeatability: 0-1% CO2 0-5%, 0-30%, 0-65%, 0-100% CO2 Accuracy Air Quality Level Power Supply: Maximum Voltage Minimum Voltage Power Consumption Sensor Ratings: Life Expectancy Maintenance Interval Warm-up Time Pump Characteristics: Maximum Flow (STP) Maximum Vacuum Maximum Pressure Maximum System Pressure Rev. 1.3. Aug 2014 0-10,000 ppm 0-5%, 0-30%, 0-65%, or 100% vol. ±20 ppm, ±1% measured value ±0.1%, ±2% of measured value ±30ppm, ±5% measured value (CO2 concentration) 9VDC 6VDC ~0.5W avg. (pump running) >15 years No maintenance required <1 min (instant measurements) 0.40 LPM 150 mbar 500 mbar ~1 atm. Pg. 18 of 23 Sample Draw/Data Logger– Manual CO2Meter.com Troubleshooting guide Symptom / Issue Possible Cause / Resolution Device/Sensor is not recognized by PC Device doesn’t power ON Your device’s batteries might be depleted. Replace the batteries with fresh ones, or if applicable, connect the device to the included power supply. The GasLab ® software doesn’t start * Slow response Reading doesn’t change “Bat” and green LED keep flashing Make sure the power adapter is plugged properly and that there is power in the outlet the adapter is connected has the appropriate voltage. If using batteries, make sure they are not depleted. Your software might be out of date. Update your software by either visiting our download webpage at http://www.co2meter.com/pages/downloads or by selecting the “Check for Updates” under the Help menu. Make sure your PC meets the minimum requirements. Check the air flow channels to make sure they are not obstructed. Make sure the meter is in maximum or minimum mode. The power adapter output voltage is inappropriate. Please use the power adapter with correct 5V (±10%), ≥0.5A. *For more troubleshooting tips on GasLab ® software, see GasLab ® manual located at www.co2meter.com/pages/downloads. Support The quickest way to obtain technical support is via email. Please send all support enquires to support@co2meter.com. In your email, please include a clear, concise definition of the problem and any relevant troubleshooting information or steps taken so far, so we can duplicate the problem and quickly respond to your inquiry. Rev. 1.3. Aug 2014 Pg. 19 of 23 Sample Draw/Data Logger– Manual CO2Meter.com Warranty This unit comes with a 1YEAR (warranty period) limited manufacturer’s warranty, starting from the date the unit was shipped to the buyer. During this period of time, CO2Meter.com warrants our products to be free from defects in materials and workmanship when used for their intended purpose and agrees to fix or replace (at our discretion) any part or product that fails under normal use. To take advantage of this warranty, the product must be returned to CO2Meter.com at your expense. If, after examination, we determine the product is defective, we will repair or replace it at no additional cost to you. This warranty does not cover any products that have been subjected to misuse, neglect, accident, modifications or repairs by you or by a third party. No employee or reseller of CO2Meter.com’s products may alter this warranty verbally or in writing. Returns If the product fails under normal use during the warranty period, an RMA (Return Material Authorization) number must be obtained from CO2Meter.com. After the item is received, CO2Meter.com will repair or replace the item at our discretion. To obtain an RMA number, please call CO2Meter.com at (386) 256-4910 When requesting an RMA number, please provide the reason for return and original order number. If we determine that the product failed due to improper use (water damage, dropping, tampering, electrical damage etc.) or abuse, or if it is Rev. 1.3. Aug 2014 Pg. 20 of 23 Sample Draw/Data Logger– Manual CO2Meter.com beyond the warranty period, we will inform you of the cost to fix or replace your device. If you are returning your device due to a warranty claim (with an RMA number) and you still have the unit original package, please use it to ship your unit to us. Please make sure to include the provided RMA number on the outside of the box, preferably on the shipping label. Make sure you secure the unit inside the package properly to prevent any damage during transit that could void your device’s warranty. Finally, please ship your device to the address shown under the “Contact Us” section below. CO2Meter.com will not, under any circumstances, be responsible for your shipment expenses and no refund will be issued for shipping charges necessary for you to ship the unit to us. Liability All liabilities under this agreement shall be limited to the actual cost of the product paid to CO2Meter.com. In no event shall CO2Meter.com be liable for any incidental or consequential damages, lost profits, loss of time, lost sales or loss or damage to data, injury to person or personal property or any other indirect damages as the result of use of our products. Rev. 1.3. Aug 2014 Pg. 21 of 23 Sample Draw/Data Logger– Manual CO2Meter.com Contact Us We are here to help! For information or technical support, please contact us. support@co2meter.com (386) 256-4910 ( Technical Support) (386) 310-4933 (Sales) www.co2meter.com Address: CO2Meter, Inc. 131 Business Center, A3 Ormond Beach, FL 32174 USA Rev. 1.3. Aug 2014 Pg. 22 of 23 Sample Draw/Data Logger– Manual CO2Meter.com NOTES: Rev. 1.3. Aug 2014 Pg. 23 of 23