1
Heatmiser Plusnet v1.00
User Instructions
Rev 1: Jan 2009
Heatmiser PlusNet User Manual: Page 1
Table of Contents
Description
Page Number
Selecting the Site and Zone you wish to view
3
Programming the Comfort Levels / Switching Times
4
Copy Function
5
Override Function
5
Holiday Function
6
Temperature Log
6
Hours Run
7
Exporting Hours Run/Log Data
7
Setting the System Frost
8
Setting up Systems Users
8
Heatmiser PlusNet User Manual: Page 2
Site List / Zone List
To the left side of the screen is the Site and Zone Zone List. From here, you can select which site
you want to connect to and which zone you want to view. When you click on the site, you will see
the site drawing appear along with the sensor and relay indications relevant for the selected zone.
Main Overview
PlusNet automatically adjusts the Main Overview display depending on the configuration of the
zone being viewed. As an example, the picture shown below shows a typical layout.
Heatmiser PlusNet User Manual: Page 3
Switching Times
The Heatmiser Plus uses “Comfort Levels” and Timer On/Off Settings.
Comfort levels are programmed different than normal On/Off times. With a comfort level, you
program a time and the temperature you want at that time. To adjust the setting, simply type over
the existing data. You can use the TAB key for easy data entry. You have the option to program 4
comfort levels for each day of the week. You should use the disable function to disable the
switching periods that are not required.
For timer zones, you should program these as On/Off times, these zones do not rely on a set
temperature.
Plusnet will auto-detect the zone configuration and will display the appropriate display.
Comfort Levels
Timer On/Off
Heatmiser PlusNet User Manual: Page 4
Copy
Plusnet enables to you copy comfort levels from one day to another. To use the Copy function,
repeatedly press the COPY FROM DAY until the day you want to copy from is shown. Then
repeatedly press the COPY TO DAY until the day you want to copy to is shown. Note, you can also
select to copy to all weekdays or to all days.
When you are happy with the setting, press Yes to copy the data.
Send
Once you have made the necessary adjustments, you must press Send in order to update the
Heatmiser Plus.
Override / Hold Function
Plusnet allows you to override each zone. For zones with comfort levels, you can set a desired
temperature and override time. For timer zones, you can enter the override time.
Highlight the zone by clicking on the zone name
Right click the zone name
Click Override
You can now enter the override duration and temperature. (For timer zones, you will be
prompted to enter an override duration only)
Press Confirm
Heatmiser PlusNet User Manual: Page 5
Holiday
The Heatmiser Plus offers 5 holiday periods. During a holiday condition, the Plus will maintain the
System Frost Temperature which can be adjusted from Plusnet (see page 08)
To adjust the holiday setting, use the calender to select the start date and then enter the
number of days for the holiday.
Press Send to send the new settings to the Heatmiser Plus
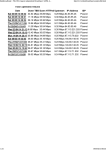
Temperature Log
The Plusnet server stores the temperature log for the past 1 year. The past 7 days can be viewed
quickly via the Plusnet interface in the form of a line chart. This function allows you to quickly
determine which zones are using more energy, therefore helping you to reduce your overall energy
consumption.
Heatmiser PlusNet User Manual: Page 6
Hours Run
The Heatmiser Plus stores the Hours Run for the past 3 weeks. This information is displayed as a
bar graph, and like the temperature log, helps you determine areas of high energy usage.
Site Setup
This option is available to the System Administrator only (See Setup Manual for details)
File Menu
Print – This menu allows you to print the temperature and hours run graph.
Backup Database – This backup utility allows you to make a backup of all sites stored in the
database. We suggest that you run this backup after a new site has been added to the system.
Upgrade Database – This upgrade utility allows you to restore the database from the backup.
Export Menu
Export Hours Run
This option allows you to export the hours run data in csv format.
Export Temperature Log
A temperature export function is available. This function allows you to export the temperature
history for a selected date range and then use MS Excel to create a line graph showing the history
over an extended duration. To export the temperature log, follow the steps below.
Press Export
Select Temperature Log and then select the zone you wish to export
On the calender, select the From date
On the calender, select the To date
Heatmiser PlusNet User Manual: Page 7
Choose the export path and enter a file name for the file to be exported
Press Export
When you import into MS Excel, you need to select Comma Delimited as an import option.
Setup Menu (Administrator Only)
System Frost The system frost temperature setting is a global setback temperature and is used to
maintain a temperature during a holiday period. The system frost temperature can be set from 00
– 35C
User Setup This option allows you to add new users to the system, and provides the ability to
assign access rights to each user.
New user with “User” Rights = Is allowed to view and edit zone switching times / override zone set
temperature and view history data but is not allowed to add or remove sites from the system.
New user with “Admin Rights” = Has full access to the system including site configuration.
Heatmiser PlusNet User Manual: Page 8