1
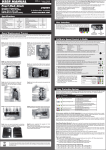
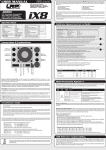
Mode Programming Dual ADPCmax.2 Profiles The SXX-SS V2 features 4 modes which enable you to adjust it 100% to YOUR special requirements. The factory settings are shown in grey colour. • How to get into „programming the modes“ Press MODE button for 3 or more seconds. • How to check the stored values Count the number of flashes of the blue SET-LED (* = value 1 | ** = value 2 | etc.). • How to change the value Press SET button to increase value by one step. • How to get to the next Mode Press MODE button once. • How to leave the programming mode If you are in MODE.4, press the MODE button one more time, which will also store the settings! Important: do not turn the switch off before leaving Mode 4 (by one more press of MODE button) as otherwise your recent changes won‘t be stored in the memory of the SXX-SS V2! Table of settings, values and modes: see below (grey-shaded values show „works default settings“) Allows you to adjust the SXX-SS V2‘s characteristics to different motor types, classes and personal likes! These two mode‘s combine LRP‘s completely revised active motor timing system, where the software calculates the best commutation & timing for „Torque/Feel“ and „Boost/RPM“. Please take your time to understand the two modes and their functions, otherwise you will not fully benefit from the latest achievements built into this speed-control. Be aware that Mode.2+3 are something entirely new and not the same as the settings we had on Version1 speedo, so do not try to „transfer“ your knowledge from old speedo to new SXX-SS V2! Mode.1 (ACS2): allows you to adjust the cut-off voltage precisely depending on the battery type you use: LED flashes Remark Cut-Off Voltage use for Yellow #0 disabled #1 3.2V 1S LiPo #2 4.4V 2S LiFePo #3 6.4V 2S LiPo Caution: WorksDefault setting is 2S LiPo, so if you use other batteries you need to adjust Mode.1 before first use! Using value #0 in this mode will also disable the motor temperature cut-off function! Please refer to section „Multi Protection System 3“ for further details. Mode.2 („Torque/Feel“): LED flashes Remark Torque Timing % Red Initial Drive Level use for motors #0 0% 1 ALL #1 40% #2 #3 #4 50% 60% 70% 2 3 X12 motors #5 80% 4 #6 #7 #8 #9 0% 3 4 5 all other motors 2 #10 6 Mode.3 („RPM/Boost“): LED flashes Remark Boost Timing % RPM Ramp Yellow/Red (alternate) #0 0% -- #1 #2 50% slow fast #3 #4 60% slow fast #5 #6 70% slow fast #7 #8 80% slow fast #9 #10 90% slow fast #11 #12 100% slow fast Mode.4 (Automatic Brake): allows you to set a slight braking action when your trigger is in neutral range. LED flashes Yellow/Red (same time) #0 disabled #1 #2 #3 #4 #5 #6 #7 #8 #9 Going from lowest to highest automatic brake setting (value 1 = minimum / value 10 = maximum) #10 Mode.2 („Torque/Feel“): there are two separate groups, which you need to choose from, based on motor type: Group A (1 - 5) for use with X12 & K4 motors. choose correct value as suggested below. Higher value doesn‘t mean more torque or power, this setting needs match your motor, motor-timing, class and preference! generally, choose lower values (1-2) for fast motors (10.5T) and higher settings (3-5) for slower motors (17.5T). Group B (6 - 10) for use with all other motors (such as LRP X11, Novak, Tekin, SP, Orion, Epic, GM, Corally, etc) these profiles vary by different initial drive levels, which alter the feeling for the motor. Higher profiles for „Group B“ result in more aggressive throttle response. Team advise: when using „Group A“ motors and a too high value for Mode.2, the power may fade before the end of your run! If this happens you need to decrease to a lower setting until power stays consistent throughout run. Mode.3 („RPM/Boost“): adjusts the boost timing %, which is applied to the motor based on it‘s RPM. There is a total of 12 profiles (see chart on left side with details and numbers): 6 of them are different boost-timing steps (from 50% to 100%) each of these % is also available with two different RPM-ramps (fast + slow). Always start with the slow rpm-ramp profiles (odd numbers) first and find the desired boost timing % for your motor before trying the fast profiles (even numbers). Certain motors will not like the slow or the fast ramps, which may result in strange feeling and unlinear power release. Choosing a too high value in mode.3 increases the motor temperature excessively, make sure you find the best performance by increasing step by step very carefully and monitor motor temperature! Important: all 12 values are designed for stock motors, if you want to run modified motors you should select #0! General gearing advise: correct gearing is crucial for good performance, generally the SXX-SS V2 produces a large amount of torque, therefore it can be geared quite high (large pinion) compared to other speed-controls. If geared too low you can not obtain maximum available power in regards of torque & speed. Recommendations by the team: based on our extensive testing, we recommend the following gearing and profile range for different motors and classes. Please take this as a starting point and finetune it from there, our recommendations are based for average/medium-size tracks. Motor Type Turns Class 10.5 LRP X12 LRP K4 Nosram Pure 13.5 Nosram Cobra Boost Zero Mode 17.5 If value #0 is choosen for Mode.2 AND Mode.3 (e.g. factory default!) the blue LED will flash in neutral trigger position to indicate that entire timing advancement is disabled for „true stock racing“ as required by certain federations! AutoCell System 2 & TwinBEC (Mode.1) AutoCell System 2: ensures that all batteries can be used safely for all applications, please select the correct value according to our table under „Mode Programming“. When the battery voltage reaches the selected cut-off voltage, the motor function will be disabled and the LED‘s will indicate that the shutdown has occured due to undervoltage of your batteries (see right side „Multi Protection System 3“ for further details). Caution: WorksDefault setting is 2S LiPo, so if you use other batteries you need to adjust Mode.1 before first use! TwinBEC: a true BEC revolution! Constant 6V/3A output with input voltage from 3.0 to 7.4V, no need for a receiver battery or booster circuit even with 1S LiPo due to the integrated buck/boost technology! There is no point in using a receiver pack in any class of racing with SXX-SS V2. there is no benefit when using one! If you still want to use a receiver pack, connect it to the receiver directly and leave the speed-controls switch in OFF position. Make sure the receiver packs voltage is within your receivers & servo‘s limitations (the speed-control itself can accept up to 7.4V from receiver pack),. (Mode.2 & Mode.3) All other motors 10.5 (such as LRP 13.5 X11, Novak, Tekin, SP, Orion, Epic, GM, Corally, etc) 17.5 Touring Car 1/12 th 1S Off-Road Touring Car 1/12 th 1S Off-Road Touring Car 1/12 th 1S Off-Road Touring Car 1/12 th 1S Off-Road Touring Car 1/12 th 1S Off-Road Touring Car 1/12 th 1S Off-Road Ratio 7.5:1 48mm tba 6.0:1 55mm tba 5.0:1 tba tba tba tba tba 6.0:1 65mm tba 5.0:1 tba tba MODE.2 1 1 1 2 2 2 2 2 2 MODE.3 1 3 1 3 3 3 3 3 3 3 3 4 1 4 4 4 5 5 6 6 6 6 7 7 7 7 5 5 4 4 5 5 3 5 3 5 6 6 8 6 6 8 6 8 8 9 8 9 9 10 7 7 3 3 4 4 4 5 8 7 7 7 7 8 8 8 8 7 8 5 9 9 10 9 9 10 9 10 7 9 10 11 9 10 11 12 9 Special Features (further explanations) Lower Motor Temperatures: LRP‘s engineers succeeded to further improve the commutation algorithm, which results in much lower motor operating temperatures then when other speed-controls are used. Our own extensive testing has shown up to 20°C lower motor temperatures, with same power then before! X-Brake: a good starting point for the brake setting on your radio is 80% for all classes. Make sure you do the radio-setup with all settings on the radio on 100%! Troubleshooting Guide Changing Mode Settings without the Transmitter: simply disconnect the receiver lead from the receiver To eliminate all other possibilities or improper handling, first check all other components in your model and the trouble shooting guide before you send in this product for repair. If products are sent in for repair, which do operate perfectly, we have to charge a service fee according to our pricelist. Always check error by checking LED error code first, this gives you a good indication were to search! Symptom Cause Remedy Motor overheats False settings on Mode‘s 2 and/or 3 Too high mechanical motor timing Too little motor cooling Wrong Gear ratio False settings on ADPC Dual MAX.2 Transmitter settings changed after set-up Power Capacitor damaged Motor or sensor-board in motor defective Speed-control defective Speedo plugged in incorrectly Multiprotection System activated Wiring problem Sensor wire missing/defective Motor defective Speedo defective Speedo connected to receiver with wrong polarity Wiring problem Battery defective Crystal, receiver or transmitter defective Speedo defective Sensor wire defective Motor or sensor board in motor defective Radio interference Power capacitor damaged Speedo defective Model with reversed gearbox! Adjust settings of Mode‘s 2 + 3 Decrease mechanical motor timing Add cooling fan and/or heatsink Adjust gear ratio Adjust settings under ADPC DualMAX.2 Repeat set-up procedure Replace Power Capacitor Replace sensor-board or motor Send in product for repair Plug speedo to receiver as Ch.2 Check settings for your application Check wires and connectors Install/replace sensor wire Replace motor Send in product for repair Connect speedo with correct polarity Check wires and connectors Replace with different battery pack Replace components one by one Send in product for repair Replace sensor wire Replace sensor board or motor Change location of components Replace power capacitor Send in product for repair Can not use a sensored brushless system! Wrong setting in ACS2 (Mode.1)! Model used too often without cool-down periods Motor stronger than motorlimit or input voltage too high Stuck drivetrain or ball-bearing Motor defective Transmitter settings changed after set-up Humidity/water in speedo Motor or sensor board in motor defective Receiver or antenna too close to power wires, motor, battery or speedo. Receiver aerial too short or coiled up Receiver defective, too sensitive; Transmitter defective, transmitter output power too low, servo problem Poor battery connection Transmitter batteries empty Change value of ACS2 (Mode.1) accordingly Let cool down after every run Use only motors and batteries which are within the specifications of the speed-control Maintain model Replace motor Repeat set-up procedure Immediately unplug and dry speedo Replace sensor board or motor See „Installation Tips“ and „Installation“ Insufficient performance. E.g. poor power, topspeed or brake Servo is working, no motor function No servo and no motor function Motor stutters while accelerating Motor runs in reverse when accelerating forward on radio Speed-control switches off frequently Motor never stops, runs at constant slow speed Radio interference Replace components one by one Only use original manufacturers crystals Check plugs and connecting wires Replace / recharge transmitter batteries The crossed-out wheeled bin means that within the European Union the product must be taken to seperate collection at the product end-of-life. Do not dispose of these products as unsorted municipal waste. and change the MODE settings on the speed-control as described under „Mode Programming“. Works-Default-Settings: All LRP speed-controls come factory-adjusted (defaults are grey-shaded). If you loose track of the modes, you can restore the works default settings easily. With your radio switched on, hold the SET button pressed while you switch on the speed-control. This returns the unit to our works default settings. Power Capacitor: Never run without a power-capacitor! It is needed for protection and increases punch, it must be connected to BAT+ and BAT- solderpads with shortest possible wires. C³ Technology (Copper Core Cooling): lowest running temperatures, a special copper core bonds the bottom side fets to the heatsink for even cooling of all fet‘s which results in higher power towards the end of the run and a lower motorlimit. Repair Procedures / Limited Warranty All products from LRP electronic GmbH (hereinafter called “LRP”) are manufactured according to the highest quality standards. LRP guarantees this product to be free from defects in materials or workmanship for 90 days (noneuropean countris only) from the original date of purchase verified by sales receipt. This limited warranty doesn’t cover defects, which are a result of misuse, improper maintenance, outside interference or mechanical damage. „This applies among other things on: • Cut off original power plug or not using reverse polarity protected plugs • Receiver wire and/or switch wire damaged • Mechanical damage of the case • Humidity/Water inside the speed control • Mechanical damage of electronical components/PCB • Soldered on the PCB (except on solderpads) • Connected speed-control with reversed polarity“ To eliminate all other possibilities or improper handling, first check all other components in your model and the trouble shooting guide, if available, before you send in this product for repair. If products are sent in for repair, which do operate perfectly, we have to charge a service fee according to our pricelist. With sending in this product, the customer has to advise LRP if the product should be repaired in either case. If there is neither a warranty nor guarantee claim, the inspection of the product and the repairs, if necessary, in either case will be charged with a fee at the customers expense according to our price list. A proof of purchase including date of purchase needs to be included. Otherwise, no warranty can be granted. For quick repair- and return service, add your address and detailed description of the malfunction. If LRP no longer manufactures a returned defective product and we are unable to service it, we shall provide you with a product that has at least the same value from one of the successor series. The specifications like weight, size and others should be seen as guide values. Due to ongoing technical improvements, which are done in the interest of the product, LRP does not take any responsibility for the accuracy of these specs. LRP-Distributor-Service: • • • • Package your product carefully and include sales receipt and detailed description of malfunction. Send parcel to your national LRP distributor. Distributor repairs or exchanges the product. Shipment back to you usually by COD (cash on delivery), but this is subject to your national LRP distributor‘s general policy.