1
trouble-shooting.
3.5. MU MEASUREMENT
3.5.1. Preparation
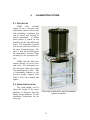
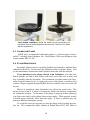
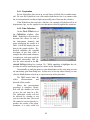
Clean the windows, attach the mounting collar, and place the HydroScat in
the calibration tank filled with clean water. To calibrate a HydroScat-4 with an integrated anti-fouling shutter, remove the shutter blade. The face of the instrument
should be fully submerged and it should be level in the tank (the face of the instrument should be parallel to the plaque). Make sure there are no bubbles on the
HydroScat windows, and continue to monitor the windows during the procedure to
be sure that no bubbles accumulate. Also make sure that the plaque is well saturated with water, and there are no bubbles on the plaque. If bubbles begin to accumulate in either place before the calibration is complete, they must be wiped
away, and the calibration must be restarted.
3.5.2. Setting the Channel Gains
The first step in calibration is to determine which gain best matches each
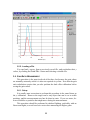
channel’s sensitivity to the calibration plaque. This requires monitoring the signals while moving the plaque through the sensor’s peak-response zone. To do
this, click the Start button, then follow the on-screen instructions.
3.5.3. Measuring the
Response Curves
After the gains have been properly set, HydroSoft will instruct you to move
the calibration plaque (“target”) to its starting position.
For instruments with flat faces, move the platform until the plaque is as
close as possible to the face of the instrument without actually touching it, and
leave the Start Distance set to its default value of 0 cm.
For a Series 250 HydroScat-6 with its deployment frame installed, set the
Start Distance to 1.3 cm and move the plaque until it almost touches the frame
ring.
For other instruments with non-flat faces, for example a HydroScat-4 with
an integrated anti-fouling shutter, measure the length of the longest protrusion for
the face, and enter that value as the Start Distance.
For all instruments, confirm that the Distance Step entered in the form is appropriate, normally 1.27 mm.
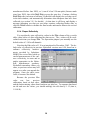
When the target is set to its starting position, click the First Step button.
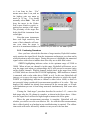
HydroSoft will open a new graph in the data window, and perform some other initializations that may take a few seconds. When this process is complete, turn the
crank handle one turn if your calibration fixture has 1.27 mm thread pitch (fixtures
9