1
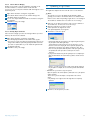
9.2.1 Adding Fixtures
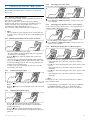
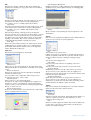
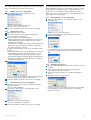
1 Click ‘Add’ in the ‘Light Group / Fixture Management’ screen.
• The ‘Add New fixture’ screen appears.
2 Enter the name for the new fixture.
It is not allowed to have duplicate names in one ‘Light Show’.
3 Select a ‘Fixture Type’ (if possible). Default ‘Fixture Type’ is ‘Color’.
4 Click ‘OK’ to save the new ‘Light Group’.
•
If desired, select a ‘Light Group’ to assign the fixture to.
• The new fixture is a simulated one as no ‘Address’ is set by
default. Use ‘Discovery’ to fill the Address combo box. For this
refer to 9.3 ‘Discovery.
Manually setting fixture properties.
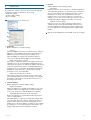
1 Enter ‘Min Dimlevel’ percentage (physical fixtures’ lamp driver
capacities).
2 Click ‘Edit’.
• The ‘Edit Primary’ screen appears.
3 Enter ‘Primary’ values (‘Color Point’, of individual lamps inside
physical fixture).
4 Click ‘OK’ to confirm.
9.2.2
Editing fixture settings
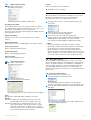
1 Select the fixture you wish to edit in the ‘Light Group / Fixture
Management’ screen.
2 Click ‘Edit’.
• The ‘Edit’ screen appears.
• Change ‘Name’, ‘Type’ and ‘Light Group’ settings as described in
8.2.1 ‘Adding Fixtures’.
• Click ‘Identify’ to see which fixture is coupled to the selected
‘Short Address’.
• Change ‘Fixture Properties’ as described in 9.2.1 ‘Adding Fixtures’.
3 Click ‘OK’ to save your settings.
4
5
9.2.3 Removing fixtures
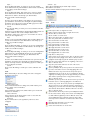
1 Select the fixture you wish to remove in the ‘Light Group /
Fixture Management’ screen.
2 Click ‘Remove’.
• The ‘Remove Fixture?’ screen appears.
3 Click ‘Yes’.
4
5
5
6
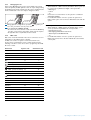
9.2.4 Updating fixture properties
Use this functionality to update the physical fixture properties with
the properties set on your computer.This is required for factory
‘virgin’ fixtures that have no properties at all, altered fixtures and
when old age has influenced the color.
It is not possible to update properties of a simulated fixture, as it
does not physically exist.
1
3
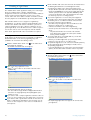
In the ‘Light Group / Fixture Management’ screen, select the fixture
you wish to updat properties for.
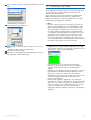
Click ‘Update’.
Click ‘Start’ in the screen that appears.
4
• The ‘Overwrite fixture properties?’ screen appears.
Click ‘Yes’ to start the update.
2
3
4
• The properties of the selected ‘Fixture type’ will be assigned to the
new fixture.
Click ‘OK’ to exit ‘Fixture Properties’ settings.
Click ‘Close’ to exit ‘Light Group / Fixture Management’.
Managing Light Groups and Fixtures
• The selected fixture will be removed from the ‘Light Show’.
Click ‘OK’ to exit ‘Fixture Properties’ settings.
Click ‘Close’ to exit ‘Light Group / Fixture Management’.
Note:
If the removed fixture was assigned a ‘Short Address’, you can
now couple this ‘Address’ to a different fixture.
Click ‘OK’ to exit ‘Fixture Properties’ settings.
Click ‘Close’ to exit ‘Light Group / Fixture Management’.
Importing fixture properties from database
1 Click ‘Database’.
• The ‘Fixture type’ screen appears.
2 Select the desired ‘Fixture type’ for the new fixture and click ‘OK’
to confirm.
Click ‘OK’ to exit ‘Fixture Properties’ settings.
Click ‘Close’ to exit ‘Light Group / Fixture Management’.
27