1
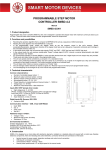
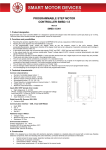
PROGRAMMABLE STEP MOTOR CONTROLLER SMSD-8.0 Manual SMSD.80.001 1. Product designation Programmable step motor controller SMSD-8.0 is designed to operate with stepper motor with maximum current per phase up to 8.0 Amp. There are four control modes provided: programmable, manual, simple driver or “synchro”. 2. Functions and possibilities • • • • Recording the operation algorithm from a computer to EEPROM of the unit as a sequence of commands. Reading the saved algorithm from the EEPROM to a computer. The unit can operate and be controlled by computer (“direct control”) or in a standalone mode. In the manual mode: the unit receives analog signal “SPEED” (voltage signal 0 – 5VDC, internal or external potentiometer) and digital signals “DIR” and “EN”. In the simple driver mode: the unit receives signals “STEP”, “DIR” – 0VDC low level and 15VDC high level, and digital signal “EN”. In the “sychro” mode unit receives quadrature-phase signal. For synchronized operation of several units and other devices there are 3 digital inputs and one output relay are provided. There is zero positioning function provided (only in controller mode): start zero search by a command or by a signal on the digital input. Stop zero searching movement as input signal is received. The function provides homing by an individual input. The unit stops motor motion as receives a signal on an “Enable” input. • • • • • 3. Technical characteristic Common characteristics: • • • • • • • Number of controlled stepper motors: 1 Maximum output current per phase: 8,0 Amp Minimum output current per phase: 1,5 Amp Microstepping modes: 1, 1/2, 1/4, 1/16 Pulse frequency in programmable and manual modes: 1 - 10000 Hz Voltage input: 24 - 72 VDC Maximum overall dimensions: 140x121x44 mm Inputs DIR, STEP (simple driver mode): • • • High voltage level: 3 – 15 VDC Low voltage level: 0 – 0,8 VDC Input resistance: no less 1,0 KOhm Digital inputs EN, IN1, IN2, START, RESET, HOME, “0”: • Contact to COM Communication interface – USB, virtual COM RS232: • • • • baud: 9600 bits: 8 parity: even stop bit: 1 Additional output «5 VDC»: • • Voltage: 4,5 – 6,5 VDC Maximum load current: 20 mAmp Environmental Conditions: Ambient Temperature: -25…+40°C Humidity: 90% RH or less upon condition +25°C Condensation and freezing: none Pressure: 650…800 mm of mercury 4. Construction SMSD-8.0 is designed as a circuit plate with electronic elements, installed on a heat sink plate and covered with a metal case. Besides electronic components, there are indicating and control elements, connection terminals and connectors on the board (img. 1). Terminal screws for step motor windings (1) and power supply (2); Control buttons “START” (13), “RESET” (14), and duplicate terminals START/COM (18) and “RESET/COM” (21); Finding home position button “HOME” (12) and duplicate terminals HOME/COM (16) and terminals for home sensor “0”/COM (17). Internal preset potentiometer “SPEED” (15) to adjust speed in the manual mode, and terminals for an external potentiometer connection (22) to control motor speed in manual mode. LEDs for indication of the controller status (7). Switches SW1 – SW4 to set the current of the motor windings. Switch SW5 to set the automatic reduction of holding current. Switch SW6, SW7 to set the microstepping mode. Switch SW9, SW10 to set the operation mode. Terminals for connection control signals “DIR”, “STEP” (10) and digital signal “EN” (9). Programmable relay (8). Programmable inputs IN1/CON (19), IN2 / COM (20). USB plug for a computer connection (11). 16 17 18 19 20 21 13 12 START HOME 11 14 RESET SPEED 15 USB COM STEP HOME “0” SMSD-8.0 COM Stepmotor Controller COM 10 DIR START 9 EN COM IN1 COM RELAY 8 IN2 COM 7 RESET +5V 22 6 SW10 SW9 SW8 SW7 SW6 SW5 SW4 SW3 SW2 SW1 SPEED COM COM A+ 5 4 3 } AB+ B+V GND } 2 1 Img. 1. SMSD-8.0 controller scheme 5. Assembly and connection Please, learn this manual carefully before connection and assembly. Please, wire just when power is off. Do not attempt to change wiring while the power is on. Please, provide a reliable contact in connection terminals. During wiring, please, observe the polarity and wire management. Assembly and connection order 1. Connect the SMSD-8.0 controller with stepper motor, switches and electric DC power supplier according to one of schemes shown down in images 2 – 5. 2. Connect if it is necessary the SMSD-8.0 controller to a computer by an interface USB cable. Connection schemes HOME START RESET SPEED The connection examples are in the images 2 – 5. The switch connection example is in the image 6. USB COM STEP HOME “0” SMSD-8.0 COM Stepmotor Controller COM “Start” button Direction change sensor DIR START EN COM Alarm sensor IN1 COM RELAY IN2 COM External potentiometer “SPEED” with full resistance 10kOhm RESET +5V SW10 SW9 SW8 SW7 SW6 SW5 SW4 SW3 SW2 SW1 SPEED COM COM A+ A- М B+ B+V GND U- U+ Power supply Img. 2. Manual mode connection example HOME START RESET SPEED USB COM STEP HOME “0” SMSD-8.0 COM Stepmotor Controller COM “Start” button DIR START Alarm sensor EN COM IN1 COM RELAY IN2 Logic signals source COM RESET +5V SW10 SW9 SW8 SW7 SW6 SW5 SW4 SW3 SW2 SW1 SPEED COM COM A+ A- М B+ B+V GND U- U+ Power supply HOME START RESET SPEED USB Img. 3. Driver mode connection example USB COM HOME STEP HOME “0” SMSD-8.0 COM Stepmotor Controller COM “0” sensor “Start” button DIR START Input signal IN1 Input signal IN2 “Reset” button Alarm sensor EN COM IN1 COM Controlled device RELAY IN2 COM RESET +5V SW10 SW9 SW8 SW7 SW6 SW5 SW4 SW3 SW2 SW1 SPEED COM COM A+ A- М B+ B+V GND U- U+ Power supply Img. 4. Controller mode connection example Channel A +5V Encoder supply STEP STEP SPEED Channel B COM DIR GND DIR Encoder Img. 5. Encoder connection example for “synchro” mode operation Img. 6. NPN switch connection example Motor connection The SMSD-8.0 controller provides operation with 2 or 4-phase stepper motors, 4, 6 or 8 wires. Winding connection examples are in the table 1. Connect step motor wires to A, A*, B and B* terminals of SMSD-8.0. Table 1 Scheme 1 Scheme 2 Scheme 3 8 wires stepmotor connection (4 phases): Scheme 1 – serial connection; Scheme 2 – parallel connection. 6 wires stepmotor connection (2 phases with midpoint taps): Scheme 3; 4 wires stepmotor connection (2 phases without midpoint taps): Scheme 4 . Scheme 4 6. Before starting 1. Make sure the power supply is turned off. 2. Make assembly and connection according to paragraph 5. 3. Choose the suitable current and set microsteps SW1 – SW4 according to table 2. Table 2 Current, Amp 1.5 2.0 2.5 3.0 3.5 4.0 4.5 5.0 5.5 6.0 6.5 7.0 7.5 8.0 SW1 Off On Off On Off On Off On Off On Off On Off On SW2 Off Off On On Off Off Off Off On On Off Off On On SW3 Off Off Off Off On On Off Off Off Off On On On On SW4 Off Off Off Off Off Off On On On On On On On On 4. Choose suitable microstepping mode and set micro switches SW6, SW7 according to table 3. Microstepping mode Microstep Microswitches Table 3 1/16 1 1/2 1/4 The full step is 1.8° 1.8 0.9 0.45 0.1125 SW6 On Off On Off SW7 On On Off Off 5. Set the switch SW5 for automatic reduction of holding current: SW5 – ON 100%; SW5 – OFF 70%. 6. Choose suitable operation mode and set micro switches SW9, SW10 according to the table 4. Table 4 Operation mode SW9 SW10 Controller ON ON Manual OFF ON Driver ON OFF “Synchro” OFF OFF If the unit is powered, the new operation mode is applied after RESET (by button or input signal). 7. Check wiring once again and turn on the power supply. 7. Operation modes Manual mode The speed is adjusted by the internal potentiometer SPEED or external potentiometer or analog signal 0-5VDC. Speed value is saved when leaving this mode, and it is restored when re-entry this mode. When the external potentiometer is used, it is necessary to set the minimum speed with internal potentiometer SPEED (fully counterclockwise) and connect external potentiometer with full resistance 10kOhm to terminals +5V / SPEED / COM (img.2), or connect contacts of analog signal source to terminals SPEED / COM. To change direction it is necessary to set signal DIR: high level or low level. To start motion you need to push START button or use START/COM terminals. To stop motion you need to push START button once more or RESET button, in this case power is removed from the motor windings. If EN signal is used: high level – motor is stopped, low level – motor continues motion. Driver mode Connection example is in the image 3. One step (or microstep) executes as front edge of the voltage pulse on the “STEP” input. Direction switches by changing voltage level on the “DIR” input. The motor can be stopped by the active signal on the “EN” input (clean contact) - power is removed from the motor windings. > 10 μs min 3V STEP max 0.8V > 10 μs min 3V DIR max 0.8V > 10 μs EN Clean contact Img. 7. STEP and DIR input signals “Synchro” mode Connection example is in the image 5. The unit receives quadrature-phase signal on the “STEP” and “DIR” inputs according to the oscillogram in the image 8. > 10 μs min 3V STEP A max 0.8V min 3V DIR B max 0.8V >10 μs EN Clean contact Img. 8. STEP and DIR input signals One step (or microstep) executes as front edge of the voltage pulse. Direction is determined by the outpacing phase. The motor can be stopped by the active signal on the “EN” input (clean contact) - power is removed from the motor windings. Controller mode There are two possible variant of operation in this mode: - Direct control: it gives the possibility to control the step motor in “real time”; - Stand alone mode: for a standalone operation the executing program should be saved via USB (virtual RS-232), after that the USB cable can be disconnected. For virtual RS-232 communication the special driver USB-RS-232 should be installed to the computer. Please, save on computer hard drive the installation pack CP210x_VCP_Win2K_XP_S2K3.zip, which is supplied with the controller SMSD-8.0. Unpack and execute the exe file. Please, follow the instructions during the installation progress. As a result when the controller is connected to the PC, the additional program COM-port appears (CP2102 USB to UART Bridge Controller). The availability and the number of new port can be checked in windows device manager (Windows XP: On the desktop right-click on My Computer and click Properties or open the Control Panel and double-click the System icon. In the System Properties window click the Hardware tab. In the Hardware tab click the Device Manager button) – image 9. This COMport should be used for communication with SMSD-8.0 controller. The port properties should be set in a terminal program according to the table 1. As a terminal program SMC_Program or some other software (software should provide RS-232 ASCII communication) can be used. The program is available and supplied with the SMSD-8.0 controller. Saving execute program with SMC_Program The program should be copied to the hard drive of the computer. Unpack the program pack. SMC_Program doesn’t require registration and installation. The write read operations should be allowed in the program folder (carefully check for windows vista and windows 7). Img. 12 Img. 13 Img. 9 It is necessary to set port properties in SMC_Program. Menu “Port settings” > «Chose port» (image 12) chose the connected port number and press “Ok” (image 13). Img. 10. SMC_Program – control via simple panel Img. 11. SMC_Program – program assembling In the simple control panel window (img 10) check the box 1, (coordinate 1 – img.14). Img. 14 If the program is in the simple control mode (image 10) - input motor operation parameters (steps number, speed, acceleration, direction) and press the button “write” to record parameters to the controller and press the button “start” to start motion according to the recorded command sequence. Or press the button “Write and start” to record new parameters and start motion at the moment. If the program is in the programming control mode (image 11) add to the command list: 1) «Start loading to the coordinate 1» ; 2) Add commands to assemble the operation algorithm. 3) «End loading» . 4) Press the button «send» under the command list. Commands list and description are in the section 8. “Commands”, and in the SMC_Program manual. After the commands sequence (operation algorithm) is recorded into the controller there are two possibilities: to continue control by the SMC_Program or to use the controller in standalone mode. To start program executing in the standalone mode press the “Start” button or contact “Start” and “GND” at the controller frame. When “Direct control” is used command “start loading to the coordinate 1”, “End loading” are not used. You need to check the box “Direct control” in “Programming control mode” and command is executed as soon as it is written in command window. Saving execute program with other terminal program with RS-232 communication function Set the port number (check in the windows device manager, image 9), set port parameters according to the section 3. Input required commands sequence using the ASCII codes (table 5, 6; section 8). 8. Commands Commands in the programmable mode should be byte-serial (character-serial) transferred. Every command should be completed with the ending character “*”. The ending character “\” instead of “*” cancels previous bytes transfer (whole string). There is the commands list in the table 5. The SMSD-8.0 controller receives and checks every command after receiving the ending character “*”. Controller sends to the communication port a reply after receiving every command (successful or error command). All possible controller replies are presented in the table 6. № Command 1 LD 2 RD 3 ST 4 LB 5 RB 6 SBddd Table5 Standalone mode «Direct control» Start loading to the controller – after the command controller is in the loading mode. Read the command sequence from the controller memory. Start or stop the commands sequence executing After receiving this command, the motor will stop Start if the controller in the programmable standby mode, immediately, the previous command is considered stop if the commands sequence is executing. complete Start loading to the operational buffer. If this command is received while driving, the motor is stopped and turned off. Read the command sequence from the operational buffer. If this command is received while driving, the motor is stopped and turned off. Start the commands sequence of the operational buffer executing. ddd – sets how many times the program from the operational buffer should be executed (from 1 to 255). If it is necessary to stop program executing use ST command 7 ED 8 BG 9 10 EN DS 11 DL 12 DR 13 RS 14 AL(-)ddd1 15 SDddd (1 to 10000) 17 18 SSddd (1 to 2000) SF CF 19 MV 20 MVddd (1 to 10000000) 21 MH 22 ML 23 HM 16 Complete executing commands sequence. After accepting Complete executing commands sequence. After accepting this command the controller records all transferred this command the controller record all commands to commands into the memory and turns to the standby operational buffer and turns to the standby mode mode. Set the address pointer in 0 Begin - start a new algorithm, the previous sequence is Begin - start a new algorithm in the bufer, the previous cleared. sequence is cleared. Set “enable” - turn on the motor Set “disable” - turn off the motor Forward motion - if the motor is stopped, the start of the motion will be in this direction; Forward motion - if this command was received while driving, the remaining steps are processed in the direction according this command Backward motion - if the motor is stopped, the start of the motion will be in this direction; Backward motion - if this command was received while driving, the remaining steps are processed in the direction according this command Reverse - if the motor is stopped, the start of the motion will be carried out in the opposite direction; Reverse - if this command was received while driving, the remaining steps are processed in the opposite direction Acceleration ddd: min = -1000, max =1000 Speed: - if the motor is stopped the start of the motion will be carried out with this speed; if acceleration is used this command sets the final speed; if there is no acceleration Speed ddd this speed will be used as start speed; - if this command was received while driving, the remaining steps are processed with this speed Start speed: This command is used only for starting motion and only when acceleration is used (AL≠0) Turn relay on Turn relay off Continuous motion - if the motor is stopped, this command starts perpetual motion; Continuous movement - if this command was received while driving, continuous motion with current speed begins Motion on number of steps (min 1pul – 10000000pul) - if this command was received when the motor is stopped, the motor will make ddd steps and stop; Move to ddd steps - if this command was received while driving, the motor will make ddd steps and stop, previous command will be considered complete Continuous movement, till signal to input IN2 - if this command is received when the motor is stopped, continuous motion will begin till signal to input IN2; Indefinite movement, till signal to input IN2 - if this command is received while driving, from this moment the motor will start continuous movement with the current speed till signal to input IN2 Continuous movement, till signal to input IN1 - if this command is received when the motor is stopped, continuous motion will begin till signal to input IN1; Indefinite movement, till signal to input IN1 - if this command is received while driving, from this moment the motor will start continuous movement with the current speed till signal to input IN1 Continuous movement, till signal to input “0” (zero limit switch) - if this command is received when the motor is stopped, Indefinite movement, till signal to input “0” (zero limit continuous motion will begin till signal to input “0”; switch) - if this command is received while driving from this moment the motor will start continuous movement with the current speed till signal to input “0”; 24 SPddd 25 LL JPddd (1 to 255) 26 Pause for ddddd ms, mах = 100000000 Set label for cycle operation Repeat from label ddd times, мах=255. Set 2 commands JPddd to create endless cycle. 27 WL Indefinite pause, wait for a signal to input IN1 28 WH Indefinite pause, wait for a signal to input IN2 Pause: min 1ms – max 10000000ms After receiving this command the motor will stop and wait for ddd ms and then will continue to execute the remaining steps. If in pause time the commands MV, MVddd, MH, ML, HM a received, they are executed immediately and previous command is considered complete Set label for cycle operation – for program in buffer Repeat from label ddd times, max 255. Set 2 commands JPddd to create endless cycle Indefinite pause, wait for a signal to input IN1 - if this command is received when the motor is stopped, next command will be executed after signal on the input IN1; - if this command is received while driving, from this moment the motor is stopped waiting for a signal to input IN1 the previous command is considered complete ЕIndefinite pause, wait for a signal to input IN2 - if this command is received when the motor is stopped, next command will be executed after signal on the input IN2; - if this command is received while driving, from this moment the motor is stopped waiting for a signal to input IN2, the previous command is considered complete 1 In “direct control” controller checks the value of acceleration: The motor is stopped: if while starting motion or , acceleration and start speed will be ignored and the motor will start operation with the speed SD. The motor rotates: if , where – current speed or , acceleration will be ignored and the motor will change its speed stepwise and remaining steps will be done with the speed SD. Table 6 Reply E10* E12* E14* E15* E16* E19 * Description The command successfully accepted Interrupting or command execution by sending another command Program executing completed Communication Error (check port parameters) Command error (check controller mode or ASCII code of the command) Command data error (check command data – integer, in allowed range, see table 5 9. LED Manual mode (SW9 – OFF, SW10 – ON) The SMSD-8.0 is powered, step motor is stopped – light green color LED indicator. Step motor is rotating – blink green color LED indicator. EN signal is active – blink both LED indicators. Driver mode (SW9 – ON, SW10 – OFF) Light green color indicator. After RESET – do not light both LED indicators. “Synchro” mode (SW9 – ON, SW10 – ON) The SMSD-8.0 is powered, step motor is stopped – do not light both LED indicators. Step motor is rotating – light green color or red color LED indicator (it depends on the direction of rotation). Controller mode (SW9 – ON, SW10 – ON) Standby mode – red color LED indicator. The SMSD-8.0 controller goes to the standby mode in one of the next cases: • After program executing completed; • After program executing was stopped by command «ST1». • After power on (if microswitches SW9=On and SW10=On); • After “Reset” button or input activated (if microswitches SW9=On and SW10=On). In the standby mode the SMSD-8.0 controller wait for one of the next event: • Arrival one of the control commands from a computer (table 6, accepted commands are «LD», «RD», «ST»); • Start executing program by pressing the button “Start” or input signal “Start” (connect “Start” and “Com”); • Start searching for a limit switch (zero position) by pressing the “Home” button or input signal “Home” (connect “Home” and “Com”); • Turn to the other operation mode: manual or simple driver modes (see section 6 and table 4). Program executing mode – blink red color LED indicator. The SMSD-8.0 controller turns to the program executing mode and start motion algorithm from the standby mode in case of: • “Start” button pressed or input activated (connect “Start” and “Com”); • Arrival the control command «ST»; The SMSD-8.0 controller turns back from program executing to the standby mode in case of: • Executing program completed; • Arrival the control command «ST»; • “Reset” button pressed or input activated (connect “Reset” and “Com”). Waiting for an external signal submode – blink red color LED indicator. The SMSD-8.0 controller turns to this submode during program executing, as per the command “WH” or “WL” – waiting for an external signal. The controller suspends program executing till receiving active signal to input IN1 or IN2. As the signal arrives to IN1 or IN2 (as per the command) the controller resumes program executing. Commands loading to the controller’s memory – light both LED indicators. The SMSD-8.0 controller turns to this mode from the standby mode as receives the command “LD”. In the commands loading mode the controller accepts the executing commands only (table 5). After arriving the command “ED” the controller record all received executing commands to the memory and turns to the standby mode. Reading commands from the controller –light both LED indicators. The SMSD-8.0 controller turns to this mode from the standby mode. The sequence of executing commands from the controller memory transfers to the computer as the controller receives the command “RD”. After the commands transferred the controller turns back to the standby mode. Temporary stop mode –blink both LED indicators. The SMSD-8.0 controller turns to this submode during program executing as receives the signal «EN». The controller suspends program executing while the signal is active. As the signal turns to inactive the controller resumes the program executing. 10. Delivery in complete sets The stepper motor controller SMSD-8.0 SMC_Program can be delivered on a CD or by e-mail Manual SMSD.80.000 Switch (Hall effect) SM8-31010NA – as an option, extra cost, on a request 1 pcs. 1 pcs. 1 pcs. 1 pcs. 11. Warranty Any repair or modifications are performed by the manufacturer or an authorized company. The manufacturer guarantees the failure-free operation of the controller for 12 months since date of sale when the operation conditions are satisfied – section 3. The manufacturer sales department address: Smart Motor Devices OÜ, Tallinn Science Park Tehnopol, Mäealuse st. 4, Tallinn 12618, Estonia, Phone: + 372 6559914, e-mail: mail@stepmotor.biz url: http://www.stepmotor.biz