1
VersaCheck
®
Platinum 2007
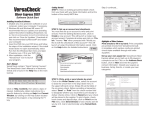
Getting Started:
Step 3 continued...
STEP 1: Have an existing pre-printed blank check from your
bank with your bank information and (at the bottom of the
check) MICR line.
Software Quick Start
Installing VersaCheck Software:
1. Disable any virus protection software on your
computer; restart your computer if necessary.
2. Windows 98 and Windows ME users: G7
recommends that you update your operating
system files before installing VersaCheck. Go to:
http://v4.windowsupdate.microsoft.com/en/default.asp
and click on ‘Scan for Updates.’ Download all files
recommended by Microsoft® and restart your computer.
3. Insert the CD into your CD-Rom drive and follow
the steps of the installation wizard. If the install
wizard does not open automatically, select Run
from the Windows Start menu and type:
D:\autorun.exe, if D is your CD-ROM drive.
4. After installation, click the
“VersaCheck” icon to launch
your program.
STEP 2: Set up an account and checkbook.
You must first set up an account to write and print checks.
From the Getting Started screen, click on Create a new
account. This will launch a 3-step new account wizard. Complete all entries and click on “Finish.” Answer “Yes” when
prompted with “Would you like to edit the checkbook of this
account?” This will launch a 5-step Checkbook Information
wizard. Click on the Help button
for detailed instructions.
User’s Manual
VersaCheck contains “Quick Training Courses”. The
VersaCheck User’s Manual is in electronic format and
is found in the Help files on the main tool bar.
Click on Help, Contents, then select a topic of interest. Additionally, obtain instructions for a specific
feature by clicking on Help then Current Window;
by clicking on the Help button located throughout the
program; or by pressing the F1 key.
STEP 3: Write, print or send checks by email.
Click on the Write Checks button, select the account to draw
the check from in the drop-down menu in the upper lefthand corner. Simply fill out the fields of the on-screen check.
Before recording a transaction, select “Send” or “Print” from
the check number field to designate whether you would like
to print locally or deliver checks online. Click on Record and
your check will be placed in the register. To print checks,
checkbook covers and deposit slips, click on Print from the
File menu. Click Send Checks to have checks sent for you
by U.S. mail or electronically using iVersaCheck.com.
Highlights of Other Features:
Working with your accounting software: Print compatible pre-printed checks from VersaCheck’s built-in
templates which replace costly pre-printed check
styles available through mail order suppliers. Import
records from your financial software or print filled-out
checks directly through Active Check ServerTM,
VersaCheck’s powerful virtual print engine for
Quicken®, QuickBooks® and Money. Use the print feature within your accounting program to print checks.
Create check drafts and schedule payments: Your
customers can conveniently pay you by check! Click
on the Address Book button and click on New. This
will launch the Payee/Payor Setup window. Complete
all entries on the General and Financial tabs and
click OK. To create and print the check draft, click on
Business from the main tool bar and select Collect
Checks/Drafts. Select the payor from the drop-down
Payor list, enter the check amount and click on Record. Print from the File, Print Checks menu. Click
on the Transactions button, select New and choose
Check Draft to schedule and automate future or
recurring check drafts.
Platinum 2007 Continued...
Set up your own payee list: VersaCheck allows you
to track all of your payees in a simple-to-use list. Click
on the Address Book button, click on New and enter
the payee’s contact information. Classify your payees as business, family, friends, or create your own
categories.
VersaCheck EZ SCANTM - Set up your accounts in a
snap! Select an account to edit. Click on Edit Checkbook in My Accounts. Click Next. Click Scan Sample
Check.
STEP 1: Select scanner in the drop-down menu. Click
on Next.
STEP 2: Click check box to view scanned check image. Click Next.
STEP 3: View sample image. Click Next.
STEP 4: Compare bank code lines to ensure characters and numbers match exactly.
Best Scanning Results: Use your scanner software
to crop the scanned image to include only the check
face.
™
VersaCheck Active Check ServerTM:
Supports unlimited simultaneous users! Active
Check ServerTM uses a client/server model to centralize account information and activity so that multiple
users can simultaneously access and utilize the same
data.
STEP 1: The Administrator installs Active Check
ServerTM onto the server machine.
STEP 2: The Administrator installs VersaCheck and
Active Check ClientTM programs on each users machine.
Refer to the help files in these programs for complete installation and user instructions.
Check Designer ProTM: Unlimited check design capabilities!
Fully customize existing templates or create check templates
from scratch! Add and edit logos, shapes, lines, text (font
styles and sizes) and tables. This feature can be accessed
from step 5 of 5 in the Edit Checkbook feature. Additional
instructions can be located in the Help files.
Generate Invoices and Estimates: Add company logos and
contact data to invoices by selecting Company Information
from the Business menu on the main tool bar. To create an
invoice, first set up your invoice account from the My Accounts screen, click on the New button and select Invoicing
as the account type. Double click on the Invoice account
and click on the New button in the transaction register. Create an estimate by selecting New Estimate from the Business menu. From the Estimate List selection in the Business menu, estimates can be quickly converted to invoices
by clicking on the Convert to Invoice button. Customer
payments can be easily tracked by selecting the Customer
Payment option in the Business menu.
Create Reports and Graphs: Click on Reports from the
Menu Bar at the top of the screen, then select Reports and
Graphs from the drop-down menu. Choose the type of report
to generate. VersaCheck creates bar and pie charts corresponding with your data.
Business Cards, badges and labels:
Easily design your own business cards, labels, and security/
ID badges from scratch! Choose from over 5,000 graphics,
fonts and templates. This software supports all G7 labels/
business card stock and most Avery formats. Includes many
popular barcodes.
Accept Credit Cards in Real Time!: Click on the Credit
Card Terminal icon on the left-hand side of the screen and
enter your customer’s credit card information. A message will
pop-up and let you know whether or not the transaction was
approved. This feature requires accounts with a gateway and
credit card merchant provider.
Send, Receive, and Process Payments on the Internet: Click on the VersaCheck Online icon, and follow
the steps to take advantage of VersaCheck features
and more – all online!
FREE CUSTOMER SUPPORT
By phone: 1-800-303-2620
Online: http://support.g7ps.com
REGISTER ONLINE
INSTANTLY & CONVENIENTLY!
During software installation, you will be prompted to
enter your registration information. Fill out the registration screens and register by selecting the “Internet”
registration check box at the end of the session.
You may also register online by visiting:
www.g7ps.com/register
To register by mail select the “mail” registration check
box and print out a completed registration form at
your desktop, or send in a 3x5 card with your name,
address, email address, phone/fax number, your
product serial number and software version.
Mail to: Product Registration
P.O. Box 270459, San Diego, CA 92198
©2006 G7 Productivity Systems, Inc. All trademarks and company names
are the property of their respective owners. Quicken® and QuickBooks®
are registered trademarks of Intuit Inc. Intuit is not affiliated or associated
with VersaCheck® or G7 Productivity Systems. Offers, terms and conditions
subject to change without notice. 1/06
P.O. Box 270459
San Diego, CA 92198
Tel: (858) 675-1095
Fax: (858) 675-0579
Email: sales@g7ps.com
www.versacheck.com
• Quick Links: A short list of links to some of the most commonly
used features in SmartInvoice.
• Scheduled Transactions: An overview of your transaction schedule for
payments, deposits, etc.
The main Navigation Panel that appears on the left-hand side of the
screen has two menus, General and Business, that allow you to quickly
navigate throughout SmartInvoice’s many features.
Software Quick Start
See the tutorial in the help file for step-by-step
instructions on setting up accounts, contacts and
inventory lists and how to get started creating
invoices
Generate Invoices, Estimates, Purchases
Orders & Statements
VersaCheck SmartInvoice lets you quickly create and manage invoices,
estimates and purchase orders, and allows you to send them online with
quick payment options for your customers. Track customer payment
histories and manage inventory against vendor’s bills.
Install VersaCheck SmartInvoice
Create a new account from the My Accounts screen and select
Invoicing as the account type. Double click on the Invoice account to
open the transaction register for the new account. You can create a new
invoice by clicking the New button or by selecting New
Invoice from the Business menu. Once you have created an estimate,
you can quickly convert it to an invoice by clicking on the Convert to
Invoice button. Customer payments can be tracked easily by selecting
the Customer Payment option in the Business menu.
Start Your Program
Create a purchase order by selecting New Purchase Order from the Business menu. Selecting Vendor’s Bills from the Business Menu will allow
you to track payment on bills and purchase orders, as well as tracking
inventory on hand when shipments are received.
Disable any virus protection software on your computer and
restart your system if necessary. Insert the VersaCheck SmartInvoice CD into the CD-ROM drive. (If the install wizard does
not open automatically, select Run from the Start menu and type
D:\setup.exe, or applicable drive letter) Follow the steps of the
install wizard.
Click on the “SmartInvoice 8.0” icon to open your program.
Set Up an Account
First set up one or more accounts from which you can create
invoices and to make payments, deposits, or transfers. Select
“Create a New Account” from the Getting Started screen and
select Bank, Cash, Credit Card, Invoicing, Money Market, Other
Asset, Other Liability, or Sales Tax as the type and complete the
simple two-step account wizard.
You can quickly and easily print out a statement to send to customers
based on any of the invoices you create. From the File menu select Print
> Customer Statements... to open the Print Customer Statements wizard.
Select whether to print a particular customer’s statement, all unpaid
statements, or overdue statements. Choose the template to use for printing the statement or edit your own and then preview and print.
Receive Payments by Online
Check
Getting Started Screen
The Getting Started screen gives you a quick overview of some
of the main features of VersaCheck SmartInvoice, including:
• My Favorite Accounts: Allows you to view current balances on
your most used accounts.
VersaCheck SmartInvoice lets you choose
between printing, emailing or uploading
invoices that you create. For invoices you
upload or email you can choose to direct
customers to pay you by integrated online
check delivery service, Qchex.com. From
the Invoice dialog box click Upload or Send and then choose the Payment Methods tab. Include links to your online check service account, or
link to PayPal for customer payment. The invoice will arrive with links that
take the customer directly to your account for making the payment.
Seamlessly Integrates with Quicken®,
QuickBooks®, Money and Others!
Export or import files following the instructions from your accounting program’s user guide. From the File menu in SmartInvoice select Import and click on Invoices, then select the file type
to import. Enter the name or location of the file in the dialog box.
Choose the source you would like the file associated with and
what dates to filter. Select which account to import the invoice
to and which sales tax account to use. Choose a form template
from the drop-down menu and click Finish.
Create Check Drafts & Schedule Payments
Receive and print check payments in seconds! Click on Address
Book, click New and
select the Financial tab.
Enter the payor’s check
account information at the
bottom of the dialog box.
To create and print the
check draft click on the
Check Collection icon on
the left-hand menu bar under Business. Select the
payor from the drop-down
Payor list, then complete
the date and amount check fields and click on Print. The check
is ready for deposit! You can easily schedule and automate
future or recurring check drafts by opening the Scheduled Transactions dialog and selecting Check Draft.
Set Up Your Address Book
VersaCheck SmartInvoice allows you to track all of your customers and vendors in a simple-to-use list. From the Address Book
screen click the New icon and enter the contact information.
Classify your contacts as bills, business, family, friends, or create
your own categories.
Schedule Future Bills & Transactions
Click the New icon to set up the type of future transaction, which
account it relates to, amounts, splits, and whether the transaction
is a one-time action or will be recurring on a schedule.
Create Reports & Graphs
Click on Reports from the Menu Bar at the top of the screen, then
select Reports and Graphs from the drop-down menu. Choose
the type of report to generate. SmartInvoice creates bar and pie
charts corresponding with your data.
Create Reports & Graphs continued...
Software License Agreement:
By opening the accompanying package containing the G7 Productivity Systems, Inc. and/or TPDP
(defined below) (“G7”) software product in object code form (the “Software” or “Program”), you will
acquire a license to use the Software and materials in accordance with the terms and any updates
or maintenance releases thereto, and subject to the restrictions, contained in this license.
TIRED OF THIRSTY INKJETS?
Use VersaCheck software with the new VersaJette™
inkjet family and revolutionary VersaInk-nano™ for
efficient and precise results everytime!
VersaJette M300
InkJet Printer
BEFORE OPENING THE PACKAGE CONTAINING THE SOFTWARE, PLEASE CAREFULLY READ
THIS LICENSE AGREEMENT, WHICH CONTAINS THE TERMS AND CONDITIONS UNDER WHICH
YOU ARE ACQUIRING A LICENSE TO USE THE SOFTWARE. IF YOU DO NOT ACCEPT THE
TERMS AND CONDITIONS OF THE LICENSE AGREEMENT, PLEASE RETURN THE SOFTWARE
AND PACKAGING AND ALL OTHER MATERIALS PROMPTLY TO THE PLACE OF PURCHASE FOR
A FULL REFUND OF THE LICENSE FEE PAID FOR IT. IF YOU OPEN THIS PACKAGE, YOU WILL
BE ACQUIRING A LICENSE TO USE THE SOFTWARE IN ACCORDANCE WITH THE TERMS AND
CONDITIONS OF THIS LICENSE, AND YOU WILL HAVE ACCEPTED AND AGREED TO THESE
TERMS AND CONDITIONS.
1. License
In consideration of the payment of the license fee, which is part of the price you paid for this program, G7 is authorized to grant to you a non-exclusive license to use and display this copy of the
Program and the enclosed materials, subject to the following terms and conditions: The copyright
and all other right, title and interest in the Program and materials shall at all times remain with G7 or
its authorized third party technology development partners (collectively, “TPDP”). Physical copies
of the Program remain the property of G7 and such copies are deemed to be on loan during the
term of this Agreement. You must fully reproduce any copyright or other notice marked on any part
of the Program on all copies and must not alter or remove any such copyright or other notice on the
original copy of the Program. G7 and its TPDPs reserve all rights not expressly granted to you.
2. Permitted Uses
VersaJette M400
Printer, Copier
and Scanner
www.versajette.com
Register Instantly & Conveniently
During installation of the program you will be prompted to enter
your registration information. Fill out the registration screens and
register instantly by selecting the “Internet” registration check
box at the end of the session. Alternatively, you may select the
“Mail” check box and print out a completed registration form at
your desktop. Fold the form and mail it to G7 using the enclosed
return envelope.
You may also register online by visiting www.g7ps.com/register,
or send in a 3x5 card with your name, address, e-mail address,
phone/fax number and your product serial number and version.
Mail to:
Product Registration, PO Box 270459, San Diego, CA 92198
Technical Support: http://support.g7ps.com
www.versacheck.com
P.O. Box 270459
San Diego, CA 92198
Tel: (858) 675-1095
Fax: (858) 675-0579
Email: sales@g7ps.com
You may:
(a) use the Program on any single computer at a single location.
(b) make one copy of the Program in machine-readable form, for backup purposes only.
(c) Transfer your right to use the Program to a third party, provided you assign all your rights under
this Agreement, cease all use of the Program and notify us of the name and address of the other
party, and the other party agrees to accept the terms and conditions of this agreement.
You may not:
(i) sublease, lease, sell, distribute, rent or grant other rights to the Program;
(ii) provide use of the Program in a computer service business, network, time-sharing, interactive
cable television, multiple-CPU or multiple-user arrangement to users who are not individually
licensed by G7;
(iii) make copies of any materials provided, except as provided in Section 2 above;
(iv) sell forms or other materials generated in conjunction with the Program to third parties(please
contact G7 directly if you wish to be licensed to create a forms based business solution for your
customers using G7 software);
(v) translate, reverse-engineer, decompile or disassemble any part of the Program; or(vi) modify or
adapt, or create derivative works based on, any part of the Program.
3. Registered User
Upon receipt by G7 Registration by U.S. mail, signed by you, or after completion and submission of
the online registration form at http://www.G7ps.com/register, you will be registered as a user of the
Program. Registered users are entitled to the applicable G7 online support plan from the date they
registered the software.
4. Limited Warranty
For a period of 30 days from the date you acquired your copy of the Program, G7 warrants that: the
Compact Disks (“CD’s”) are not defective, and the Program is properly recorded on them.
YOUR SOLE REMEDY UNDER THIS LIMITED WARRANTY IS TO RETURN, WITHIN THE WARRANTY PERIOD, THE DEFECTIVE CD FOR REPLACEMENT. THIS LIMITED WARRANTY IS IN LIEU
OF ALL OTHER WARRANTIES AND CONDITIONS, EXPRESS OR IMPLIED, WRITTEN OR ORAL,
INCLUDING, BUT NOT LIMITED TO, WARRANTIES OF MERCHANTABLE QUALITY, MERCHANTABILITY AND FITNESS FOR A PARTICULAR PURPOSE AND THOSE ARISING BY STATUTE OR
FROM A COURSE OF DEALING OR USAGE OF TRADE. G7 PRODUCTIVITY SYSTEMS DOES
NOT WARRANT THAT THE PROGRAM WILL BE ERROR-FREE OR THAT ITS OPERATION WILL BE
UNINTERRUPTED. EXCEPT AS PROVIDED ABOVE, THIS SOFTWARE AND ANY RELATED SERVICES ARE PROVIDED “AS-IS”, AND TO THE MAXIMUM EXTENT PERMITTED BY APPLICABLE
LAW, G7 DISCLAIMS ALL OTHER REPRESENTATIONS AND WARRANTIES, EXPRESS OR IMPLIED,
REGARDING THIS SOFTWARE, DISK(S), RELATED MATERIALS AND ANY SERVICES, INCLUDING
THEIR FITNESS FOR A PARTICULAR PURPOSE, THEIR QUALITY, THEIR MERCHANTABILITY, OR
THEIR NON-INFRINGEMENT. G7 DOES NOT WARRANT THAT THE SOFTWARE IS FREE FROM
BUGS, VIRUSES, ERRORS, OR OTHER PROGRAM LIMITATIONS, NOR DOES G7 WARRANT
ACCESS TO THE INTERNET OR ANY OTHER SERVICE THROUGH THE SOFTWARE.
THE WARRANTIES IN THIS AGREEMENT GIVE YOU SPECIFIC LEGAL RIGHTS. YOU
MAY HAVE OTHER RIGHTS, WHICH VARY FROM JURISDICTION TO JURISDICTION.
THE ENTIRE RISK AS TO THE RESULTS AND PERFORMANCE OF THE PROGRAM AND
USE OF THE MATERIALS IS ASSUMED BY YOU. G7 SHALL NOT HAVE ANY LIABILITY
TO YOU OR ANY OTHER PERSON OR ENTITY FROM ANY INDIRECT, INCIDENTAL,
SPECIAL OR CONSEQUENTIAL DAMAGES WHATSOEVER, INCLUDING BUT NOT
LIMITED TO LOSS OF REVENUE OR PROFIT, LOST OR DAMAGED DATA, OR OTHER
COMMERCIAL OR ECONOMIC LOSS, EVEN IF G7 HAS BEEN ADVISED OF THE POSSIBILITY OF SUCH DAMAGES; NOR SHALL G7’s AGENTS, REPRESENTATIVES OR
THIRD PARTY TECHNOLOGY DEVELOPMENT PARTNERS HAVE SUCH LIABILITY. G7’s
MAXIMUM AGGREGATE LIABILITY TO YOU SHALL NOT EXCEED THE LICENSE FEE
PAID BY YOU FOR THIS COPY OF THE PROGRAM.
5. Term
The license granted under this agreement shall remain in effect until terminated. You
may terminate the license at any time. G7 may terminate the license due to your failure
to comply with any of the provisions of this Agreement. Upon termination, you agree to
return to G7 all copies of the Program and materials.
6. Government End Users
G7 Software is a “commercial item,” as that term is defined at 48 C.F.R. 2.101 (OCT
1995), consisting of “commercial computer software” and “commercial computer
software documentation,” as such terms are used in 48 C.F.R. 12.212 (SEPT 1995). Consistent with 48 C.F.R. 12.212 and 48 C.F.R. 227-7202-1 through 227-7202-4 (JUNE 1995),
all U.S. Government End Users acquire the G7 Software (or Licensed Product) with only
those rights set forth herein. You acknowledge and agree that the G7 Software is subject
to restrictions and controls imposed by the Export Administration Act and the Export Administration Regulations (“the Acts”). You agree and certify that neither the G7 Software
nor any direct product thereof is being or will be used for any purpose prohibited by the
Acts. You agree and certify that you are not a citizen or permanent resident of the following countries: Cuba, Iran, Iraq, North Korea, Libya, Sudan, Afghanistan or Syria.
7. Online Services
Qchex.com, USAplaza.com, G7PS.com and any other online services available through
the Internet and accessible via selected G7 products (“Online Services”) are provided
by G7. Financial services are provided by your financial institution or other third party,
and not G7. In some versions of the G7 Software, access to Online Services can be
through the optional use of a user name/password key pair (the “KEY”). Keys are kept
under high security, but factors such as well-chosen password, physical security for
your computer and proper safeguards when you use a network or the Internet are all
important. Because most of these factors are beyond G7’s control, you agree that G7 is
not liable for safeguarding your KEY data. You agree not to hold G7 liable for any loss or
damage of any sort incurred as a result of any such dealings with any services provided
by your financial institution or other third party. All Online Services are subject to change.
The limitations of damages set forth above are fundamental elements of the basis of the
bargain between G7 and you. G7 would not be able to have provided this product or
services without such limitations.
8. Governing Law
This agreement shall be governed by and construed in accordance with the laws of the
state of California, San Diego County.
9. Severability
If any provision of this Agreement is found to be invalid or unenforceable, such provision
shall be severed from this Agreement and the remaining provisions shall remain in full
force and effect.
10. Product Information
You agree that the preferred method of communication between you and G7 is via email,
and G7 has the right to communicate up-to-date information, update notices and offerings, that are relevant for you as a G7 customer. You may elect to change your method of
communication with G7 at any time, by contacting G7 .
©2006 G7 Productivity Systems, Inc. All trademarks and company names are the property of their respective owners. Quicken® and QuickBooks® are registered trademarks
of Intuit Inc. Intuit is not affiliated or associated with VersaCheck® or G7 Productivity
Systems.Offers, terms and conditions subject to change without notice. 01/06