1
READSENSOR INSTRUCTIONS
-
Version 1.3
December 2007
3 - 38
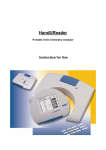
The Readsensor can by used without PC and with PC.
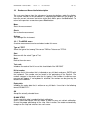
To move from the use with or without PC you have to change the electronic key
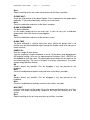
(photo nb 1) that is located just close to the printer paper under the bleu cap (photo
nb 2). WHEN YOU CHANGE THE KEY PLEASE SWITCH-OFF THE READER.
There are 2 keys provided with the Readsensor: The first named “anyCheckValues”
is for the use of the paper printer and the other key “camera” allows connexion of the
readsensor to your PC. Both keys are placed into the small plastic pouch.
For using the paper printer, proceed as follow:
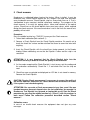
1. connect the small keyboard (photo nb 3).
2. connect to power supply (photo nb 3).
3. Switch-on (rear panel, photo 3) and after 2 sec the system ask for the name of
operator. Introduce the name with the keyboard and press ENTER with the
keyboard.
4. The system request to have a BLANK dipstick. Take the tray and deposit a
blank dipstick into the furrow of the tray. The dipstick must facing out of the
reader. The sample pad of the dipstick must be visible outside the reader
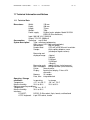
when the dipstick is introduced. If the dipstick is in the wrong position, turn it
for 180° like in the photo nb 4. IT IS VERY IMPORTANT TO INTRODUCE
THE DIPSTICK IN THE RIGHT WAY THAT IS THE SAMPLE PAD ALWAYS
OUTSIDE (facing out).
5. The system make the blank calibration automatically and than ask for the type
of test you want to run. Switch on the black button from the reader to indicate
the type of test and for running a Twinsensor, switch on the first black button
just under TWIN.
6. The reader request to have a CHECK dipstick and you have to introduce the
check lot number with the keyboard, so please type 051612 and ENTER.
7. Enter the EXP date that is 16/12/2006 and ENTER, note that the year should
be in 4 numbers.
8. The reader ask you to pull the BLANK dipstick out and to insert a TWIN
CHECK dipstick in. Remember the way to insert always the sample pad
outside the reader (photo nb 4).
9. Now the system print a small ticket indicating that the blank and check have
been done correctly. The reader is now free for any additional measurements.
To continue please switch on “Measure” the first black button again.
10. Tell what you want to do for instance switch on START, again the first button.
11. Tell the type of test: again the first black for Twinsensor reading.
12. Inter the test code that is BT00640 ENTER with the keyboard.
13. Enter the LOT number in 6 numbers like 061303 ENTER.
14. Enter the EXP date like for the check EXP date : 13/03/2007 ENTER
15. Enter the SAMPLE ID: like MILK Nb1 ENTER
16. The reader ask you to pull the dipstick out, until you see the indication “Insert
a dipstick” and than introduce it in the right position like on the photo nb 4.
Than the system display and print the paper.