1
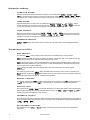
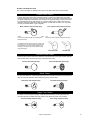
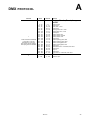
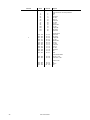
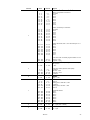
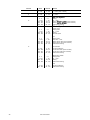
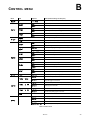
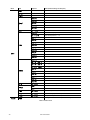
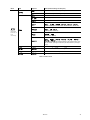
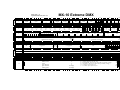
Information readouts POWER-ON HOURS Read the total number of hours the fixture has been on since fabrication ( → → → ), and the number of hours on since the counter was last reset ( → → → ). This can be used to track maintenance intervals. Press [up] for 5 seconds while displayed to reset. LAMP HOURS Read the total number of lamp hours since fabrication ( → → → ), and the number of lamp hours since the counter was last reset ( → → → ). Reset this counter after installing a new lamp. Press [up] for 5 seconds while displayed to reset. LAMP STRIKES Read the total number of lamp strikes ( → → → ), and the number of lamps strikes since the counter was last reset ( → → → ). Reset this counter when installing a new lamp. Press [up] for 5 seconds while displayed to reset. FIRMWARE VERSION → displays the firmware version number. The firmware version is also displayed briefly at startup. Test and service utilities DMX READOUT The DMX log ( ) menu provides useful information for troubleshooting control problems. displays the DMX refresh rate in packets per second. Values lower than 10 or higher than 44 may result in erratic performance, especially when using tracking control. displays the quality of the received DMX data as a percentage of packets received. Values much below 100 indicate interference, poor connections, or other problems with the serial data link that are the most common cause of control problems. displays the DMX start code. Packets with a start code other than 0 may cause irregular performance. The remaining options under display the DMX values received on each of the 13 channels, from (shutter, channel 1) to (effect speed, channel 13). If the fixture does not behave as expected, reading the DMX values can help you troubleshoot the problem. MANUAL CONTROL The manual control menu ( ) provides commands for turning the lamp on ( ), turning the lamp off ( ), and resetting the fixture ( ). It also permits you to position and move individual effects. EFFECTS TEST The test sequence ( → ) runs through all effects to provide a quick check of fixture performance. Note: the test sequence does not automatically strike the lamp. Use → and → to control lamp power. Press [menu] to stop the test. FEEDBACK TOGGLE Magnetic sensors monitor the positions of the color wheel, gobo wheel, and rotating gobos. If they detect an error, the shutter closes while the effect resets. This feature can be disabled by turning effects feedback off ( → → ). ADJUSTMENT POSITIONS The adjustment menu ( → ) provides commands for positioning effects during mechanical adjustment. 14 MX-10 Extreme