1
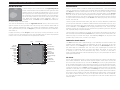
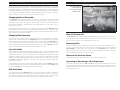
45 THE BATTLE GENERATOR: BATTLE GENERATOR DEPLOY SCREEN CONTROLS
Increasing or Decreasing a Unit’s Strength
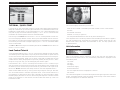
The buttons whose legends are +STR and -STR raise or lower the selected unit’s
strength one level each time you left-click on them. This can be used to create
stronger or weaker units for specific scenarios. A unit can be lowered to a strength
of “1” or as high as “15.” Remember that a unit’s strength over 10 cannot exceed its
experience level.
The exception to this are capital ship units, whose strength can never exceed their
starting value.
Increasing or Decreasing a Unit’s Entrenchment
These buttons increase or decrease the entrenchment level of the selected unit up to
a maximum of the terrain the unit is currently in. These values vary depending on
the terrain and unit, so some experimentation may be needed.
Deploying Mounted Units
This control lets you mount a deployed unit in its organic transport.
Embarking / Debarking a Unit
Units such as Paratroops start the scenario airborne unless you use this control to
change their deployment status to place them on the ground. Once a unit is placed,
left-click on the Embark/Debark button to change the unit from airborne deployment to
ground deployment and vice versa.
Note: This control is not necessary to use for ground units placed at sea. They are
automatically deployed mounted on their transports.
Building a Scenario
Building a scenario can be a very simple process, or an extremely complex one that
could be the subject of an entire manual in its own right. The previous section
detailed the functions of most of the controls and options contained in the Battle
Generator. This section describes how to create a simple scenario, and lists all of the
steps that are required, as well as some possible options to make a scenario
more interesting.
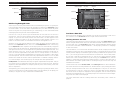
When the Battle Generator Setup screen appears, there are default numbers in most
of the fields. The one absolutely necessary step that must be performed from this
screen is the selection of a map. The middle button of the five under the world map
on the right side is the Load Map button. Left-clicking on this button opens the directory where the map files (.MAP extension) are stored. Select one by double-clicking
on it, and the menu window closes. While not necessary, the Edit Scenario Title and Edit
Scenario Description controls make the scenario truly yours and help differentiate
between a scenario you have created and one that came with the game.
THE BATTLE GENERATOR: BUILDING
A
SCENARIO 46
The default victory condition settings are sufficient for a simple scenario where the
objective is to eradicate all of your opponent’s units. Setting the Victory Hexes Needed to
Live to a value greater than “0” makes victory hexes important as well.
Adjusting the settings in the AI Bucket control is not necessary, but can make for a much
more interesting scenario, particularly if victory hexes are going to play an important
part. See the “Setting AI Bucket” section, starting on page 35, for an example.
Select nations for the Allied and Axis sides if you wish to play something other than
the default selections of the US and Japanese. This is where you would add additional
nationalities as secondary adversaries.
Set Turns
Clicking on the Go to Purchase (Next) button opens the Battle Generator Purchase screen.
Select the units you want to use in the game — remember to select units for both sides!
Before buying air units, make sure that the map you select has an airfield or they may
not survive the scenario. Once you have established the forces to be used by both
sides, use the Go to Deploy (Next) button to go to the Battle Generator Deploy screen.
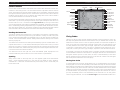
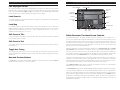
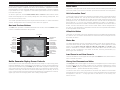
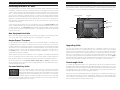
The Battle Generator Deploy screen displays the map you loaded previously. The
default setting is Lay Units mode, visible on the Status bar above the left-hand column
of buttons. To continue with our “simple” scenario example, choose the hexes where
you wish the first side to deploy, and left-click to place the first unit. Right-clicking
picks up a placed unit. Deploy all the units from one side then left-click on the
Allies/Axis button in the upper right corner to change sides. Left-click on the Place Mode
button and deploy all of the units from the other side. Left-click on the Save Scenario
button to open the window where you can save your work.
If you want this scenario to be something other than a slugging match, you should
use the Victory Hexer control to create victory hexes, and assign values to them.
Use the Save Scenario button again to save your work Use the Load Home Made Scenario button from the Scenario Selection screen to load this scenario and you are ready to play
your first hand-crafted scenario.
Some ways you can use the Setup controls to customize your scenarios are as follows:
• Use the Set AI Bucket menu give one side a prestige point advantage.
• Set more than one victory hex.
• Adjust the scenario turn length.
• Include night turns.
• Experiment with high latitudes and bad weather.
• Use more than one nation on each side to vary the mix of units available.