1
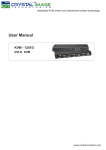
PacificCable.com DVIKVM Switch Manual Introduction Thank you for purchasing the DVIKVM switch. DVI (Digital Visual Interface) is widely applied to flat screen monitors or LCD monitors. The traditional CRT (Cathode Ray Tube) style monitor is used with HD-15 pin connectors and its radiation is higher than a LCD monitor's. The heavy CRT monitors are being replaced with LCD monitors day after day. At the same time, traditional KVM switches which work with HD-15 connectors also need to be upgraded to DVI KVM Switches. DVIKVM is a power free switch box specifically designed for small office or home (SOHO) computers users to control multiple computers without redundant keyboards, monitors, and mice. DVIKVM switch supports a wide range of PC hardware and software platforms. DVIKVM can save you money, time, space, and power. DVIKVM switch is loaded with features such as hotkey, individual push buttons on the front panel, Audio and auto scan control. It has complete keyboard and mouse emulation for simultaneous PCs boot-up process. Safety Instructions Always read the safety instructions carefully. 1. Keep this User's Manual for future reference. 2. Keep this equipment away from humidity. 3. Lay this equipment on a reliable flat surface before setting it up. 4. If any of the following situations arise, get the equipment checked by service personnel: The equipment has been exposed to moisture The equipment has been dropped and damaged. If the equipment has obvious sign of breakage. The equipment is not working well or you cannot get it work according to User's Manual. Features 2 port KVM switch is desktop size design. Supports Microsoft Intellimouse, Microsoft Intellimouse explorer, Microsoft Optical mouse, Logitech Net Mouse, ... etc. Supports DOS, Win3.X, Win95/98/98SE/2000/ME, WinNT. Hot Plug - Add or Remove connected PCs for maintenance without powering down the KVM switch or PCs. For applications requiring mixed analog / digital operation or multiple video head switching from different PCs connected to this switch. Supports DVI Flat Panels and monitors at resolutions up to 1600 x 1200 @ 60Hz (165MHz) - i.e. the maximum DVI single-link bandwidth. No software required - easy PC selection via Push Buttons, Hot Keys. Auto Scan Mode for monitoring PCs. Keyboard status restored when switching PCs. LED display for easy status monitoring. Buzzer sound for switching port confirmation. Package Contents Qty. 1 2-port PS/2 DVI KVM Switch Qty. 1 User's manual Qty. 1 Transformer Specifications PC Ports: 2 Console Ports: 2 Max PC Connections: 2 LED's: 4 PC Port Connector: PS/2 Keyboard mini-din 6 pin (purple) PS/2 Mouse mini-din 6 pin (green) DVI-I video connector Console Port Connector: PS/2 Keyboard mini-din 6 pin (purple) PS/2 Mouse mini-din 6 pin (green) DVI-I video connector PC Selection: Hot Key / Push Button On Screen Display Control: NO Scan Intervals: 8 seconds Keyboard Emulation: PS/2 Mouse Emulation: PS/2 VGA Resolution: 1600 x 1200 Bandwidth: 165MHz Daisy Chain and Levels: NO Housing: Metal Size: Desktop Weight: 3 pounds Dimension (mm): 184L x 143W x 45H System Requirements Console Side: One DVI-D or DVI-I Monitor One PS/2 Keyboard One PS/2 Mouse Computer Side: Two 3-in-one (PS/2-PS/2-DVI) to 3-in-one (PS/2-PS/2-DVI) cables. Hardware Installation Before installation, please make sure all of peripherals and computers have been turned off. 1. Connect the Keyboard, DVI, Mouse cables to the computer ports of the DVIKVM switch. 2. Connect the Keyboard, DVI Monitor, and Mouse to console port of DVIKVM switch. 3. After powering on computers and finishing the boot-up process, you can start the DVIKVM switch. NOTE: Please don't switch the PC port (i.e., Don't press the push button of the DVIKVM switch or run hot key) during the computers boot-up process. Usage The push buttons: Press the individual button to select the respective PC port. Normally, there is one LED always lit. (i.e., the console is connected to this PC port) for one PC port and the other PC port's LED is off when you power on the DVIKVM switch. When you select one of two PCs and it is shut down, the selected port LED will flash. Keyboard Hot Key Commands: You can also conveniently command DVIKVM switch ports through simple key sequences. To send commands to the DVIKVM switch the SCROLL LOCK key must be pressed twice within 2 seconds. You will hear a beep for confirmation. Below are the different hot key commands: [Scroll Locks need to be pressed within 2 seconds] Scroll Lock + Scroll Lock + Up Arrow = Previous Channel Scroll Lock + Scroll Lock + Down Arrow = Next Channel Select PC port: Scroll Lock + Scroll Lock + 1 = To select PC1 (port 1) Scroll Lock + Scroll Lock + 2 = To select PC2 (port 2) Beeper Function: Scroll Lock + Scroll Lock + B = Beeper Scroll Lock+Scroll Lock + S = Auto Scan (Factory default value is off) Troubleshooting Ensure that all cables are well seated. Label all of the cables with number for each respective computer to avoid confusion. 1. DVIKVM switch draws the power from the keyboard port of the computers. If the computer, such as a laptop computer, notebook computer, or another computer, cannot support enough power to the DVIKVM switch, please ass a DC 9V, 500mA~1A to the power jack. The power jack polarity is center positive. 2. Don't press any keys on the keyboard while the selected computer is booting up. Otherwise, it might cause a keyboard error or the keyboard may not be detected. 3. If the computer boot up is fine but the keyboard doesn't work: Make sure the keyboard works when directly plugged into the computer Try a different keyboard, but use only 101, 102, or 104-key keyboard. 4. The mouse is not detected during PC boot up. Make sure the mouse works when directly plugged into the computer. Make sure the mouse is a true PS/2 mouse. A combo mouse will work as long as it is set for PS/2 mode with the correct adapter. Try a different mouse. 5. Avoid moving the mouse or pressing the mouse buttons when switching the port. Certificate FCC This equipment has been tested and found to comply with Part 15 of the FCC Rules. Operation is subject to the following two conditions: (1) This device may not cause harmful interference (2) This device must accept any interference received. Including interference that may cause undesired operation. CE-Certificate This equipment is in compliance with the requirements of the following regulations: EN 55 022: CLASS B