1
5.1
Access to the File Server
up any users yet, do this now and, if necessary, log in on the Windows 2000
computer with the relevant information.
Tip
The configuration of a user on the SuSE Linux Connectivity Server is described in Chapter 4.5.1 on page 53 in more detail. If you have Windows
2000, you can add a new user in the control panel, under ‘Configure
User and Password’.
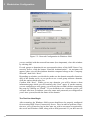
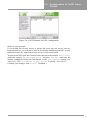
After logging in, click on “Network Neighborhood” and choose “Neighboring
Computers”. In the new window, you should now see your SuSE Linux Connectivity Server underneath the name assigned during installation. Double-click the
server name and you will receive a list of all available files, or shares, where you
can save your preferred data from now on.
Linking Drives
You will probably want to avoid having to go through the network neighborhood
every time you just want to quickly open or save a file on the server. The solution
for this is simple: link local drive letters to a network drive.
In order to assign a user-friendly drive letter, such as E:, to a network drive such
as \\slcs\SharedVolume, select ‘Workstation’ → ‘Extras’ → ‘Connect
Network Drives’ and enter the necessary data.
If you would like the connections to remain active even after the next login,
simply select the option “Restore Connection at Next Login”.
5.1.3
With MacOS
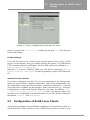
In no other operating system is configuring MacOS clients to access your SuSE
Linux Connectivity Server so easy. Click on the ‘Apple’ button and select
‘Choice’.
If it is a MacOS 9, you will have to select “AppleShare” before typing the server
address. For MacOS X, it will suffice to enter the IP address of your SuSE
Linux Connectivity Servers (usually 192.168.0.1). Right after confirming by
clicking ‘OK’, MacOS will invite you to enter a user name and password. This
login (User name&Password) must correspond to the information saved on the
SuSE Linux Connectivity Server.
Tip
If you want to create a new user, you can also make use of the YaST2
Control Center. See Chapter 4.5.1 on page 53.
After a logging in, MacOS will present you with a list of all shares available on
75