1
Installing the Daytime Fan Kit
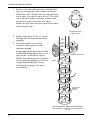
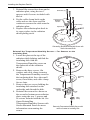
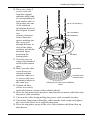
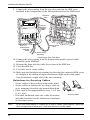
21. Lower the ISS base
onto the stack so that
the screw goes into the
boss. Turn the screw a
few times to engage
the threads.
22. Place a lock washer
and flat washer on the
other two 3 1/4''
screws then insert
them through the other
two screw holes.
23. Tighten all three
screws to securely
fasten the radiation
shield to the ISS base.
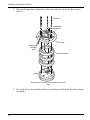
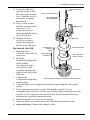
Re-Install the ISS
Insert front screw
first
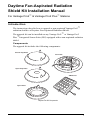
#8-32 x3-1/4" Screws (3)
#8 Lock Washers
#8 Flat Washers
SIM Housing
ISS Base
Temperature/
Humidity
Cable
Closed Cap Plate
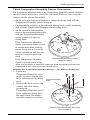
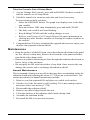
1. Install the rain
collector cone and lock
Power Cable
Open Cap Plate
Assembly
it in place.
(hole in center)
2. Slide the
Temperature/Humidity
cable and the
fan-aspirated unit’s
solar power cable
Fan Plate
assembly through the
cable access port of the
SIM box.
3. Connect the
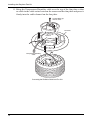
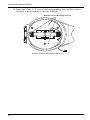
Reconnecting the Radiation Shield to the Rain Collector
Temperature/Humidity
sensor cable.
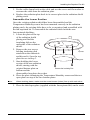
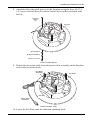
4. Close the SIM cover temporarily without connecting the solar panel
cables.
5. Test communication between the ISS and the console. To test
communication, take the console out of Setup Mode and make sure the
console is receiving data from the ISS. See the ISS manual for more
information on testing communication.
6. Reinstall the ISS in its previous location.
7. Open the SIM cover and connect the WIND (anemometer) cable.
8. Cabled ISS Only: Connect the console cable.
13