1
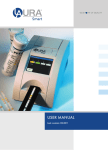
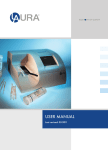
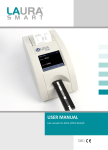
Urine Analyzer
User´s guide
Contents
1. Introduction
2. LAURA M - Technical Specification
2.1 Intended Use
2.2 Technical Parameters
3. Installation
3.1 Unpacking
3.2 Urine Analyzer Description
3.3 Working Environmental 3.4 Switch On
3.5 Printer – Paper Replacement
3.6 Switch Off
4. Settings
4.1 Test Strip
4.2 Units
4.3 Critical Values
4.4 Date / Time Setting
4.5 Language setting
4.6 Printer
4.7 Serial Port
4.8 Product Information
5. Routine Operation Overview
5.1 Collection of Urine Sample
5.2 Measurement
5.3 Notice
5.4 Messages
6. Memory and database archiving
6.1 Printing of Selected Results
6.2 Data Transmission to Host Computer
6.3 Deleting of Selected Results
6.4 Viewing of Results
7. Maintenance
7.1 Daily Maintenance
7.2 Cleaning Procedure of Plastic Strip Feeder
7.3 Cleaning Procedure of Waste Container
7.4 Fuse Replacement
7.5 Clock Battery Replacement
8. Service information
8.1 Service Information
9. Communication (RS232)
9.1 Serial Cable
9.2 Basic Specification
9.3 Communication Protocol
10. Quick Start Guide
3
4
4
4
5
5
5
6
7
8
9
10
10
10
12
13
13
14
15
15
16
16
16
18
18
19
19
20
20
21
22
22
22
23
24
24
25
26
27
27
27
28
29
3
1. Introduction
Urine analyzer LAURA M is a reflectance photometer for semi-quantitative urine analysis using
test strips PHAN® LAURA/Uro-dip. Urine analyzer LAURA M is designed for use in laboratories of
clinical biochemistry. User only dips the test strip into the urine sample and places it in the insert
area. The next steps – movement, timing and measurement – are done automatically by the
urine analyzer.
Major features of urine analyzer LAURA M:
• High throughput – 600 measurements / hour
• Memory capacity – last 2000 measurements (sorted by measurement date)
• Sleek, ergonomic design
• White LED (light source) – high signal / noise ratio; longer life
• RGB measurement principle
• Direct power cord
• ”Flash memory” – measurement data are stored in parallel with the ongoing measurement
• Easy operation
• Possibility of SW update – via connecting the analyzer to PC (parallel ports)
• Infra-red sensor for detection of strips inserted on the feeder
• Sophisticated monitoring of strip position (ongoing measurement is not broken when
an error message appears)
• Waste container for collection of used test strip with Waste full indication)
• Removable cover protects the urine analyzer from excess of fluid
(elimination of contamination)
Symbols in User Manual:
IVD
4
Biohazard!
Danger of electric shock!
Warning! Handle with care!
Protective ground terminal.
In vitro diagnostic unit.
2. LAURA M - Technical Specification
2.1 Intended Use
The system consists of urine analyzer LAURA M and test strips PHAN® LAURA and Uro-dip strips
is designed for semi-quantitative urine analysis.
Urine analyzer LAURA M can be used in medical facilities of any type and level.
Before use check the colouring of the test zones. Do not use test strips with abnormal
colouring of the test zones. Check the expiry date of test strips. Do not use the expired
test strips.
Operate the analyzer as instructed in User Manual. Not following the operating
instructions may lead to instrument damage.
2.2 Technical Parameters
Specification
Technical parameters
Measurement principle
Reflectance photometer evaluates the colour intensity
of each test zone. The intensity is then used for calculation
of concentration for each analyte (semi-quantitative value).
Wavelengths
470nm; 525nm; 625nm
Throughput
600 samples / hour
Equipment
Touch screen, Colour LCD display (320x240 dot-matrix)
Built-in thermal printer
Option for connecting External printer
Operation
Through LCD touch screen
Memory capacity
Last 2000 measurements
External ports
RS 232 (connection with PC)
External printer (25 pin port)
Power source
AC100 - 240V / 50 - 60 Hz
Power consumption
≤ 45 W
Dimensions
390 x 330 x 210 mm
Weight
6 kg
Table 2-1
Specifications subject to change without prior notice!
5
3. Installation
3.1 Unpacking
Unpack carefully the urine analyzer and its accessories from the transport box. Check that your
package contains all the parts listed below and all of them are in good condition. Contact the
authorized distributor or the supplier immediately if the urine analyzer is damaged or contents
are missing.
List of parts is given in table 3-1:
Item
Qty (Nos)
Laura M analyzer
1
User manual
1
Thermo paper roll
1
Power cord
1
Serial cable
1
Fuse
2
Table 3-1
3.2 Urine Analyzer Description
Built-in
thermo filter
LCD
touch screen
Strip insert area
Waste container
Figure 3.1
6
RS232
External printer
Power input
Main switch
Figure 3.2
3.3 Working Environment
Requirements for working environment (table 3-2):
Parameter
Specification
Temperature
10 – 30°C
Humidity
≤ 75%
Atmospheric pressure
76 – 106 kPa
Working area
Free from intense light source,
free from electromagnetic interference.
Use, grounded electrical outlet only
Table 3-2
To ensure safe operation and proper functioning of urine analyzer, it must be connected
using the power cord provided only into a grounded electrical outlet. Connecting
another cable (dual without earthing) is strictly prohibited.
Urine analyzer LAURA M is designed for professional use in laboratories of clinical
biochemistry. Opening the covers is strictly prohibited. All components of the analyser
can be controlled only by the producer.
rine analyzer LAURA M must be installed in such a way so as to allow emergency
U
shutdown or disconnection of the power cord.
Not following the instructions given in User Manual may lead to instrument damage.
7
Place the urine analyzer LAURA M on a fixed desktop, the rest of this desktop will be used as
working place. If any of the four legs of the urine analyzer will not touch the desktop, adjusting
the upper left set screw shown in the picture below as needed will ensure sufficient stability
of the urine analyzer.
Figure 3.3
Do not operate the urine analyzer LAURA M in following environments:
• in direct sunlight
• close to flammable or explosive fumes
• close to heater or refrigerator
• close to intense light sources
• close to electromagnetic fields
3.4 Switch ON
Connect the power cord and turn the main switch to position “I”. The urine analyzer starts the
operation and the logo appears on the screen (figure 3.4).
Figure 3.4
8
After performing the self-test and calibration the urine analyzer goes to standby mode (figure 3.5).
Figure 3.5
3.5 Printer – Paper Replacement
1) Push the printer cover and open it. Carefully take out the black rubber roller (figure 3.6).
Figure 3.6
2)
3)
Unpack a new roll of thermo paper. It was shipped together with the urine analyzer LAURA M.
Remove the roll from the covering and place it into printer (pull out 8 - 10 cm of the paper),
place back the black rubber roller. The roller ensures the right position of paper during
printing (figure 3.7).
Figure 3.7
9
4) Stretch the free end of paper across the cover. Then close the cover carefully (figure 3.8).
Figure 3.8
Install the roll of paper very carefully. Wrongly installed roll can cause the improper
printing or can lead to jamming of paper.
3.6 Switch OFF
Before switch OFF, make sure there are no test strips on the transport belt (use ESC button
to finish the in progress measurements). Switch the urine analyzer off when all test strips have
been measured
Switch the main switch to position “0”. The operation is finished and the urine analyzer LAURA M
is switched OFF.
Figure 3.9
10
4. Settings
The default settings for urine analyzer LAURA M were predefined by the producer. The user
can start the measurement with default settings immediately or he can modify the settings
in compliance with his requirements. The modification of settings parameters can be done
in an easy way.
Click on Settings in main menu (figure 3.5), following menu appears (figure 4.1).
4.1 Test Strip
To display the next menu click on “
(figure 4.2).
Figure 4.1
Strip”. In this screen you can select the type of test strips
Figure 4.2
Select the required type of test strips (radio button) and click on
to save the selection. Click on
to return to Settings menu (figure 4.1).
Urine analyzer LAURA M supports more than only one type of test strips (different
number of parameters). Before measurement make sure that type of test strips set in
the urine analyzer corresponds to actual measured strip.
4.2 Units
The software of urine analyzer LAURA M can perform the evaluation of test strips in SI units,
conventional units or arbitrary units. Click on “µ± Unit” in Settings menu and select the required
units (the same units are used for all test zones of the test strip) – figure 4.3:
Figure 4.3
Select the required units (radio button) and click on
to Settings menu (figure 4.1).
to save the selection. Click on
to return
11
4.2.1 Parameter table
Parameter
BLD
LEU
BIL
UBG
KET
GLU
PRO
value
NEG
10
50
250
NEG
25
75
500
NEG
1
3
6
NORM
1
3
6
12
NEG
16
52
156
NORM
50
100
300
1000
NEG
30
100
500
CONV
unit
Ery/µl
Leu/µl
mg/dl
mg/dl
mg/dl
mg/dl
mg/dl
pH
NIT
SG
SI
value
NEG
10
50
250
NEG
25
75
500
NEG
17
51
103
NORM
17
51
102
203
NEG
1,5
5
15
NORM
2,8
5,5
17
55
NEG
0,3
1
5
≤6
7
8
9
NEG
POS
unit
Ery/µl
Leu/µl
µmol/l
µmol/l
mmol/l
mmol/l
g/l
1,000
1,005
1,010
1,015
1,020
1,025
1,030
CRE
MA
12
0,1
0,25
1
2
>3
10
30
80
150
300
1000
5000
g/l
mg/l
0,9
2,2
8,8
17,7
> 26,5
0,01
0,03
0,08
0,15
0,3
1
5
mmol/l
g/l
ARB
value
NEG
1+
2+
3+
NEG
1+
2+
3+
NEG
1+
2+
3+
NORM
1+
2+
3+
4+
NEG
1+
2+
3+
NORM
1+
2+
3+
4+
NEG
1+
2+
3+
4.3 Critical Values
Click on “ Critical Values” in Settings menu. The displayed screen enables to set so called critical
value for each parameter (figure 4.4).
Figure 4.4
The table shows all parameters of selected type of test strips and corresponding critical values.
The values can be modified in compliance with the requirements of laboratory. Select the
parameter. Clicking on will increase the value, clicking on will decrease the value. Click on
to save the critical values. Click on
to return to Settings menu.
If the measured value for the parameter is above the set critical value, the result will be displayed
or printed with “*” sign.
13
4.4 Date / Time Setting
Click on “ System Clock” in Settings menu. The window opens in which you can set the time
and date (figure 4.5):
Figure 4.5
Click on
to set the new date. The date can be set in format yy-mm-dd. Use the numeric keys
for setting the new date. Click on to save the correct date (figure 4.6).
Figure 4.6
Click on
to set the time. The time can be set in format hh-mm-ss. Use the numeric keys for
setting the new time. Click on
to save the correct time (figure 4.7).
4.5 Language setting
Figure 4.7
The user can select in this menu the language, which want to communicate with the instrument.
The selection can be performed using the corresponding button. OK button must be pressed to
make the selection valid (figure 4.8).
Figure 4.8
The following languages are available: English, Russian, Spanish and French.
14
4.6 Printer
Click on “ Printer” in Settings menu. Now you can set the parameters of printer and the
parameters of printing (figure 4.9).
Figure 4.9
The setting of printer specifies if the printing of results is done parallel with the ongoing
measurement. This setting is valid for both printers – built-in and external.
Click on “ Option” in Printer menu. Here you have the possibility to switch the printer on
or switch it off (figure 4.10).
Figure 4.10
Select the option “Print” or “Not print” (radio button) and click on
to save the selection.
In “Shade” menu you can set the intensity of printing for built-in printer.
Figure 4.11
There are 21 levels of printing intensity. Black and white strip in developing zone corresponds with
the shade. The shade is directly proportional to the length of black strip. Click on to increase
the intensity of the shade, click on to decrease the intensity of the shade. Click on
to save
the intensity of the shade (figure 4.11).
15
The high intensity of printing has a negative impact on printing speed (decreasing) and also
reduces the time life of the printer. The shade must be sufficient to ensure good readability of the
results. Too high intensity of printing is not necessary. The intensity of printing is also influenced
by ambient temperature. In warmer rooms it is possible to reduce the intensity, in cooler rooms
is recommended to increase the intensity.
In connection with setting the corresponding intensity it is possible to use the function “print
test”. Test point is printed for verifying the set shade.
4.7 Serial Port
Click on “
Parallel Port” in Settings menu. Now you can select the baud rate (communication
between urine analyzer LAURA M and host computer) – figure 4.12.
Figure 4.12
Window “Serial port” enables the user to set the baud rate between urine analyzer LAURA M (serial
port on the back side of urine analyzer) and host computer (LIS). There are four options: 9600,
19200, 38400 and 57600. Select one option and click on
to save the selection and return to
Settings menu (figure 4.1).
4.8 Product Information
Click on “ Product Info” in Settings menu. The general information about urine analyzer
LAURA M appears (model, SW version etc.).
Figure 4.13
16
5. Routine Operation Overview
5.1 Collection of Urine Sample
Collect the urine sample into a clean container. Be sure there are no residues of cleaning
solutions or detergent on the walls. Do not use the urine sample standing more than 4 hours.
Use of long standing can cause the growth of bacteria, change of pH etc. Dark coloured urines
may affect the analytical result (in these cases, we recommend to make a visual measurement).
These conditions can lead to erroneous results of measurement.
Use the test strips PHAN® LAURA/Uro-dip as instructed in User Manual.
5.2 Measurement
Click on the button “Test” in main menu (figure 3.5). First you are asked to enter the sequence
number. Enter the sequence number (use the displayed keyboard – figure 5.1) and click on to
confirm it. The measurement of urine samples can start.
Figure 5.1
The reader first checks the daily results and automatically offers the new sequence number –
this sequence number corresponds to the last measurement sequence number increased by
one. Click on to continue. If you want to enter different sequence number use the keyboard.
Enter the new number and click on to confirm it.
After entering the sequence number the testing window will open (figure 5.2).
Figure 5.2
17
The upper right corner of screen shows information about current run of diagnostic strips. Below
this information is displayed the type of test strip, the current time, the printing options and
information about paper in thermal printer.
Take a new test strip and dip it into the urine sample. Be sure that all test zones are dipped.
Remove excess urine from the test strip – push the edge of the strip to an absorbent paper,
follow instruction for the test strips PHAN® LAURA/Uro-dip.
Place the test strip on the insert area as shows figure 5.3. Acoustic signal – beep – confirms the
placement of a new test strip on the feeder. The measurement starts.
Figure 5.3
The test zones must be side-up.
Each test strip must be placed vertical between the first and second pin of the feeder.
The steps of the measurement process:
1) Place the dipped strip on the feeder as shown when the green LED is flashing
2) Measurement starts – confirmation by acoustic signal and LED turns to red
3) Transport system moves the strip inside the urine analyzer
4) The evaluation is done within 60 seconds
5) The data are printed by built-in thermo printer (or sent to host computer) depending on the settings
6) The next strip can be placed when the blinking light turns to green from red
Built-in strip detector recognizes the presence of the test strip on the transport belt. Urine
analyzer starts with the measurement of the test strip only after this identification. If the test strip
is not present on the transport belt the measurement will be stopped.
18
After dipping the test strip into the urine sample and subsequent drying of urine excess the
measurement cycle can start. The strip placed on the transport belt moves to the right and
the starting position is free for the next strip. Missed position (empty position on transport belt)
does not influence the results or the sequence number of the analyzed sample. The sequence
numbers are assigned only for the recognized test strips.
Do not place the strip on the feeder at the time when the transport belt is moving and
the red LED is blinking.
The test results are displayed on the screen of urine analyzer LAURA M. As the printer is activated
the results are printed parallel (the same conditions are valid for both printer- built-in printer and
external printer). The data are stored in the memory. In the case of power supply failure the data
are not lost. The user can recall the data from the memory at any time.
5.3 Notice
• Make sure that the test strips you use for measurement correspond with the setting. Make sure
that the test strips are not expired. This can lead to erroneous results.
• After dipping the strip into the urine sample and subsequent drying it is necessary to place the
strip on the transport belt immediately. Not doing so may extend the evaluation time, which may affect the accuracy and correctness of the result.
• Carefully remove the excess of urine sample from test strip to eliminate cross contamination.
• Do not handle the test strip feeder or waste container during the measurement.
• After each finished measurement cycle wash the test strip feeder and waste container.
It is not necessary to switch off the urine analyzer after each measurement cycle if you are
expecting the next run of samples
5.4 Messages
In the case feeder is handled during the measurement cycle the message “Feed Table Improperly
Installed” appears on the screen. After adjustment to the right position all strips that were already
on the feeder are displaced from the transport belt to the waste container. It is necessary to
repeat the measurement of these samples once more with new strips in the next measurement
cycle.
In the case that waste container is handled during the measurement cycle the message “Waste
Box Improperly Installed” appears on the screen. If the container is positioned within 5 seconds
the measurement cycle continues. If the time for positioning is longer than 5 seconds, the
measurement cycle breaks and the movement of the transport belt stops. After adjustment to
the right position all strips that were already on the feeder are displaced from the transport belt
to the waste container. It is necessary to repeat the measurement of these samples once more
with new strips in the next measurement cycle.
When the number of evaluated strips reaches certain number and waste container is full,
the message “Waste Box Full” will appear on the screen. It is possible to measure next
20 strips with this message. The waste container must be emptied before placing the
next strips. The continuing measurement will cause the interruption of the process. After
adjustment to the right position all strips that were already on the feeder are displaced from
the transport belt to the waste container. It is necessary to repeat the measurement of these
samples once more with new strips in the next measurement cycle.
19
6. Memory and database archiving
The Laura M stores results of the last 2000 measurements and offers a choice of archiving of test reports.
Click on “Reports” in Settings menu and the following screen appears. In this screen you can
search the results according the testing date (figure 6.1):
Figure 6.1
The screen displays the results from the last 10 days (days when the measurements were done).
Description of functions of various buttons is given in table 6-1:
Button
Function
Goes to the previous page with results (newer data)
Goes to the next page with results (older data)
Selection according to the date of measurement
Viewing of results according to the date of measurement
Printing of the selected results according to the date of measurement
Transmission of selected results to host computer
Deleting of selected results
Return to main menu
Table 6-1
6.1 Printing of Selected Results
Click on
icon. The user is prompted by urine analyzer LAURA M to enter the requested date
of measurement (figure 6.2):
Figure 6.2
20
Click on
to save the selected date.
Another option is to select from the memory the corresponding sequence numbers. Click on icon.
The user is prompted by urine analyzer LAURA M to enter the initial sequence number (figure 6.3):
Figure 6.3
After entering the initial sequence number click on to confirm the selection. Subsequently
the user is prompted by urine analyzer LAURA M to enter the ending sequence number.
Enter the number and click on
icon.
The results corresponding to the selected date or the sequence numbers interval are
printed after clicking on
icon. The data can be printed by built-in or external printer.
6.2 Data Transmission to Host Computer
Selected results can be sent to host computer. The selection is done as at printing by date
or sequence numbers. Click on
icon. Enter the selected date or sequence number.
Click on icon to confirm the selection.
After the confirmation by clicking on
icon the selected data are sent to host computer.
6.3 Deleting of Selected Results
Click on
icon to delete the selected data.
The deleted results are irretrievably lost. Be very careful during this operation.
21
6.4 Viewing of Results
Click on
icon to search and view the test results (figure 6.4):
Figure 6.4
The function of buttons in this window is described in following table:
Button
Operation
Shows the newest result of selected day
Shows the previous result
Shows the next result
Shows the oldest result of the selected day
Entering of measurement number which corresponds with the result
Printing of selected result
Sending of selected result to host computer
Deleting of selected result
Return to main menu
Table 6-2
22
7. Maintenance
7.1 Daily Maintenance
Since the urine analyzer uses an automatic assessment mechanism it is necessary to observe
certain rules and procedures when cleaning. Regular maintenance of urine analyzer LAURA M
extends its time of life and ensures accurate and correct results.
Biohazard! Pay attention to the protection during handling.
7.2 Cleaning Procedure of Plastic Feeder
It is recommended to perform the cleaning of plastic feeder every day after shutdown of the unit.
The cleaning procedure of plastic feeder:
Switch OFF the urine analyzer Remove the plastic feeder from the urine analyzer. Rinse the
feeder with water and wipe it with wet cloth. After drying insert the plastic feeder back into the
analyzer. Make sure that the feeder is placed into the correct position. Figure 7.1 and figure 7.2
show how to handle with the plastic feeder.
Figure 7.1
23
Figure 7.2
Biohazard! Observe standard safety precautions and operator safety during the above
procedure.
The plastic feeder is one of the most important parts of urine analyzer LAURA M. Do not
use detergents, solvents or hot water for cleaning. Damage of feeder can influence the
test results!
7.3 Cleaning Procedure of Waste Container
It is recommended to perform the cleaning procedure of waste container every day.
The cleaning procedure of waste container:
Switch OFF the urine analyzer. Remove the waste container with used strips from the analyzer.
Empty the container and rinse it with water. Wipe it with the dry cloth. Insert the waste container
back in its position and ensure that is correctly.
Figure 7.3
24
Biohazard! Observe standard safety precautions and operator safety during the above
procedure.
The test strips are intended only for single use and cannot be recycled or used
repeatedly. The used test strips have to be disposed in accordance with guidelines for
waste disposal.
7.4 Fuse Replacement
In the event of blown fuse, disconnect the power cord from the mains supply. Use a flat
screwdriver to open the fuse box. Replace the fuse with the fuse of correct rating. Close the
cover and refix the screws.
Please use only the fuse that was delivered with the urine analyzer. Specification
of fuses: diameter – 5 mm, length – 20 mm, 250V/2A, T2AL250V.
7.5 Clock Battery Replacement
To support the system clock the battery (3V) is placed on the basic plate of urine analyzer LAURA M.
Follow this procedure when replacing the battery:
1) Disconnect the power cord from the mains supply.
2) Turn over the urine analyzer carefully so that its bottom side is accessible.
M3X10
M3X8
3) Unscrew 7 screws (type M3 x 10) and another one screw (type M3 x 8).
4) Make sure all screws are safe kept safely.
5) Turn the urine analyzer the right side.
6) Carefully open the upper cover and find the battery holder.
7) Replace the battery.
8) Close the covers by fixing all 8 screws.
25
8. Service information
Compliance with the instruction of operation and maintenance of urine analyzer LAURA M
ensures its proper functioning. In the moment when an error is detected the screen displays the
corresponding error message. The message helps to find the right solution of the problem. The
table 8-1 lists the available error messages, including code, description and solution.
Error
Error description
Problem and its solution
E01
Operating system
error
System memory error. Urine analyzer is not able
to operate. Please contact service engineer.
E02
System data error
Stored system controls and calibrations are lost.
Urine analyzer is not able to operate.
Please contact service engineer.
E03
Threshold error
System error associated with test strip.
Please contact service engineer.
E10
Transport belt error
System error associated with transport belt.
Please contact service engineer.
E11
Transport belt error
System error associated with mobility of transport belt.
Please contact service engineer.
E12
Test strip sensor error
Test strip sensor failure. Please contact service engineer.
E21
Test component
motion abnormal
The scanning motor is failure, or the belt clip is loose.
Please contact service engineer.
E22
High intensity
Beyond the data range. Please contact service engineer.
E23
Intense light
Cause of this error message may be damage of the
analyzer housing and/or proximity of intense light
source. Light affects the measurement. If this is not the
cause of problem please contact service engineer.
E30
Printer out of paper
The printer is out of paper in a moment when
measurement results are ready for printing.
E31
Faulty position of
feeder
Check the position of plastic feeder. Try to reinstall it.
Follow the instruction in paragraph 7.2.
E32
Contamination of
feeder
The urine sample was detected on the feeder. Please
clean the plastic feeder as described in paragraph 7.2.
E33
Incorrect position of
waste container
Check the position of waste container.
Try to reinstall it.
E34
Waste container is
full
Remove the waste container. Dispose the used strips.
Reinstall the waste container in correct position.
Incorrect position of
test strip
The incorrect position of test strip was detected.
This test strip cannot be evaluated correctly.
The measurement is to be repeated. The other strips
will be evaluated correctly. The new measurement of
the test strip can be performed after finishing the run.
E42
Table 8-1
26
8.1 Service Information
If an error appears try to solve it in compliance with the table 8-1. If the problem continues,
contact your distributor or service engineer.
WARRANTY SERVICE
Erba Lachema s.r.o. warrants the urine analyzer LAURA M against any manufacturing defects for
12 months from the shipment date (unless otherwise specified by the seller).
CUSTOMER SERVICE
The service during and after the warranty period is rendered by the authorized representative
distributor.
8.1.1 Warranty Conditions
The warranty conditions are included in the sales agreement. The close of sales agreement
specifies the parts of the urine analyzer that are excluded from the guarantee.
8.1.2 Safety Information
Urine analyzer LAURA M complies with the EMC Directive 89/336/EEC and low voltage devices
Directive 73/23/EEC.
Urine analyzer LAURA M in combination with PHAN® LAURA/Uro-dip test strips complies with
the requirements of IVD Directive 98/79/EC.
8.1.3 Producer
The producer of urine analyzer LAURA M and test strips PHAN® LAURA/Uro-dip:
Erba Lachema s.r.o.
Karásek 1d
621 33 Brno
Czech Republic
8.1.4 Ordering Information
Catalogue number:
Urine analyzer LAURA M DekaPHAN® LAURA
MicroalbuPHAN® LAURA
Uro-dip 10 e
–
–
–
–
50004173
10008297
10010262
FREUSPLI0001
27
9. Communication (RS232)
9.1 Serial cable
The serial cable is a part of LAURA M accessories. The cable supports the communication between
host computer and RS232 port. In case of urine analyzer LAURA M port use DB9 connector
(male) and for host computer use DB9 (female) – the connection specified the table 9-1:
Analyzer: Port DB9 (male)
PC: Port DB9 (female)
2
2
3
3
5
5
Table 9-1
9.2 Basic Specification
Parameter
Specification
Communication mode
Asynchronous serial communication
Communication signals
TXD, RXD, GND
Available baud rate
9600, 19200, 38400, 57600 bits/sec
Parity
Odd
Data bits
8 bits
Stop bit
1 bit
Table 9-2
28
9.3 Communication Protocol
Urine analyzer LAURA M sends the data to host computer. Urine analyzer is a sender and it does
not receive any data (Uni directional communication only). Host computer is a receiver and does
not send any data.
The data are sent as frames. Each frame is a complete package of result and consists of 15 lines.
Each line ends with ASCII code 0DH and 0AH. Each line consists of one or two fields. The fields
are separated by ASCII code 09H.
The table 9-1 lists all the data of the frame.
Line
Field 1
Field 2
Description
1
Date: 20XX-XX-XX
Only 1 field
2
Time: XX:XX:XX
Only 1 field
3
Sample Number: XXX
Only 1 field
4
Blank
5
Name of item 1
Item 1
6
Name of item 2
Item 2 result
7
Name of item 3
Item 3 result
8
Name of item 4
Item 4 result
9
Name of item 5
Item 5 result
10
Name of item 6
Item 6 result
11
Name of item 7
Item 7 result
12
Name of item 8
Item 8 result
13
Name of item 9
Item 9 result
14
Name of item 10
Item 10 result
15
Name of item 11
Item 11 result
Blank if using 10-item strip
Table 9-3
In the reports are the characters „±“ and „μ“ replaced with characters „+ -“ and „u“.
Host computer does not respond to any data after receiving the frame report.
29
10. Quick Start Guide
1) Check carefully if the urine analyzer is intact and there are no signs of damage.
2) Connect the urine analyzer to the mains supply with the relevant cable, check the connection.
3)Switch ON the analyzer with the main switch.
4) Wait until the self-test is completed.
5) Set up the mode of results (direct printing after measurement, sending to host computer etc.):
6)Now you can start the measurement in the mode Seq.No.
7) Perform the measurement of patient urine samples. Follow the recommendation included in the instruction of the diagnostic strips during the analysis.
8)Perform the daily maintenance and cleaning of the feeder and waste container after finishing the day’s work.
9) Now you can leave the urine analyzer in standby mode or you can switch it off using the main switch.
30