1
FPOSS User Manual
INS-MAN-AUS-13271-0079
Page 14 of 48
After a first configuration, which will, of course, only have allocated fibres to a small subset
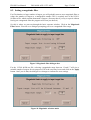
of the targets available, select the List… option from the File menu. A dialogue box will
allow you to control what is output to the list file. Select the Unallocated objects option. This
will produce a new target list that contains only the unallocated targets and the reference
targets. (All reference stars and guide stars are included, even those allocated in the present
configuration, since they can sensibly be reused in the next configuration.). You are then
prompted for the name and location of the new list file.
You can then select the Open Input file… option from the File menu and specify this new
target list as the input file. You now have all the targets except for those non-guide targets
allocated in the previous configuration. You can create a new allocation and repeat the
process.
4.5 Viewing allocations using Skycat
You may want to see the allocated targets plotted against an image of the sky. In particular, if
you have sky targets you may want to check on whether or not these really do represent blank
sky. FPOSS can generate catalogue files in the standard ESO catalogue format containing all
the allocated targets, and these can be read by the ESO SKYCAT program.
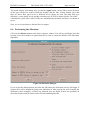
To do this, select the List… option from the File menu, and select the Allocated objects in
Skycat format option from the dialogue box that comes up. You are then prompted for the
name of the catalogue file to be written.
If you now run Skycat, you can read this newly created catalogue file as a local catalogue file.
(Use the menu sequence Data-Servers -> Local Catalogs -> Load from file.) If you do so
immediately after launching Skycat, with no image displayed, the Max Radius set to 0, Skycat
will default to a display centred on the centre of the field that was allocated, and will show
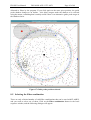
some of the allocated targets around the centre of the field. To get the allocated objects
displayed on a sky image, use the Image servers sub-menu. (The usual menu sequence is:
Data-Servers -> Image Servers -> Digitized Sky at ESO.) The centre of the field will
already be set, but you should increase the size of the field to be somewhere in the range 25 to
30 arcmin, depending on how much of the field you want to see. An image will be retrieved
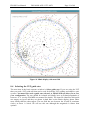
from the image server and will be displayed. The allocated targets can be superimposed on it
by pressing the Plot button in the local catalogue window.
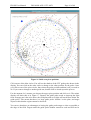
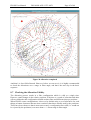
By default, sky targets will be displayed as blue crosses, reference stars (FACB targets) will
be displayed as red squares, the VLT guide star as red diamond, and all other targets will be
displayed as blue circles. The catalogue as written by FPOSS contains a text entry that
describes the target type precisely, and numeric entries that indicate whether or not each target
is a sky target or a reference target. There is one dummy target included in the catalogue, the
first one listed, that indicates the centre of the field.
IMPORTANT NOTE: Service Mode users will have to prepare finding charts as part of their
phase 2 preparation. These finding charts must be prepared according to the procedure
described above using the Skycat package distributed with the FIMS software, which includes
a dedicated Finding Chart Plugin.