1
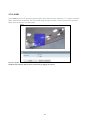
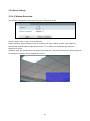
3. Administration and Configuration 3.1 Live View Simply click on Live View on the top left side of the browser window while accessing the IP address of the unit, and a live video is displayed directly in the browser window. When clicked on Configuration, a window will be pop out for configuring “Image”, “Network”, “System”, “Event”, and “Record”. Please refer to 3.2 Configuration for more information. The current logged in identity shows next right. If clicked on Logout, this window of administration and configuration will be closed. Followings are explanations to the live view window. Snapshot: Take a picture from live view. e-PTZ: After you click the ePTZ button, an ePTZ control panel will shows up where you can click the corresponding indicators to perform desired operations:: • To zoom in/out: Click the +/- indicator repeatedly to zoom in/out the live view image. • To pan left/right: Click the left/right indicator to pan the viewing area. The pan function does not work if the video is not zoomed-in (no zoom status). • To tilt up/down: Click the up/down indicator to tilt the viewing area. The tilt function does not work if the video is not zoomed-in (no zoom status). • To preset to home: Click the home indicator and the image will return to the original view. : Alarm Indicator: Appears when an alarm is triggered. : Recording Indicator: Turns red when the recording is proceeding. * When the resolution is set to 2048x1536 or 2304x1296, only one single streaming is available. 20